Bookcloth Samples: Joanna Arrestox B

What, you aren’t completely bored of looking at old book cloth samples? You want more? You got more.

Joanna Western Mills in Kingsport, TN.

Arrestox B

It conforms to all ANSI standards for Group B! It is vermin-proof! It is moisture resistant! Don’t you wish you had some, right now?

Continue reading to see all the fantastic images of Arrestox B!

Continue reading “Bookcloth Samples: Joanna Arrestox B”

Bookcloth Sample Books: Columbia Royal Buckram

I acquired some vintage bookcloth samples a few years back.  The person who sold them to me said they were useful as a source of fabric to repair old books, and I hope I didn’t look too horrified. Sure enough, there are some chunks missing out of some of the pieces, but the books still seem very full so I don’t think any pieces are completely gone.

I took photos of the cloths, because I thought you might enjoy looking at them. I photographed the book covers, the front sides of the fabrics showing identification marks, and sometimes the reverse side as well. I didn’t use a very professional setup – OK, I used a most unprofessional setup – the books are lying on two pieces of white kraft paper on a gray cutting mat. I corrected the color cast to get the background paper to look as neutral as I could, then adjusted the levels – mostly on the white side, except for the reverse of some dark samples to make the labels more legible. The pictures were then resized to about 8″ on the longest side at 200 dpi, and saved as jpg files at quality 10. If for some reason anybody needs a bigger or un-retouched photo, let me know. I figure this is good enough for entertainment purposes.

The first series is Columbia Royal Buckram, possibly from 1972

Continue reading to see all the great images of bookcloth you can’t get any more!

Continue reading “Bookcloth Sample Books: Columbia Royal Buckram”

Barnaby gets a spine

I wrapped the book in plastic, and glued the new spine liner with false raised bands (same dimensions as the original remnant) to the plastic. Many steps left undescribed.

Barnaby_R

Here the book with new hollow, layer of thick paper pasted on and then sanded down to even out the bumps caused by the new reinforcing linen cords. The book was wrapped in plastic, new spine liner and raised bands glued to plastic, new repair calf cut using pattern.

Barnaby_S

While the dyed leather was drying, I lifted some more of the pastedown, then flattened it out.

Barnaby_U

Lifted portion folded back over white paper, showing bare board. I put mylar in here before closing the cover, so the underside of the old paper wouldn’t stick to the fly leaf.

Barnaby_T

Using a sharp knife to cut through the old leather turn in at the edge of the board. When the new spine is put on, it will be pasted underneath this lifted piece, so that the old leather covers up the new. Don’t ask how nerve-wracking it is to cut into beautiful, dry, brittle, gold-tooled leather almost 180 years old. My blood is ice! I OWN this! Plus, the book gods were kind.

Barnaby, the Prequel

I found the “before” pictures of Barnaby. Here they are.
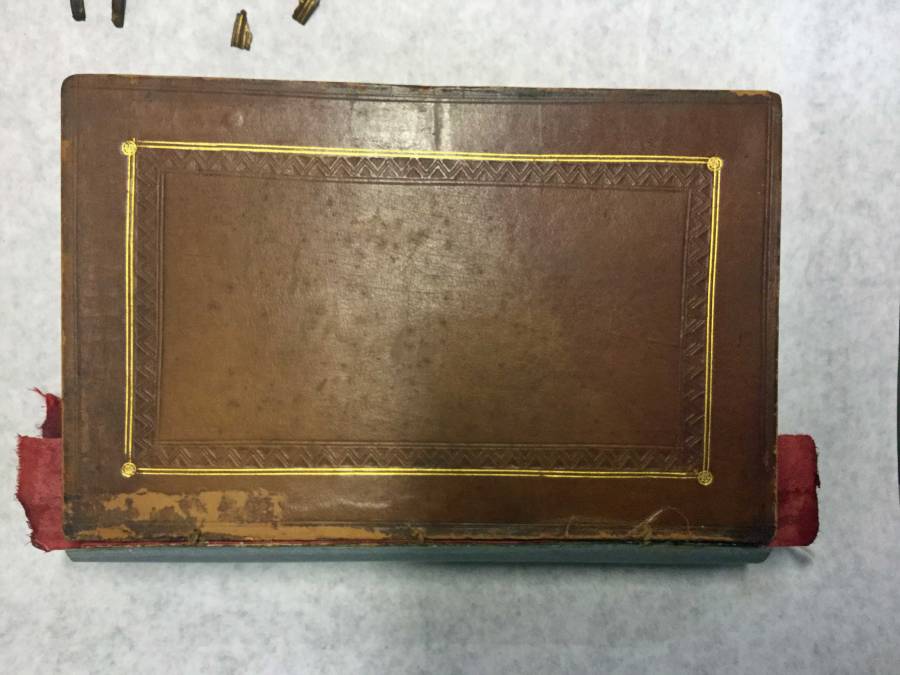
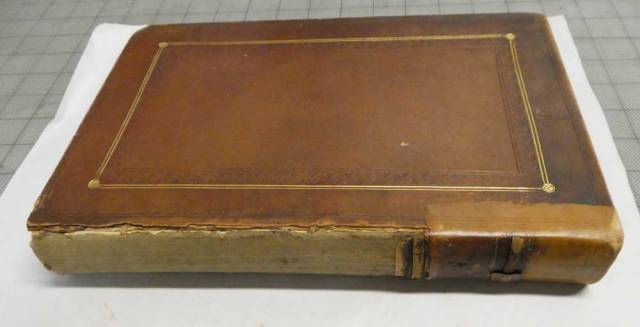
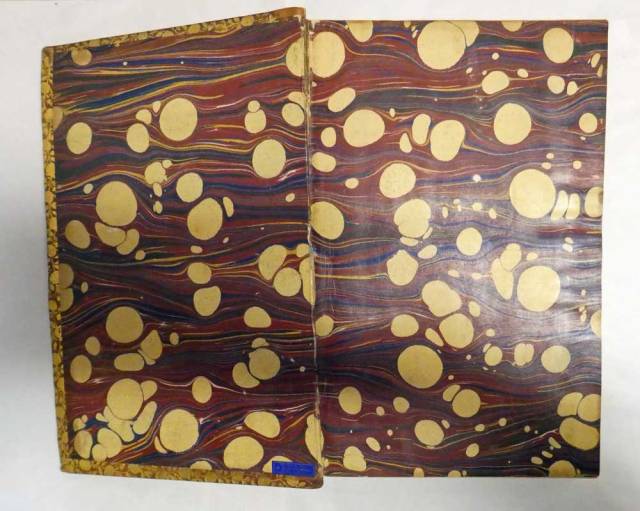
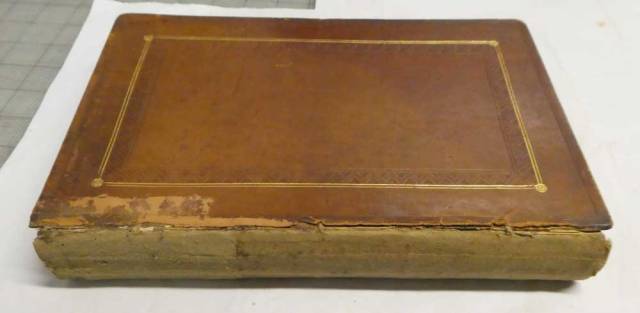
Barnaby_A

Front Cover

Barnaby_B

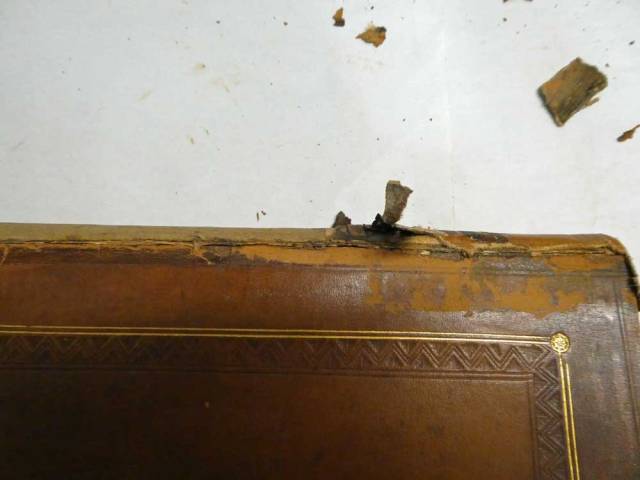
Front cover, showing the remnants of late repair. Looking at this, I assume this repair leather was inserted underneath the original spine. It worked for a while, and then the rest of the original spine was lost.

Barnaby_C

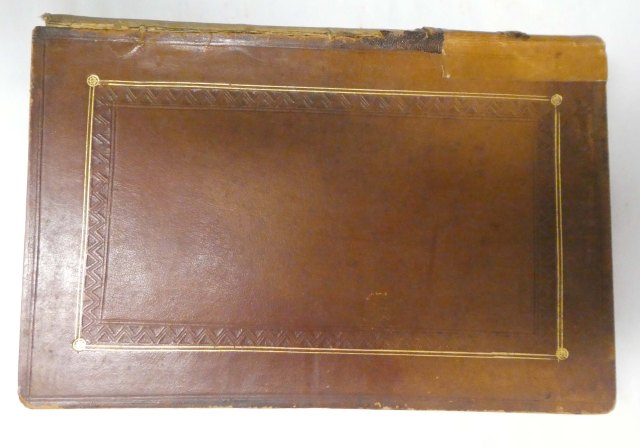
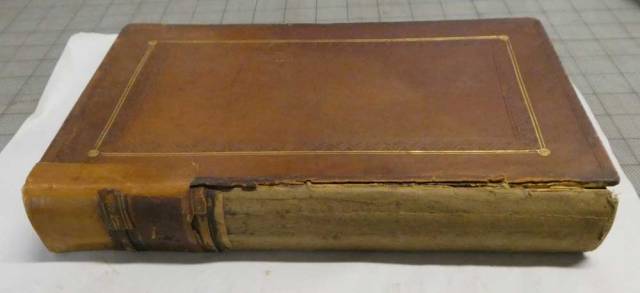
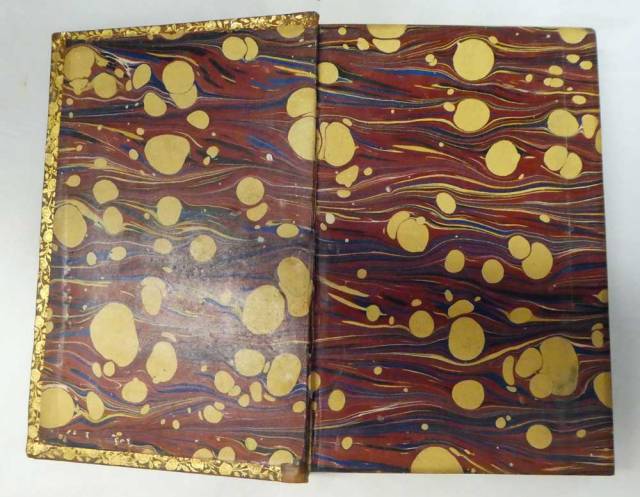
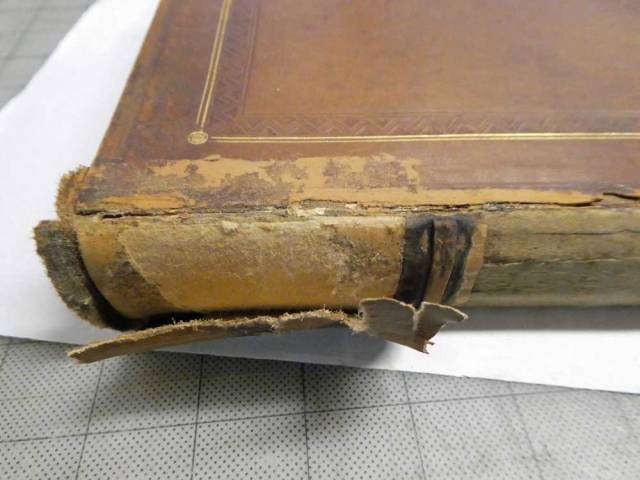
Back of book, showing repair attached. Notice how the repair leather is pasted on TOP of the original boards, and only goes part way down. That’s probably because at the time that repair was made, part of the original spine was still attached. And normally the repair leather would have been put UNDER the cover leather, not on top of it.

Barnaby_D

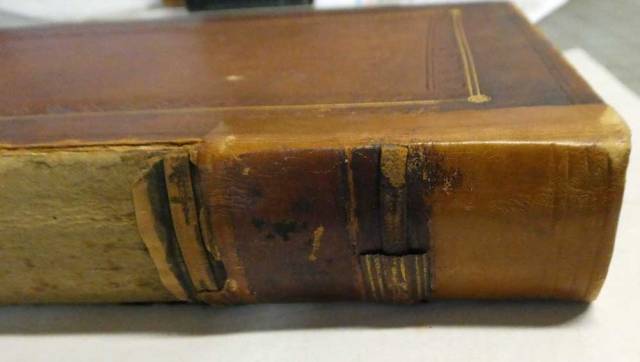
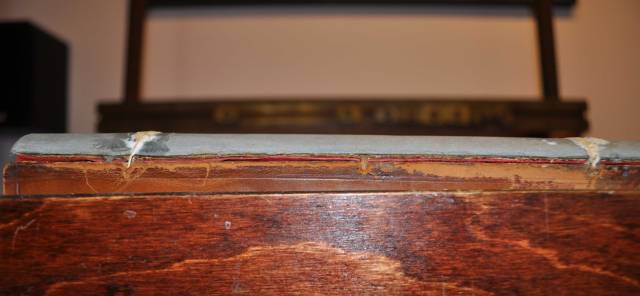
Close up of the repair. If you look closely, you can see a piece of gold-tooled leather on top of the plain leather. I think this is a remnant of the original spine.

Barnaby_E

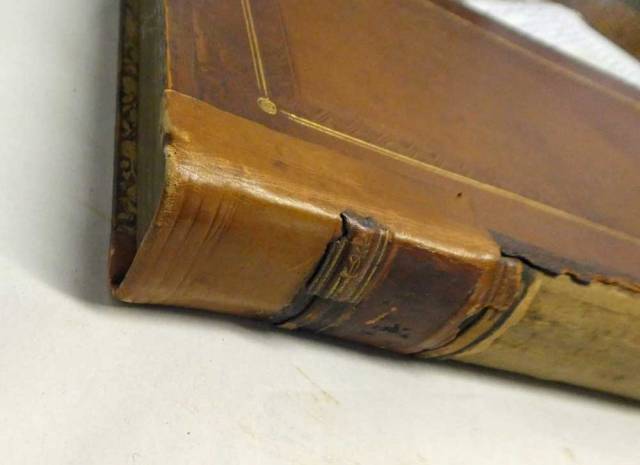
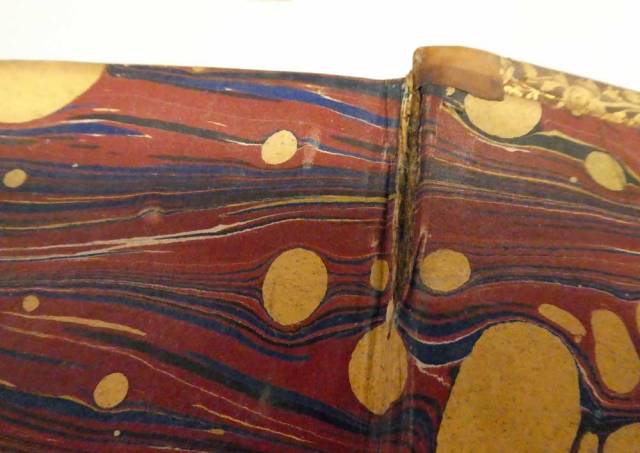
You can see how the repairer turned the leather in at the top. Part of the leather is dark – was the old label pasted on here?

Barnaby_F

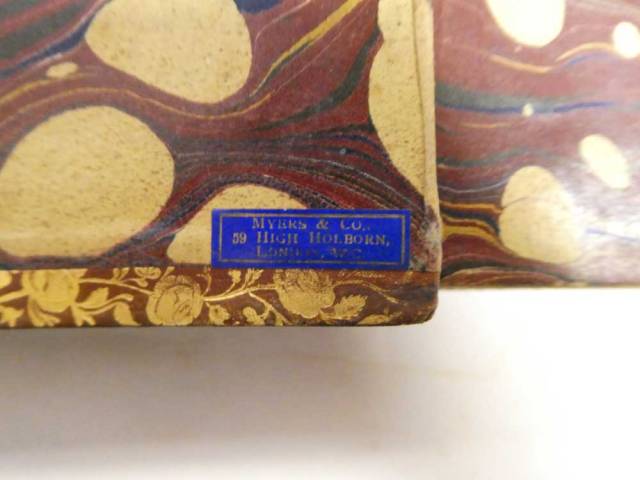
The bookseller’s ticket is stuck inside the lower front inside cover. Myers & Co, 59 High Holborn, London, can’t make out the rest from the photo

Barnaby_G

Inside front of book.

Barnaby_I

Inside back of book. Sorry, it’s upside down.

Barnaby_J

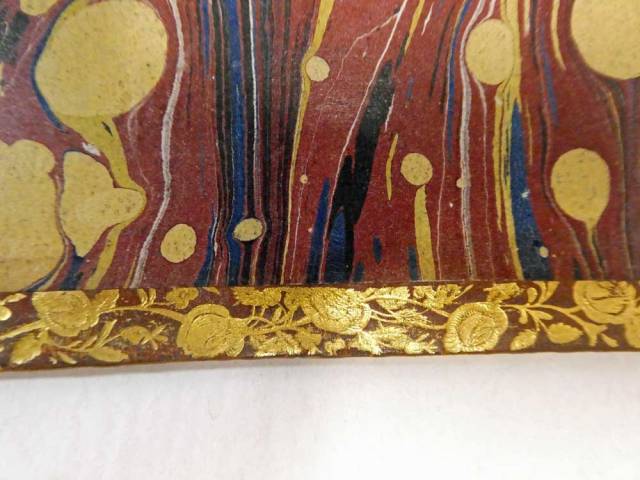
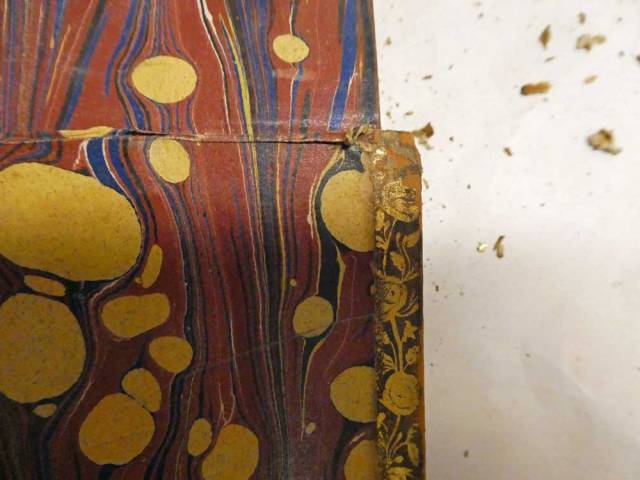
Lovely gold tooling on the inside leather turn-ins, done with gold leaf using a decorated roll tool.

Barnaby_K

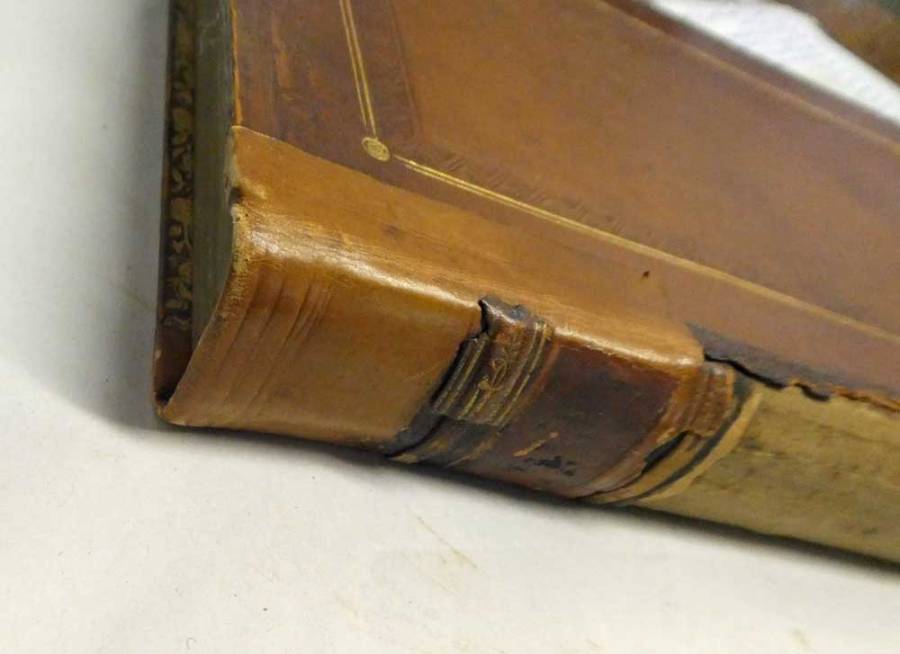
Corner shows some wear and loss of leather. Looks as if the finisher didn’t miter the corners, but just ran the roll off the end.

Barnaby_L

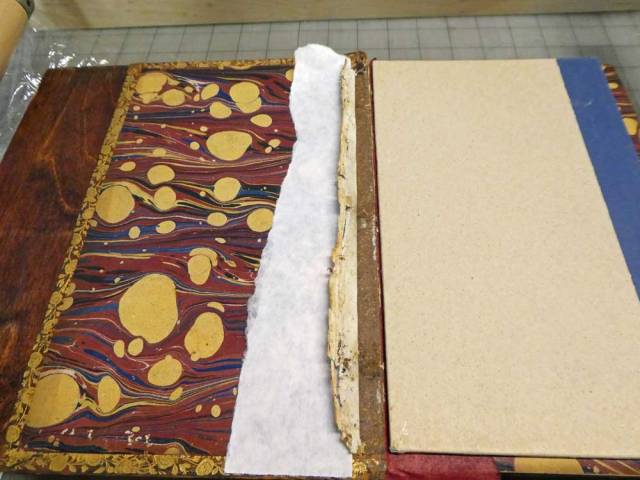
Inside back of book. See the plain leather folded over the decorated leather? That’s the repair leather, and it should have been tucked under the old leather, not glued on top of it.

Barnaby_M

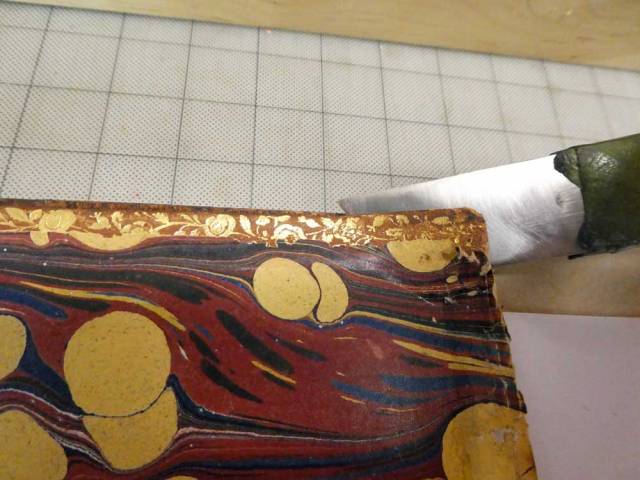
Here the repair is being lifted off the spine. I did not dare use any water to soften the adhesive, because I feared it would blacken the old leather, so I lifted it with a scalpel. You can see that the top layer of the old leather was pulled off in the process.

Barnaby_N

A zoomed-out photo of the process. Old leather is being slowly lifted off mechanically.

Barnaby_O

Interesting. As the old leather comes off, I can see what looks like some of the original spine – the leather piece on the false raised band is probably from the original spine, along with the cardboard underneath it.

Barnaby_Q

Here I am lifting the turned-on repair leather from the original leather. The old gold tooling, which was covered up, is starting to re-emerge.

Barnaby_H

The book is now pared down to the original parts. The repair has been removed, and you can see the change in color of the spine, and the lighter leather on the cover where the top layer of calf was stripped off. Now I can begin the restoration.

Barnaby, Part 2

Before doing anything else, I decided to reinforce the board attachment. The boards were still attached by the original cords, but one was broken and one was loose. I laced some Irish linen cord through the original holes, top and bottom. Two of the old cords were strong enough that I felt comfortable knotting the new cord to the old, and two were weak enough that I laced the needle through the back of the spine. I adhered the new cords to the top of the new spine with PVA – it doesn’t cause the linen to swell the way paste does, and since it’s new to new material I don’t worry about reversibility.

I have a plan to fabricate the new spine in such a way that I can decorate it off the book, and do it over if I mess it up. More on that later.

Barnaby_12

Barnaby Rudge


Still looking for the before-before pictures. This is a work in progress: a friend’s nice old leather bound copy of Barnaby Rudge. Most of the spine was missing. All that remained was a bit of leather near the head that was not the original spine, but an older repair about half the height of the book. It was still attached to the outside top of the boards. The repair had false raised bands, and the it’s possible that the leather used to make them came from the original spine. You can see the lighter area on the cover leather where some of the patina was removed along with the repair. The repair was attached with paste, I think, and I didn’t want to risk blackening the original leather by moistening the paste, so I removed the material mechanically, and it took the top layer of cells off the leather. It’s not ideal, but it’s better than having the cover turn jet black. Some leather blackens when wet and the change is irreversible.


Barnaby_3-copy

I believe these small scraps are all that remain of the original spine. There was once some good tooling over the bands, and I will guess that the entire spine was decorated, since there is more than just a simple line below the raised band.


Barnaby_1-copy


This photo shows the edge gilding, which is on all three sides, as well as a bit of the gold tooling on the leather turn-ins. So much decoration on the insides really makes me think the spine must have been quite ornate.


DSC_0056-copy

The cover boards are still attached – barely – with the original lacing. I didn’t want to remove them. The marbled paper inside is broken at the joints, though, and needs repair. I hate to cover up that paper, so I dampened the edges of it enough gently lift a tiny bit of it off the boards on the inside. It turns out the original binder had made a bit of a wrinkle in the paper at the joint, and pasted it down over all the board edges, so I was able to tease quite a bit of it out. I colored a piece of Japanese tissue to match the dominant maroon color. The marble flyleaf was pasted to the first white endsheet for about a half an inch near the joint. I was able to also lift up the edge of this paper, attach the repair paper to the shoulder (and just barely on the first endsheet) and then paste the unfolded marble paper down on top of that. My hope is that once the book has been rebacked, there will be enough of the old marble paper left to nearly cover all the JT repair paper.


Barnaby_5-copy

This is a close-up of the inside front with a better view of the tooling of the turn-ins, and a booksellers ticket that reads “Myers & Co., 59 High Holborn, London” plus whatever is covered up by the folded up pastedown.  Sorry, the book is on another floor and I’m lazy. That’s the back side of the repair tissue. The idea is to eventually paste it down onto the bare board surface, then paste the colored paper back over the top.


Here are the first few pages of the book. No printing date. There is a pasted in newspaper clipping that seems old. I hope there’s enough information to identify the edition, and then perhaps I can locate an original copy and see if the decoration matches this one. That will give me an idea of what the original spine may have looked like. Whether or not I have the skill to tool a fancy spine is another matter.