I recently joined a Mastodon server because Twitter, once a source of casual amusement while waiting for paste to dry, has become more twitt and less er, amusing. Neil Gaiman is there! He writes good books! You obviously like books, or you wouldn’t be wasting time here. So you would like it, too. The particular server where I live is called Universeodon.com.
Impossible Bible Repair

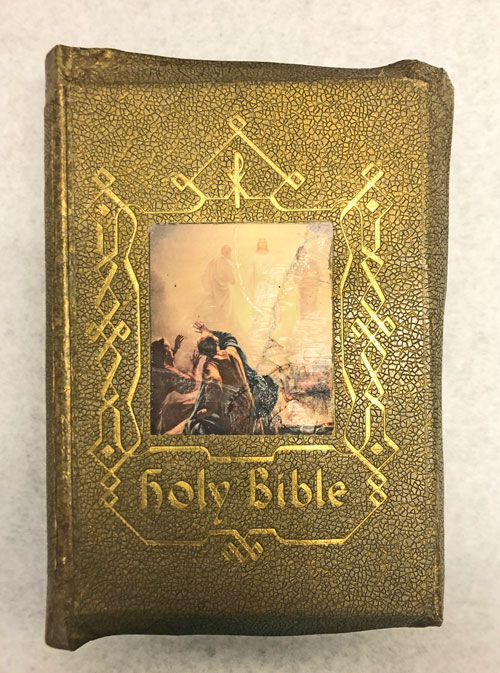
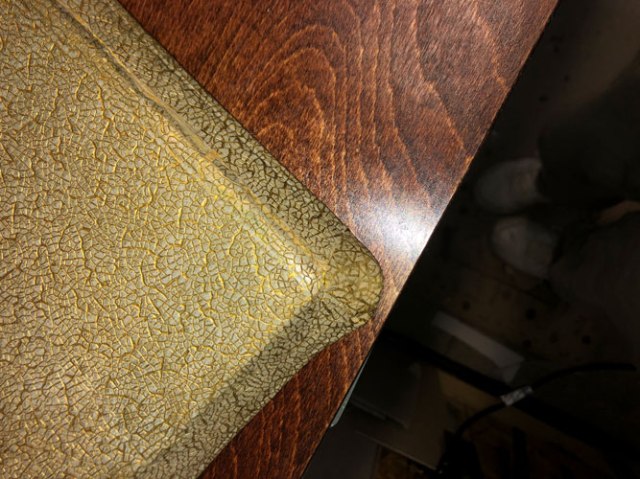
I say “impossible” because ordinarily no sane bookbinder would try to restore or repair one of these bibles. This particular bible edition was made with thick cardboard covers – these become brittle over time. The endcaps break off, the projecting cover edges (called “yapp” edges) break off, the padded covers come apart… and usually the small pieces get lost.
I couldn’t just glue the broken bits back on…it might hold for a few seconds, but as soon as any stress is put on the paper the pieces would come apart. I could have put paper or cloth over the break to hold the pieces together, but that’s unsightly and also liable to tear. Most binders would rebind this type of bible by remove the covers, trimming off the wide margins, making a new cover, then glueing the trimmed pieces back on. Most SANE binders.
But I took this as a personal challenge. The wide yapp edges, the three dimensional textured cover…those were probably why the original owner chose the bible in the first place. The bible has been passed down in the family. I thought about this. The current owner probably remembers the bible the way it was when it was new … maybe the family read from it, or kept it in a place of honor. The current owner didn’t keep it safe it all these years because it was a fancy bible. They kept it because it was their FAMILY bible. I wanted them to be able to look at it and see that original old bible, with all the warm memories associated with it – not look at it and think, “It’s not the same any more.”
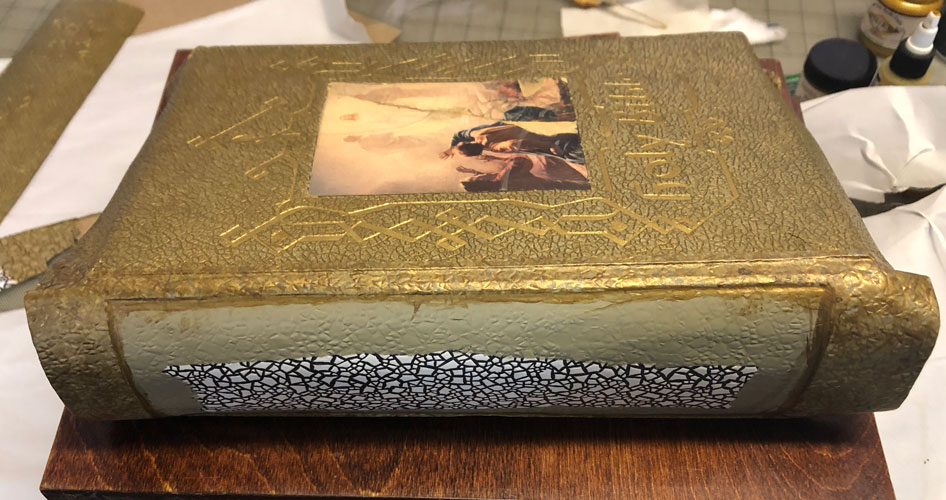
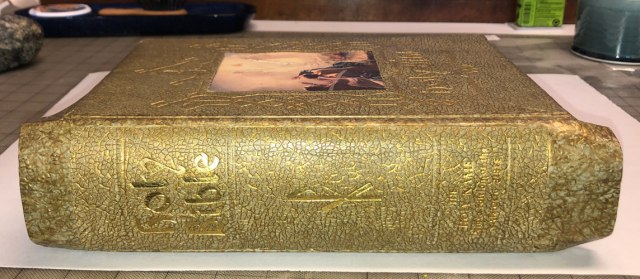
You can see from the initial before/after images that the process went better than I expected. In fact the before and after pictures don’t look radically different. This is what a good restoration is supposed to look like – the repair work is very quiet, and all you see is the book. It’s not easy to do! If you would like to see the “during” photos, keep reading. Click on any image to see a larger view.

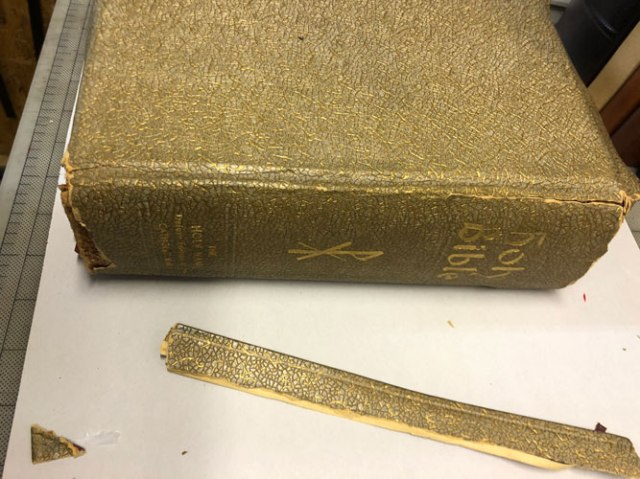


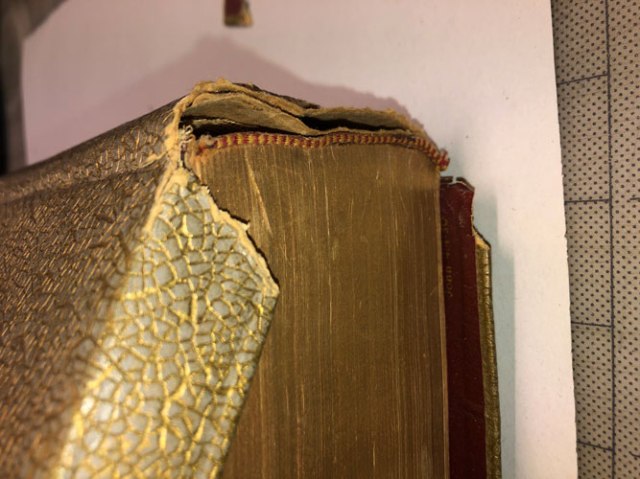

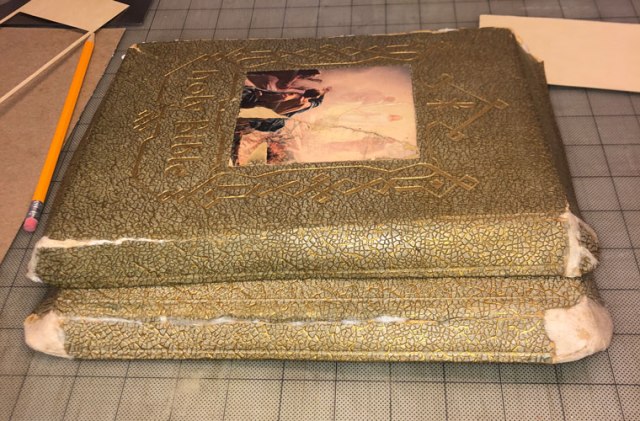
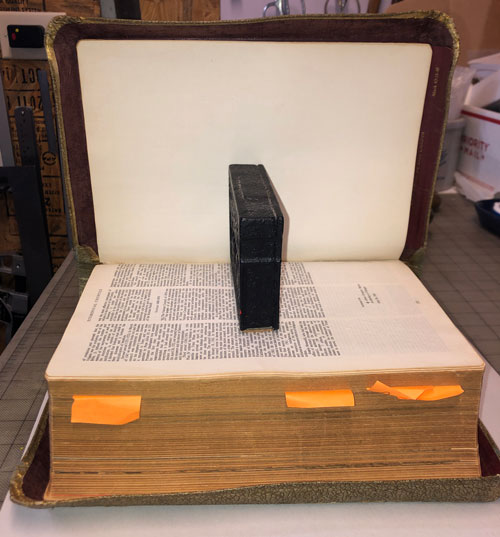
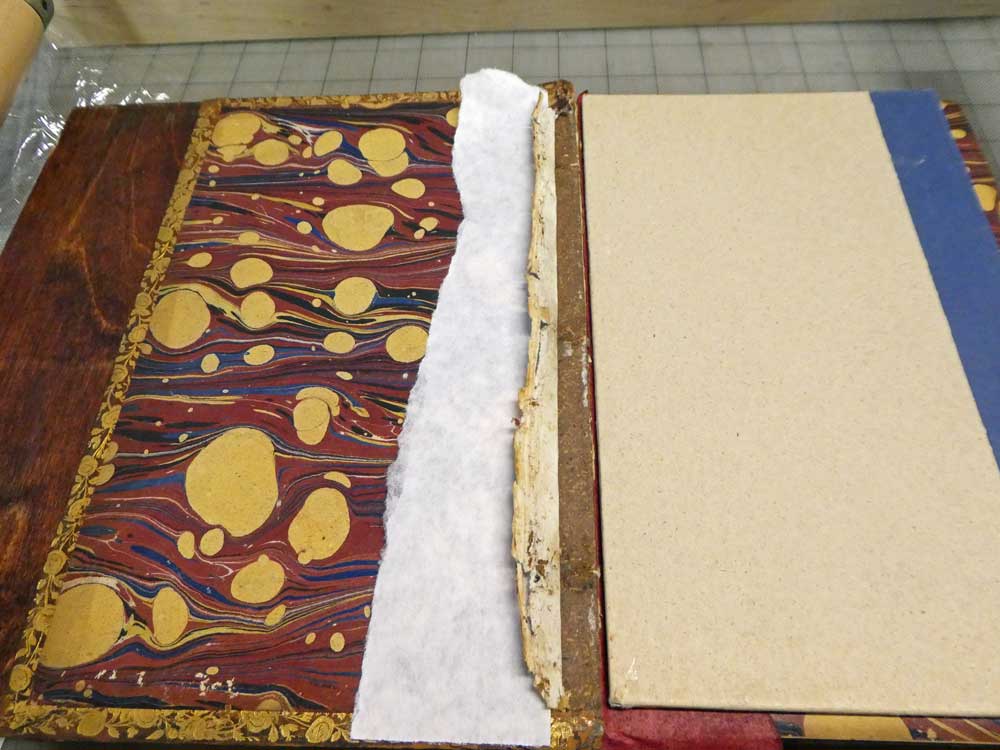
Here’s where we start: the front cover is fully broken at the spine, and the back cover is beginning to separate. The projecting “yapp” edge of the rear cover has broken off, and the front edge is halfway broken from the cover. Both endcaps are missing. I had to carefully remove the entire cover, in pieces, before I could begin the repairs to the pages inside.


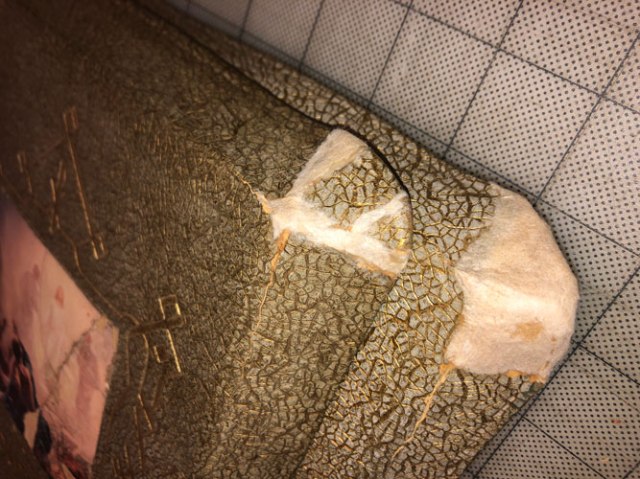
Details of the cover construction: There were several layers of tissue paper between the cover cardboard and the printed fabric pastedown. All that held the pastedown to the cover was the fabric around the edge. The cloth pastedown was dry-rotted and torn, so I cut it away from the cover. The endpapers were actually all that was holding the front cover on to the bible. The front cover had the first few pages of bible attached to it, all separated from the main part.


The spine had lost its nice curve and the cloth endbands were torn and dirty. Above at right, the removed endbands on top of the front section. Notice the row of stitching along the spine edge? This first section was sewn separately, stabbed through the side, and then that section attached to the main block of text. It was not well attached.


I re-sewed the first few signatures back in place more firmly, sewing through the new cloth, because the existing thread was loose and partially broken. I cleaned the old glue from the spine, reshaped the spine to a nice curve, then re-glued it. The spine was lined with cloth, new replica endbands were attached, and the spine was lined with several layers of paper.
The sins of construction were many. The first inside pages were glued together along the spine, making a very stiff edge that didn’t turn easily to show the title page. The “stab” sewn section made the pages want to come away from the rest of the book in a bunch. The cloth had dry-rotted with age. I fixed the problems as much as I could – I reattached the front section to the title section so it would open nicely, but I couldn’t remove the old glue between the pages. That only comes off with soaking, and soaking would have destroyed the fabric endsheets. There were scads of small paper repairs, guarded joints, new hollow spine, little details that binders know all too well so I don’t need to go into them all here.

I trimmed the rough edges of the covers and spine, and made a cut-out from thin board to allow me to recess the old spine into the new cover. I pasted several layers of new paper inside the old covers front and back, sort of like making plywood. I alternated the paper’s grain direction between layers to counteract any future tendency to warp. I attached some stiff, thin board paper to provide scaffolding for the rebuilt corners. The new layers of paper made the cover much stronger and held the yapp edges firmly in place.


I happened to have piece of textured paper in a three-dimensional broken egg shell pattern. I colored it to match the existing cover color. I colored the lines between the raised paper by hand with a tiny paintbrush.
I rebuilt the missing corner pieces on top of the paper scaffolding using special material invented in my bindery – a kind of cross between paper and fiberglass. It is very sturdy, strong, hard, and adheres well to the old cardboard cover. I used it to fill in the gaps where the edge pieces had been reattached. Then I covered the repair with the paper I’d just painted. It blended fairly well.
I used strong, thin fabric to create a lining/base for the existing covers. I made a new paper spine ling with endcaps, and attached the cut-out recess to it. I attached the cloth to the inside of the pieces, then use the hand-colored “egg shell” paper to cover the paper lining and the cut edges of the old covers on the outside, turning it in at the top and bottom to cover the inside of the newly formed endcaps. I didn’t paint the whole recess since it would be hidden under the original spine. I decided my original method of painting in the recesses of the paper was too clunky looking, so I painted several more layers of veining and colors onto the repair paper. Then I glued the salvaged spine into the recess on the cover.
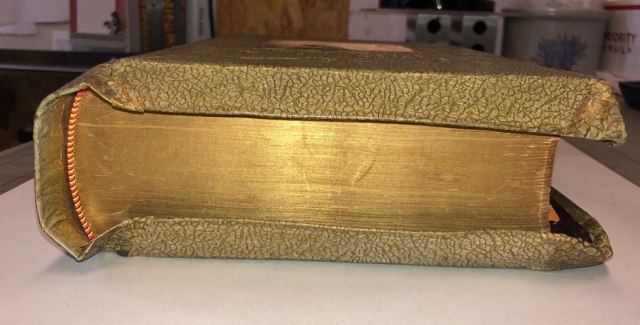
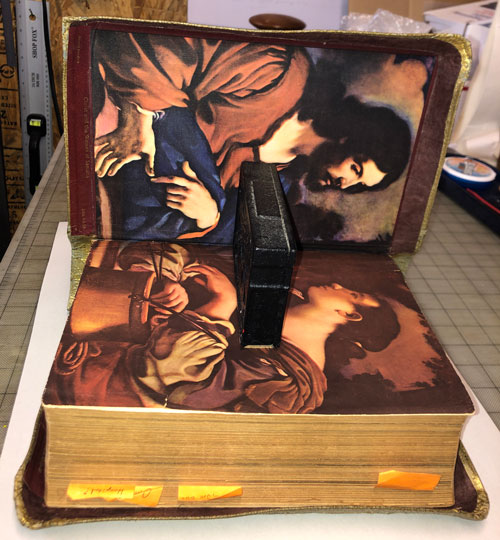
I adhered the cover back onto the bible. I touched up the color of the inside of the cover. I glued the printed endsheets back down to the insides of the covers front and back. I lined the edges of the inside covers, where the old fabric had rotted, with handmade Japanese tissue. I salvaged the old cloth edges with the printed captions and attached them on top of this tissue.
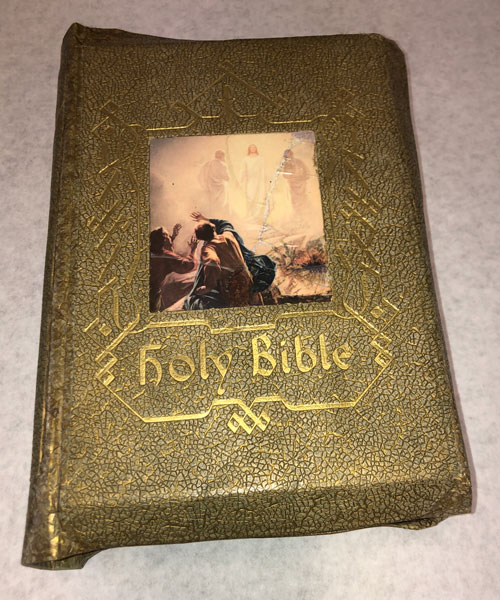
Once I was happy with the structural repairs, I primped and fussed and adjusted the colors and generally tried to get the repair as perfect as I could. I noticed that the small printed image on the front cover had a protective plastic layer that was delaminating and that some of the image was missing. I painted in the missing parts of the image, and put a layer of protective acrylic over all.


All in all, the restoration of this bible took over 20 hours. For this reason alone, most SANE bookbinders don’t undertake this type of restoration. I am well satisfied with how it came out.


Bookbinding for fun and profit
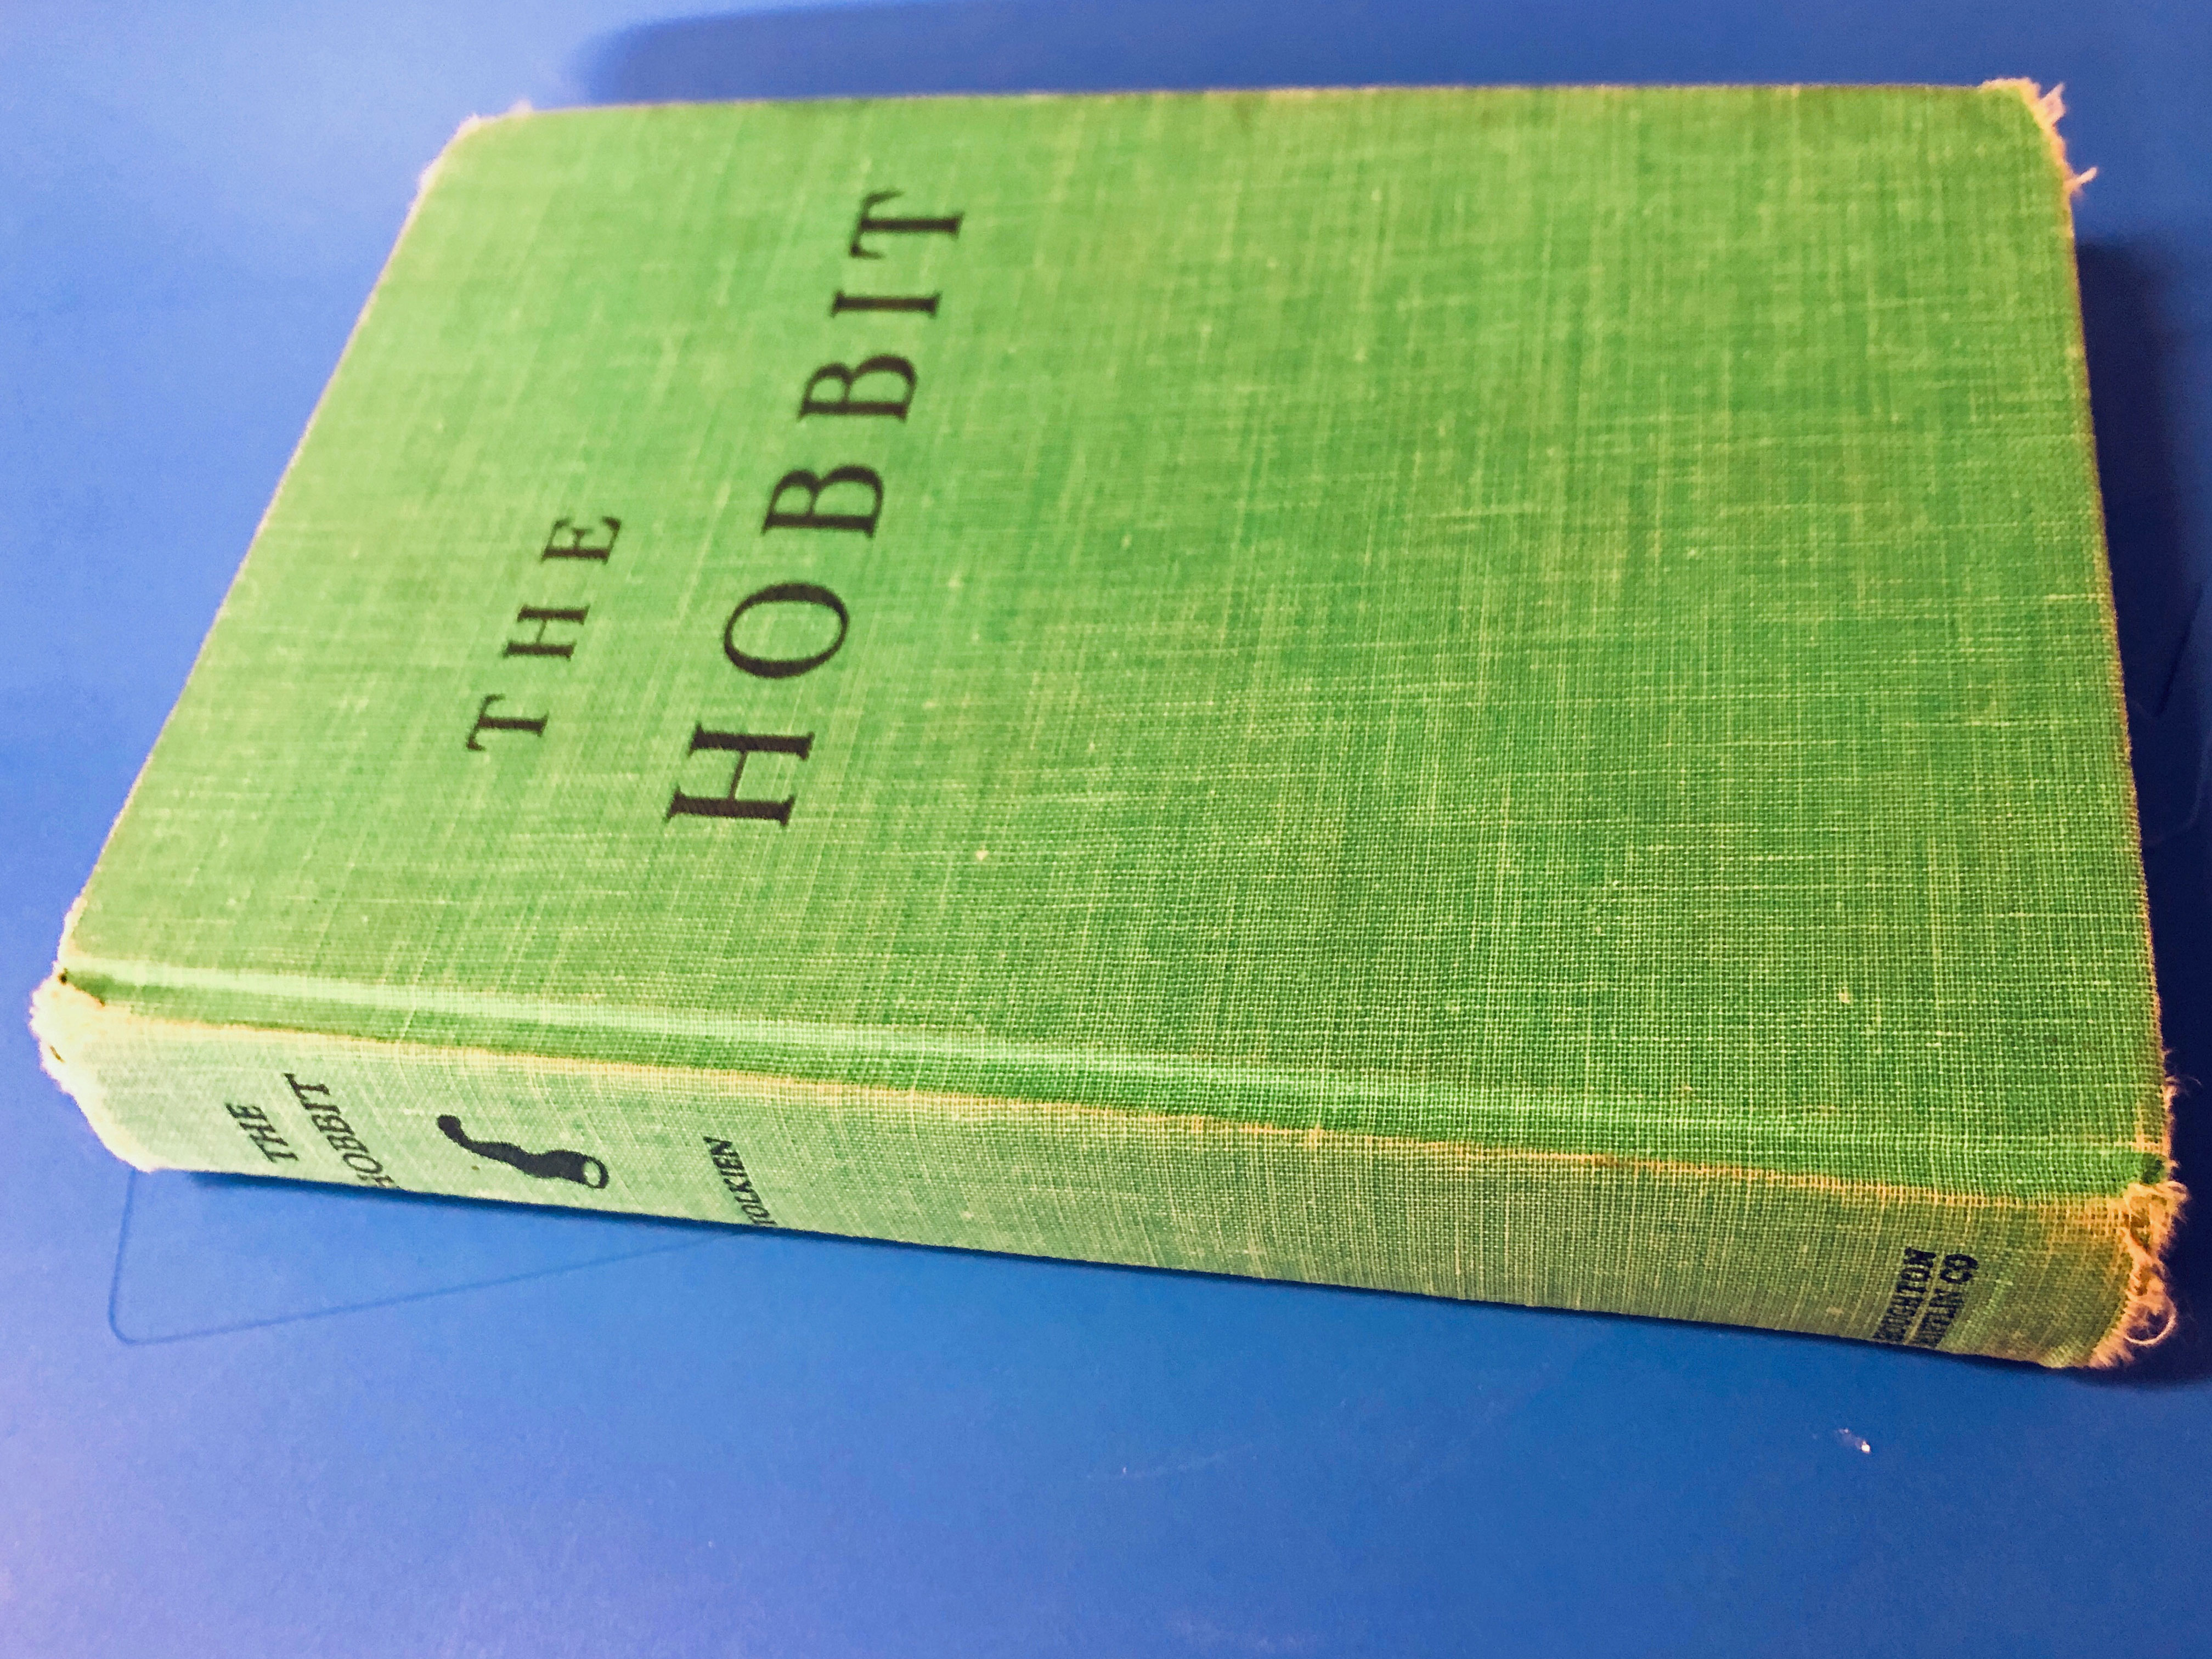
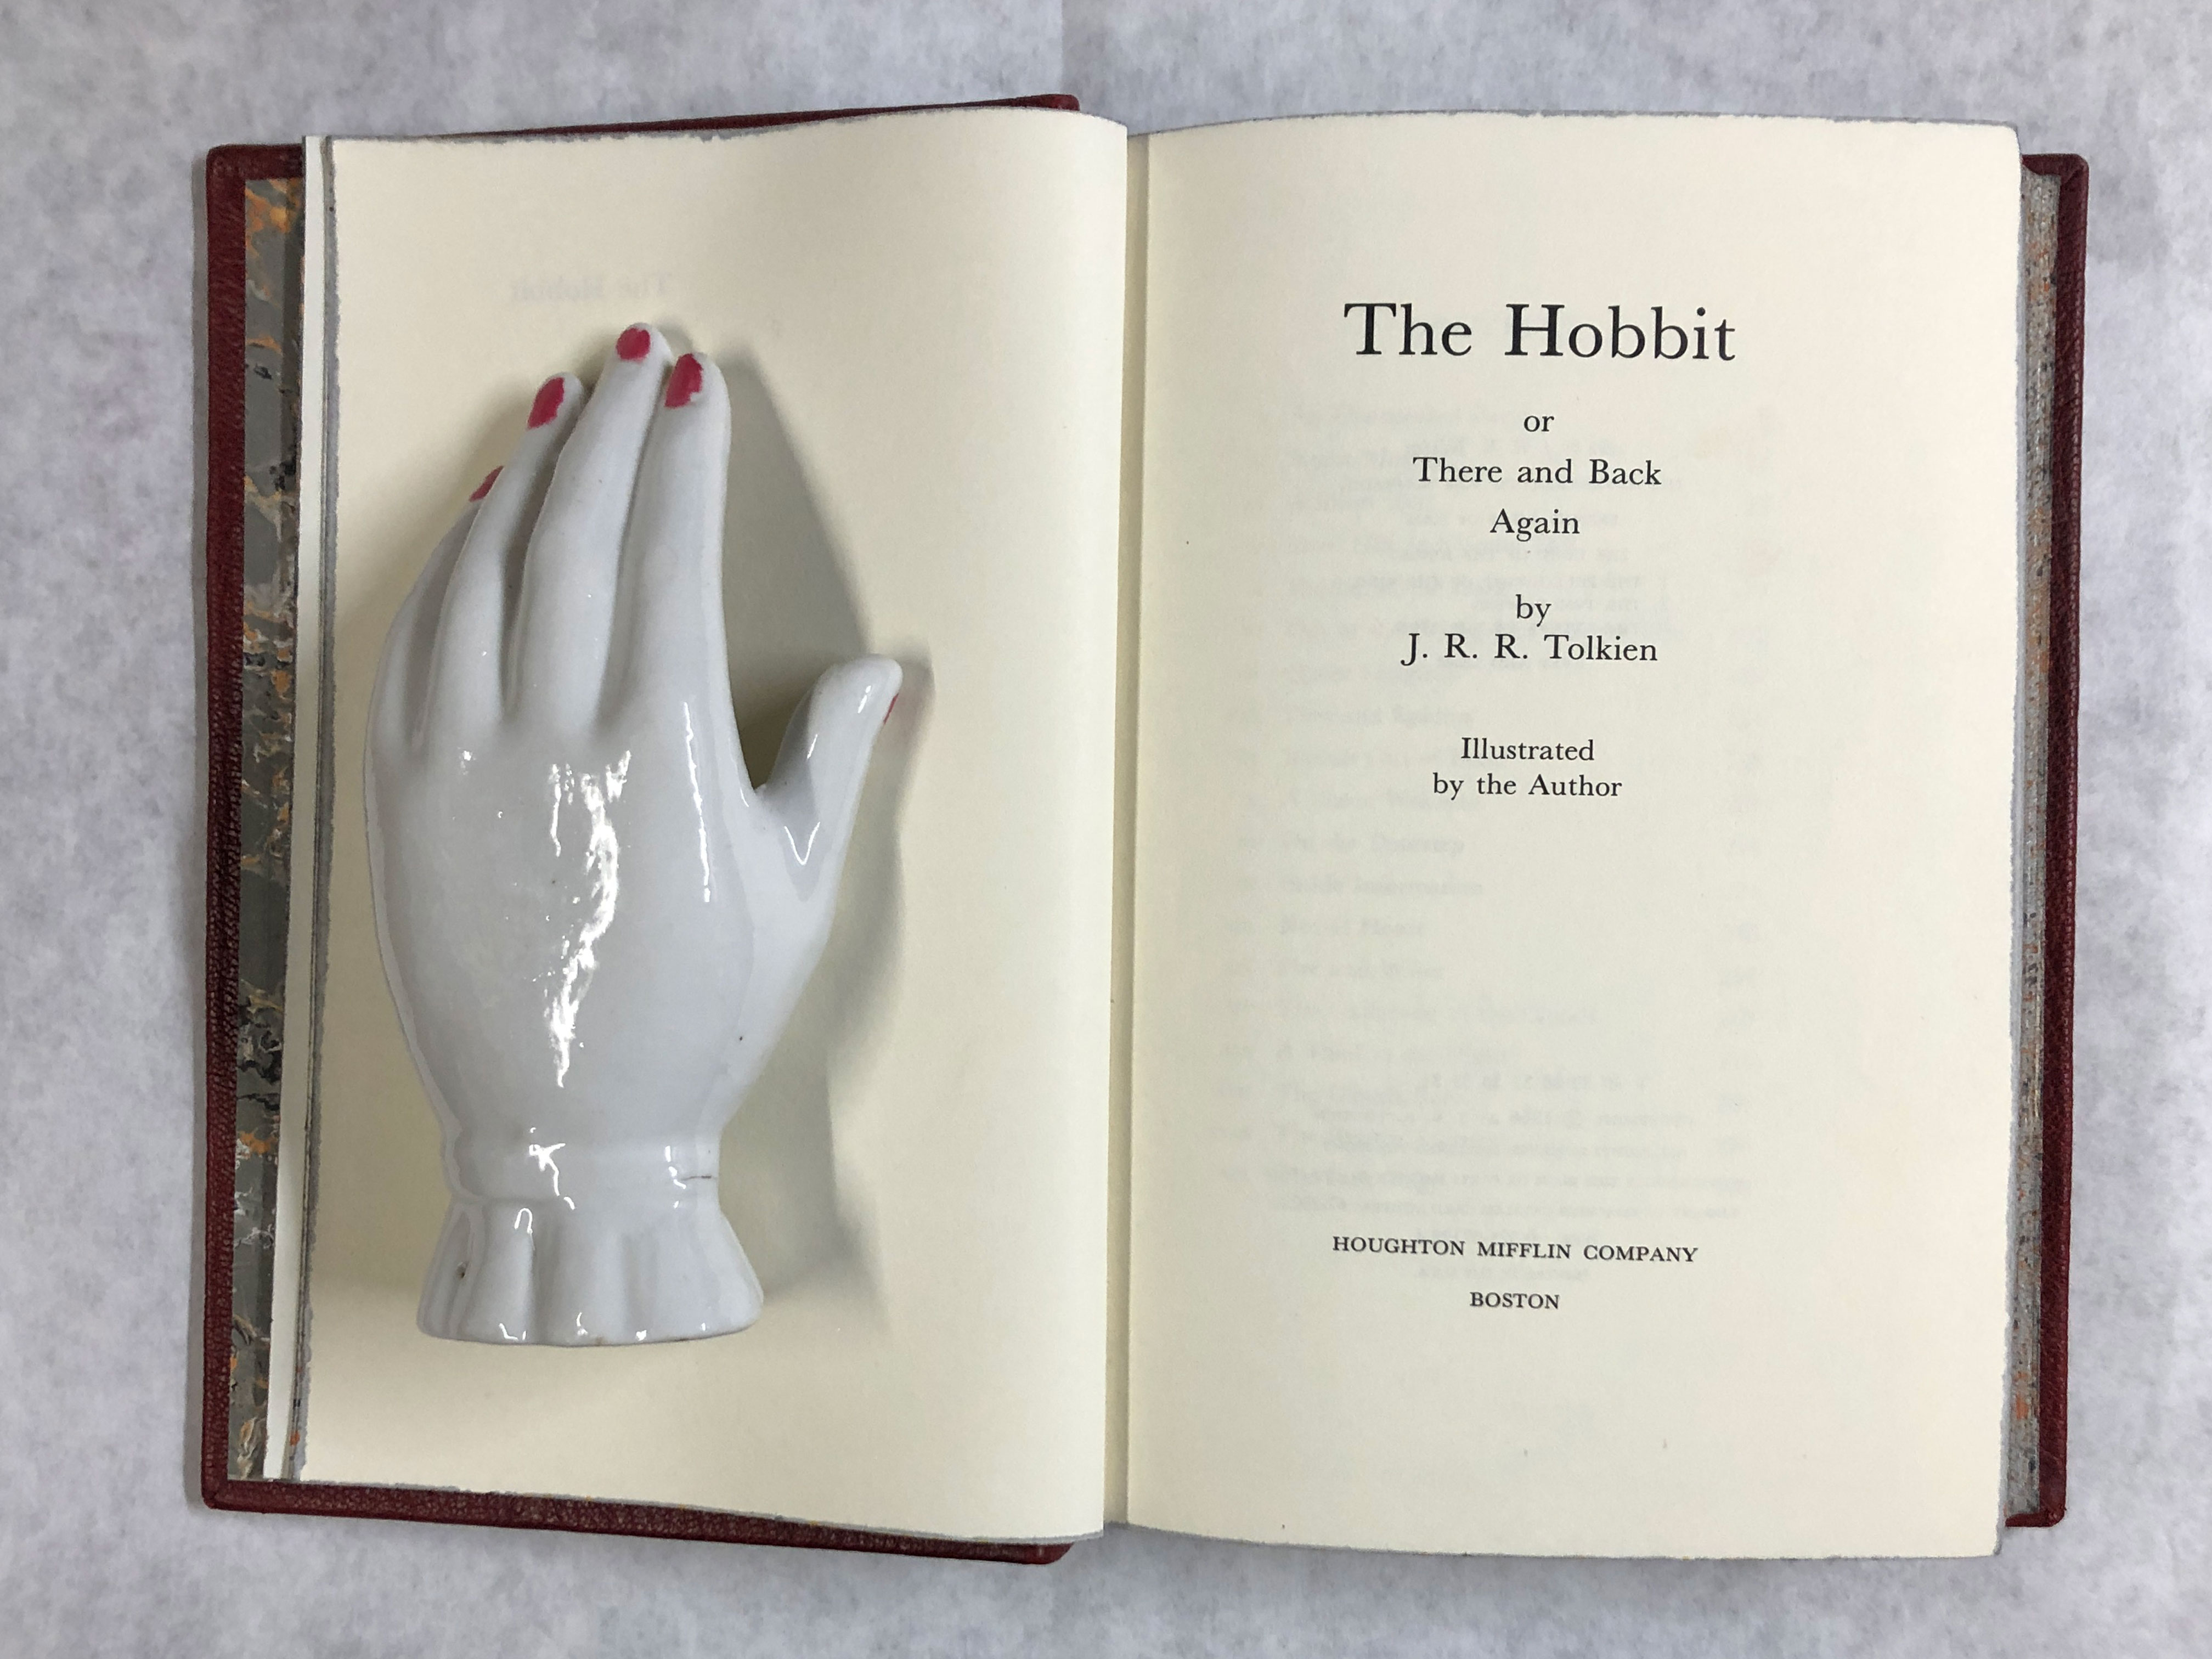
A friend mentioned that he’d like to see what I would do with a copy of “The Hobbit” by Tolkien. I wondered about that myself. Here’s what I did.
First, found a hardcover copy of the book that was sewn, not glued. This was an ex-library book with a lot of use that was still in good condition.
Next I removed the old cover, keeping it handy to protect the text block during rebinding.

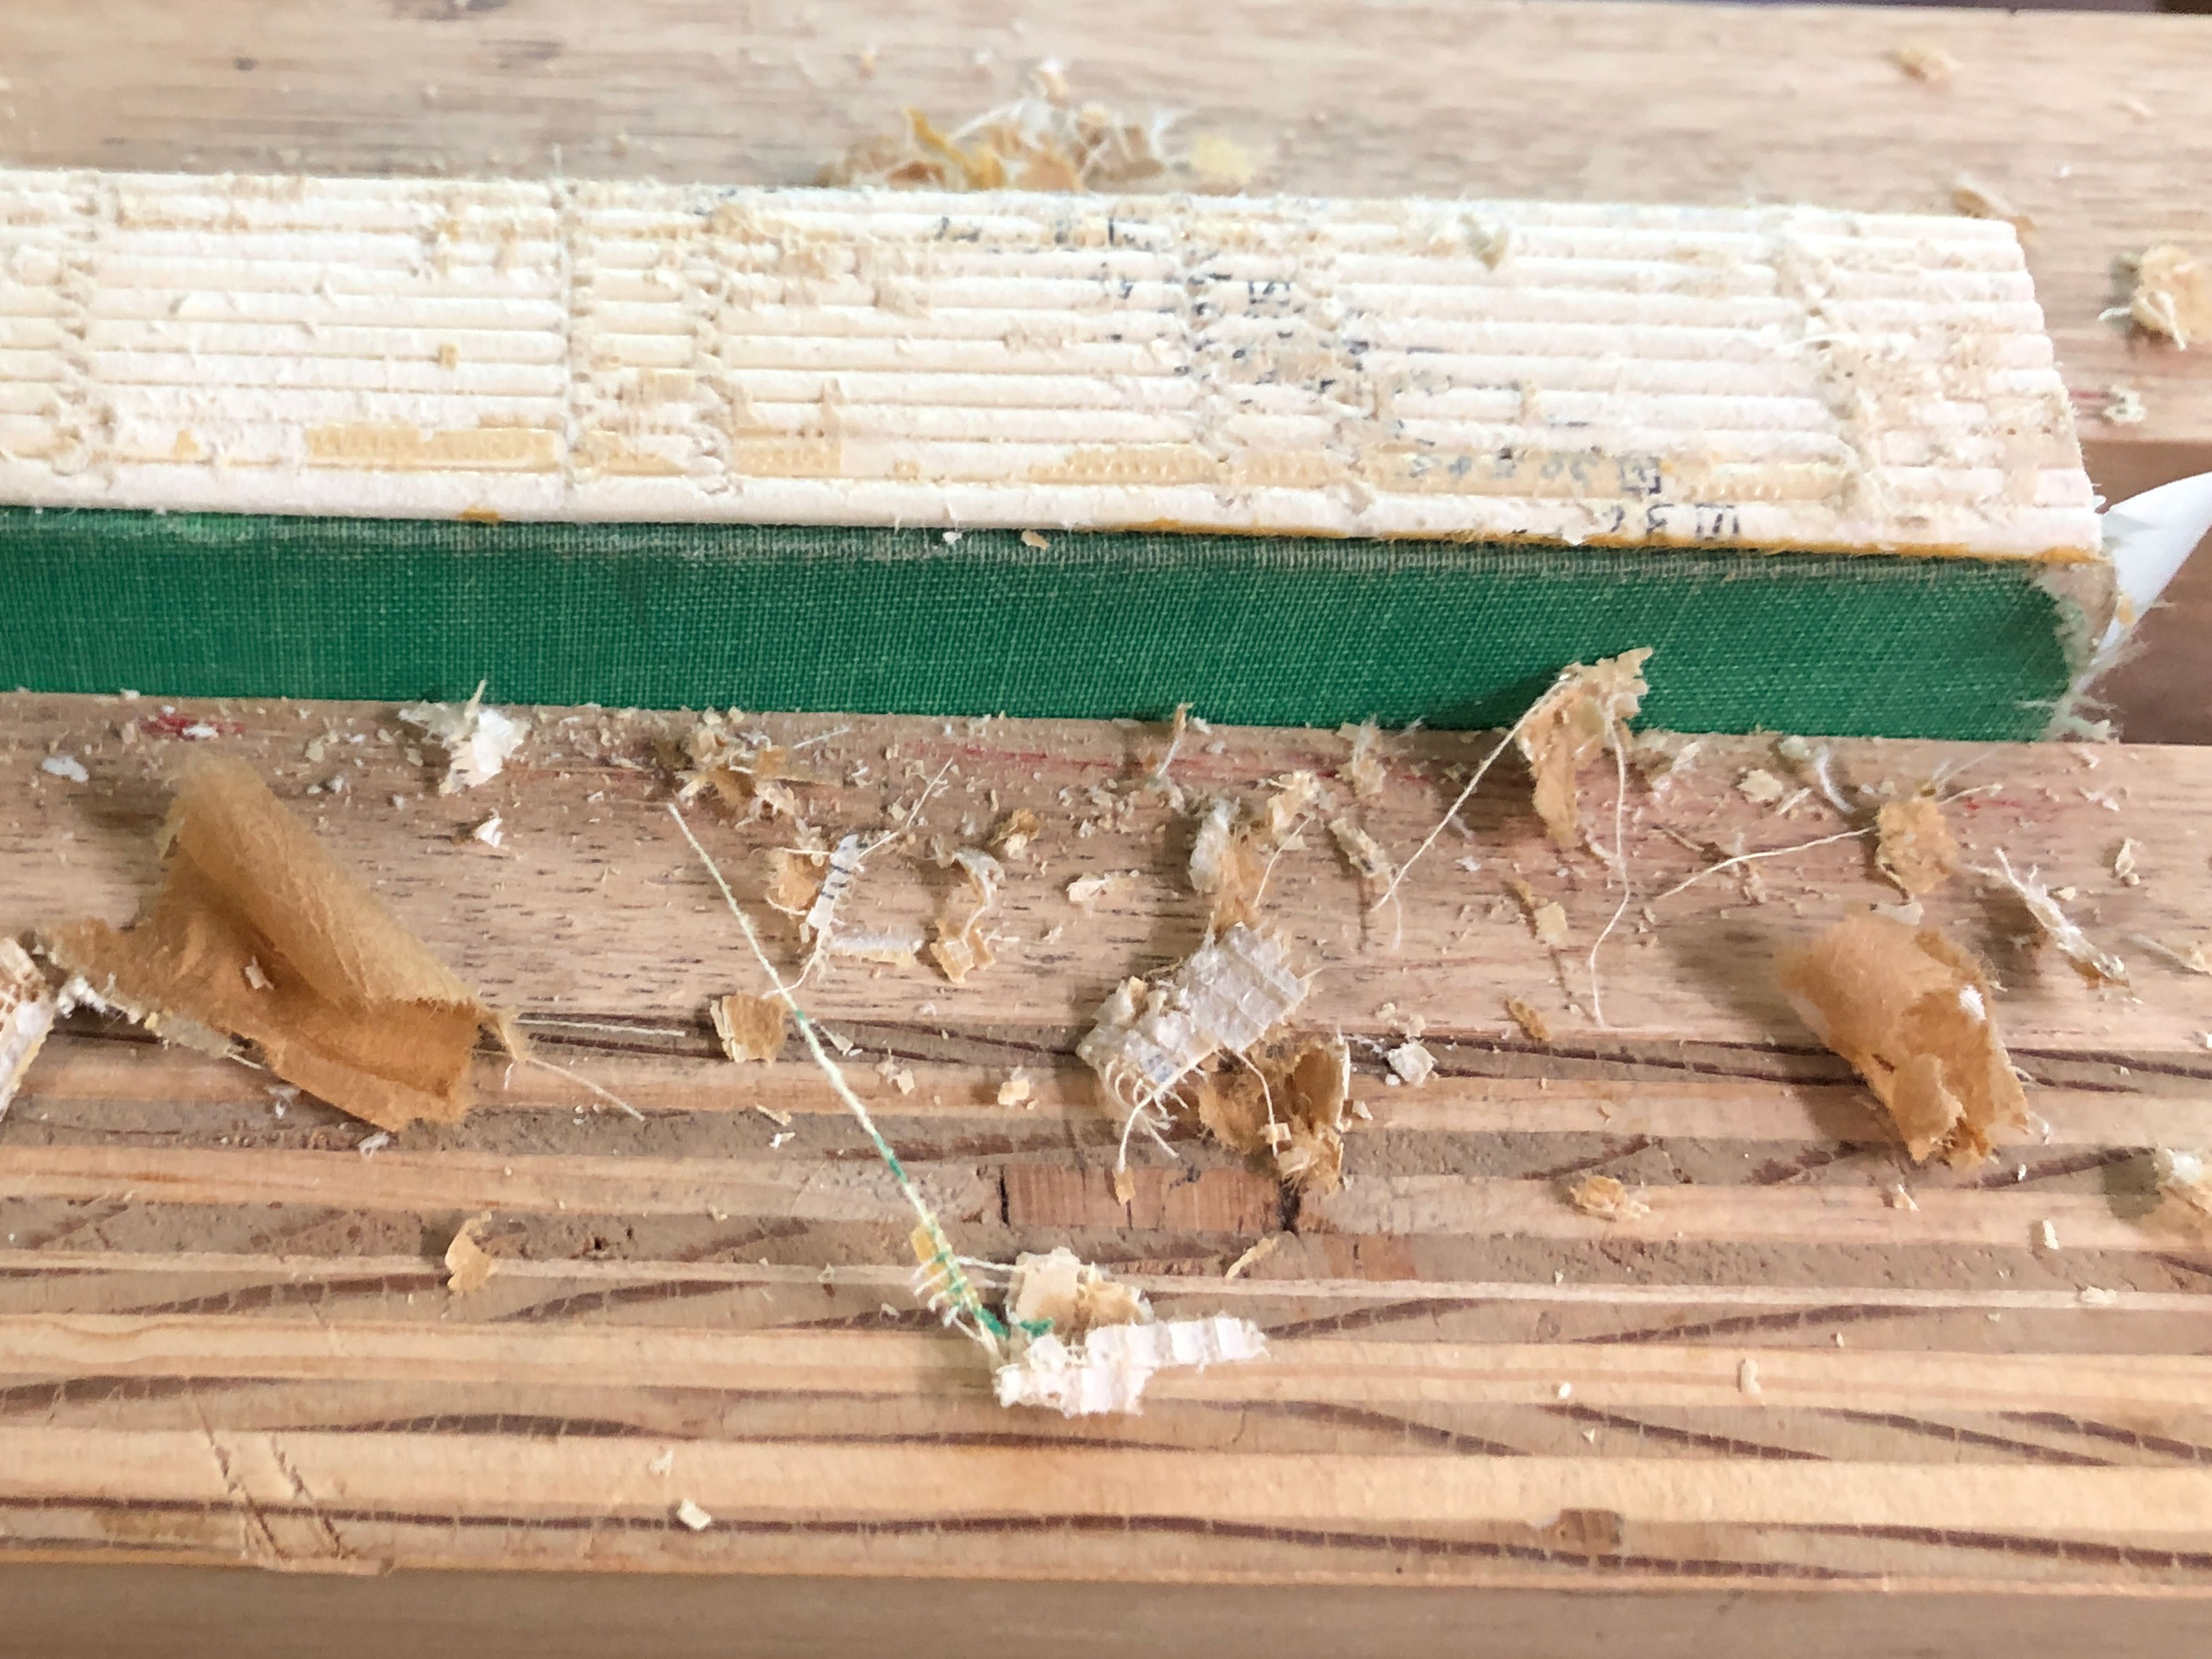
Then I chucked the book in the job backer to clean the old paper and glue off the spine.
Then I made the final decisions about leather and endpapers. Made flexi-fold endpapers. A typical book has a “stiff leaf” – the colored endsheet is pasted to the first white sheet. When this page is turned, it tends to lift the next white endsheet with it. A “flexi-fold” endsheet has the colored sheet pasted to the first white endsheet just along the outside edge, which makes the page much more flexible. It shouldn’t lift the next page when turned.

After cleaning and reshaping the spine, I reglued it, decorated the book edges, attached leather endbands, then lined spine with suede and sanded that smooth.
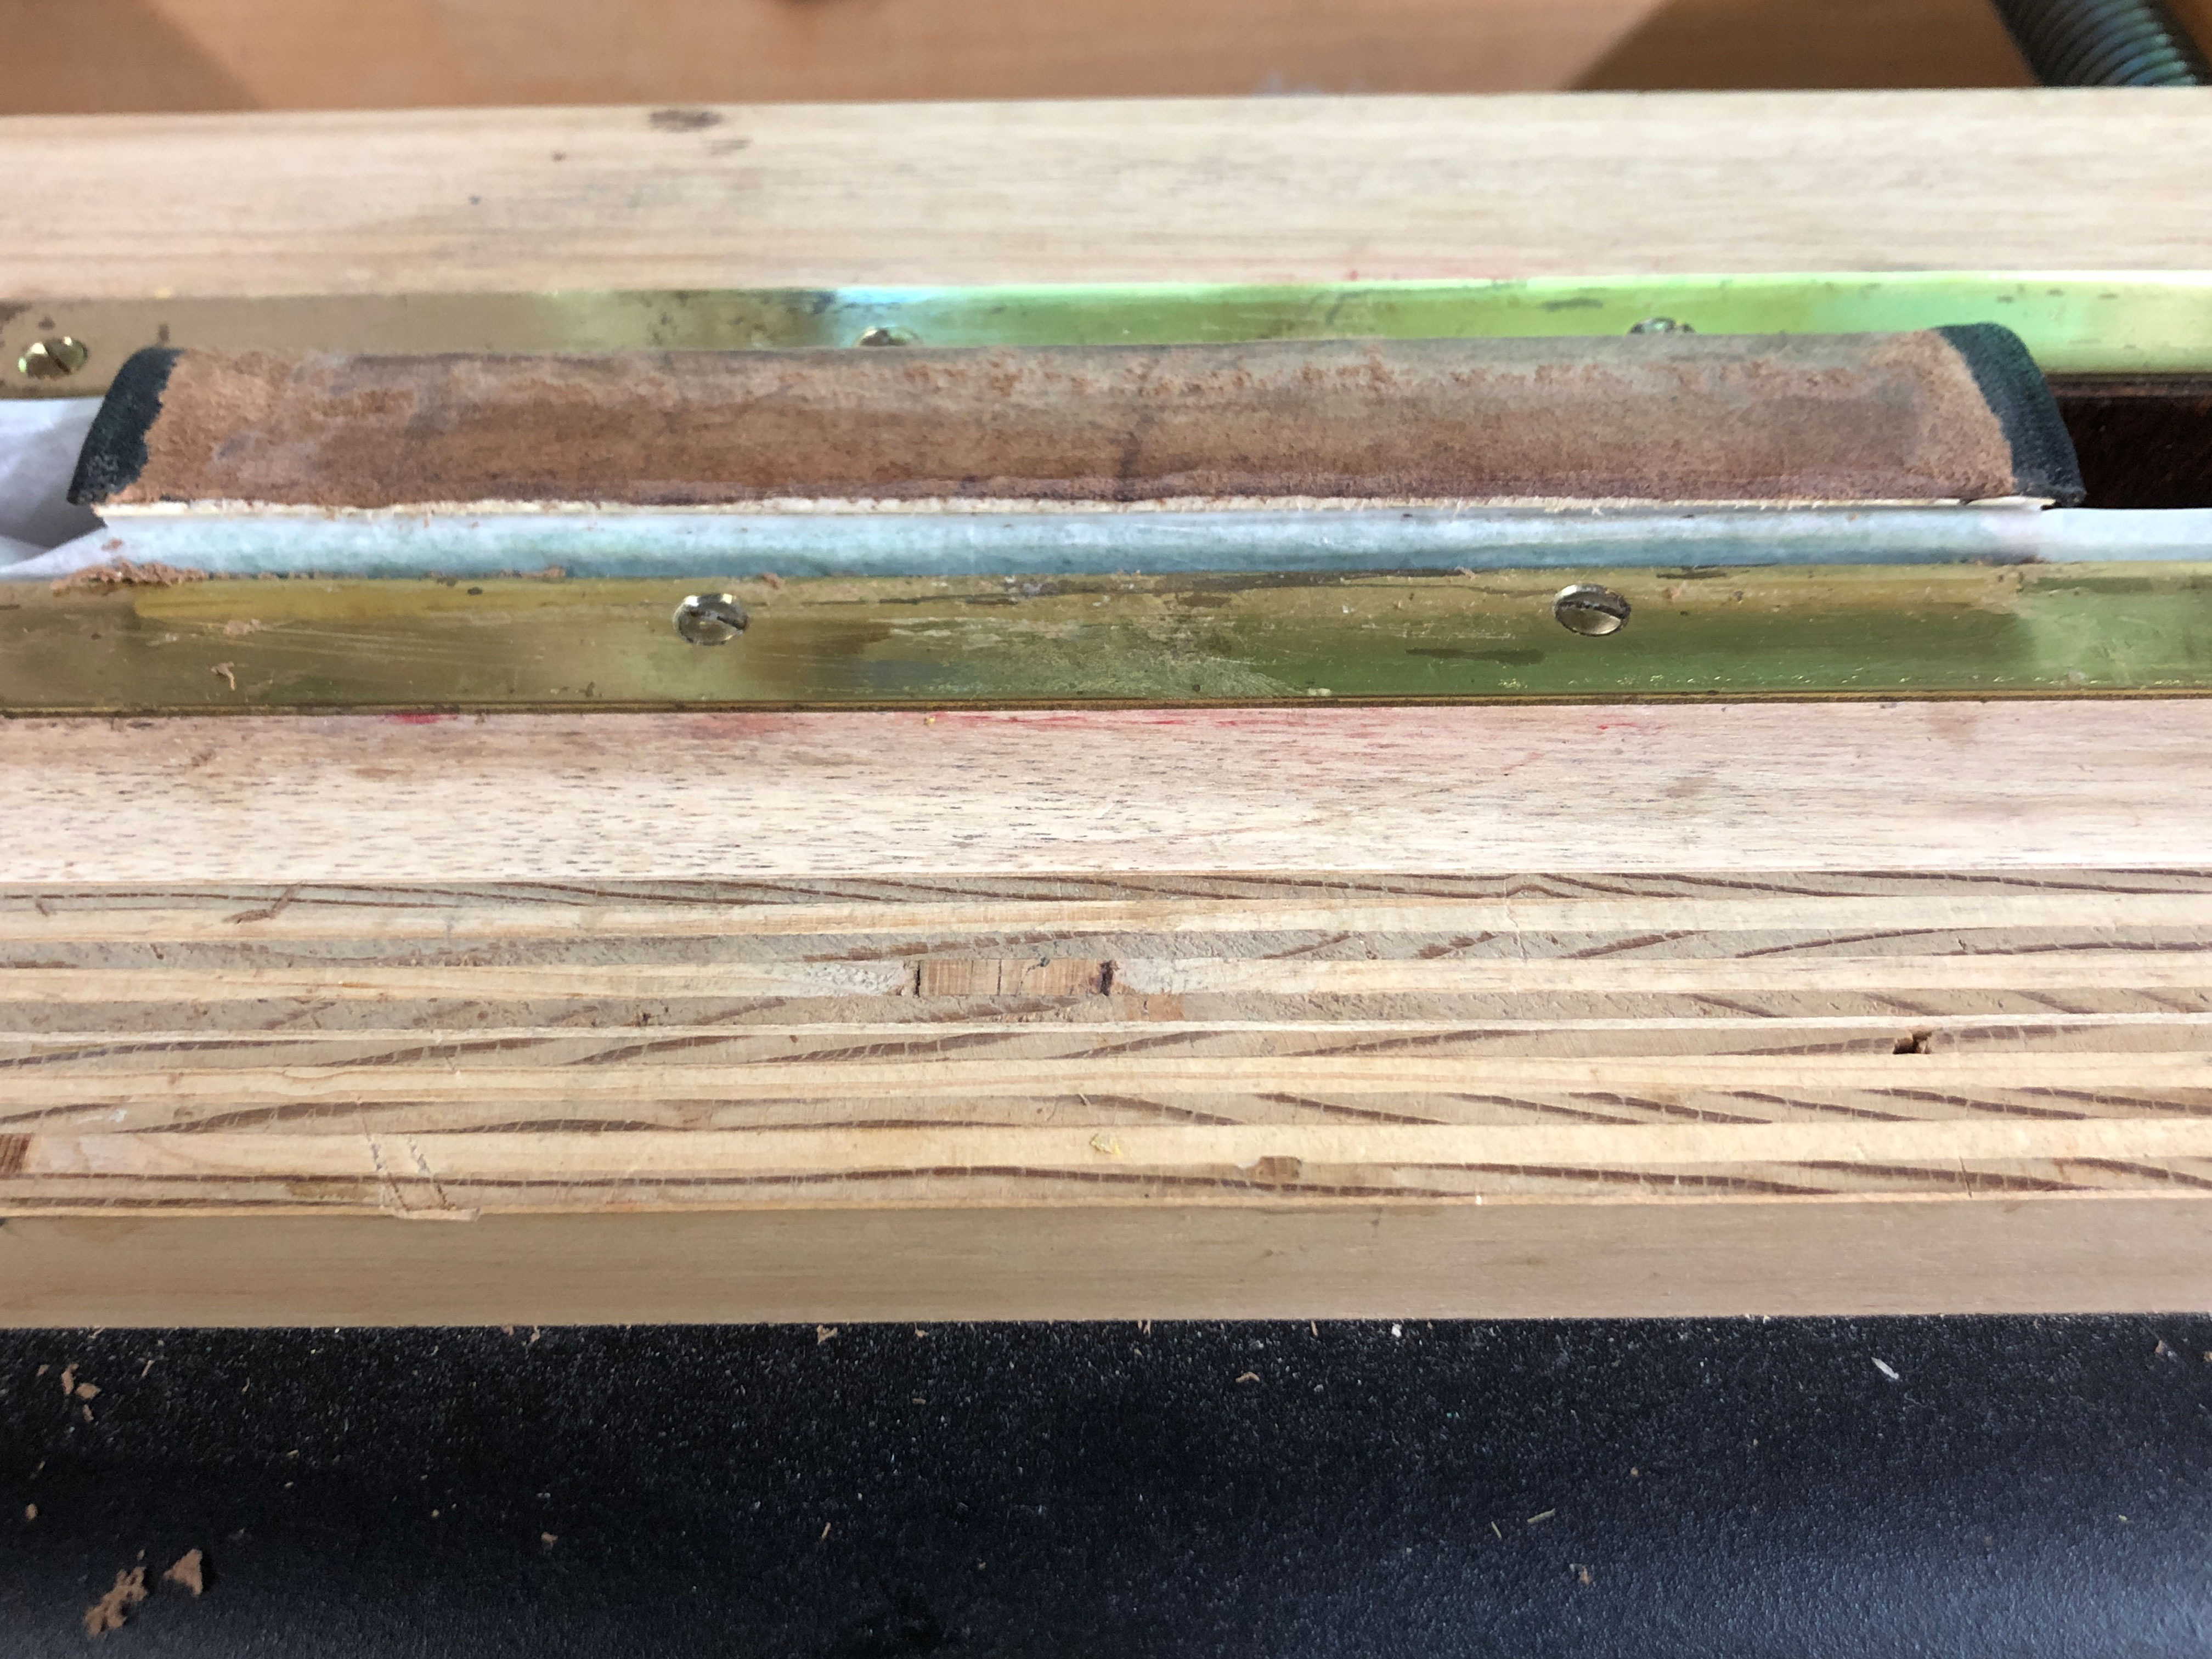
Then added a strip of linen to aid it attaching the new cover.

On top of the linen I glued a German hollow tube.

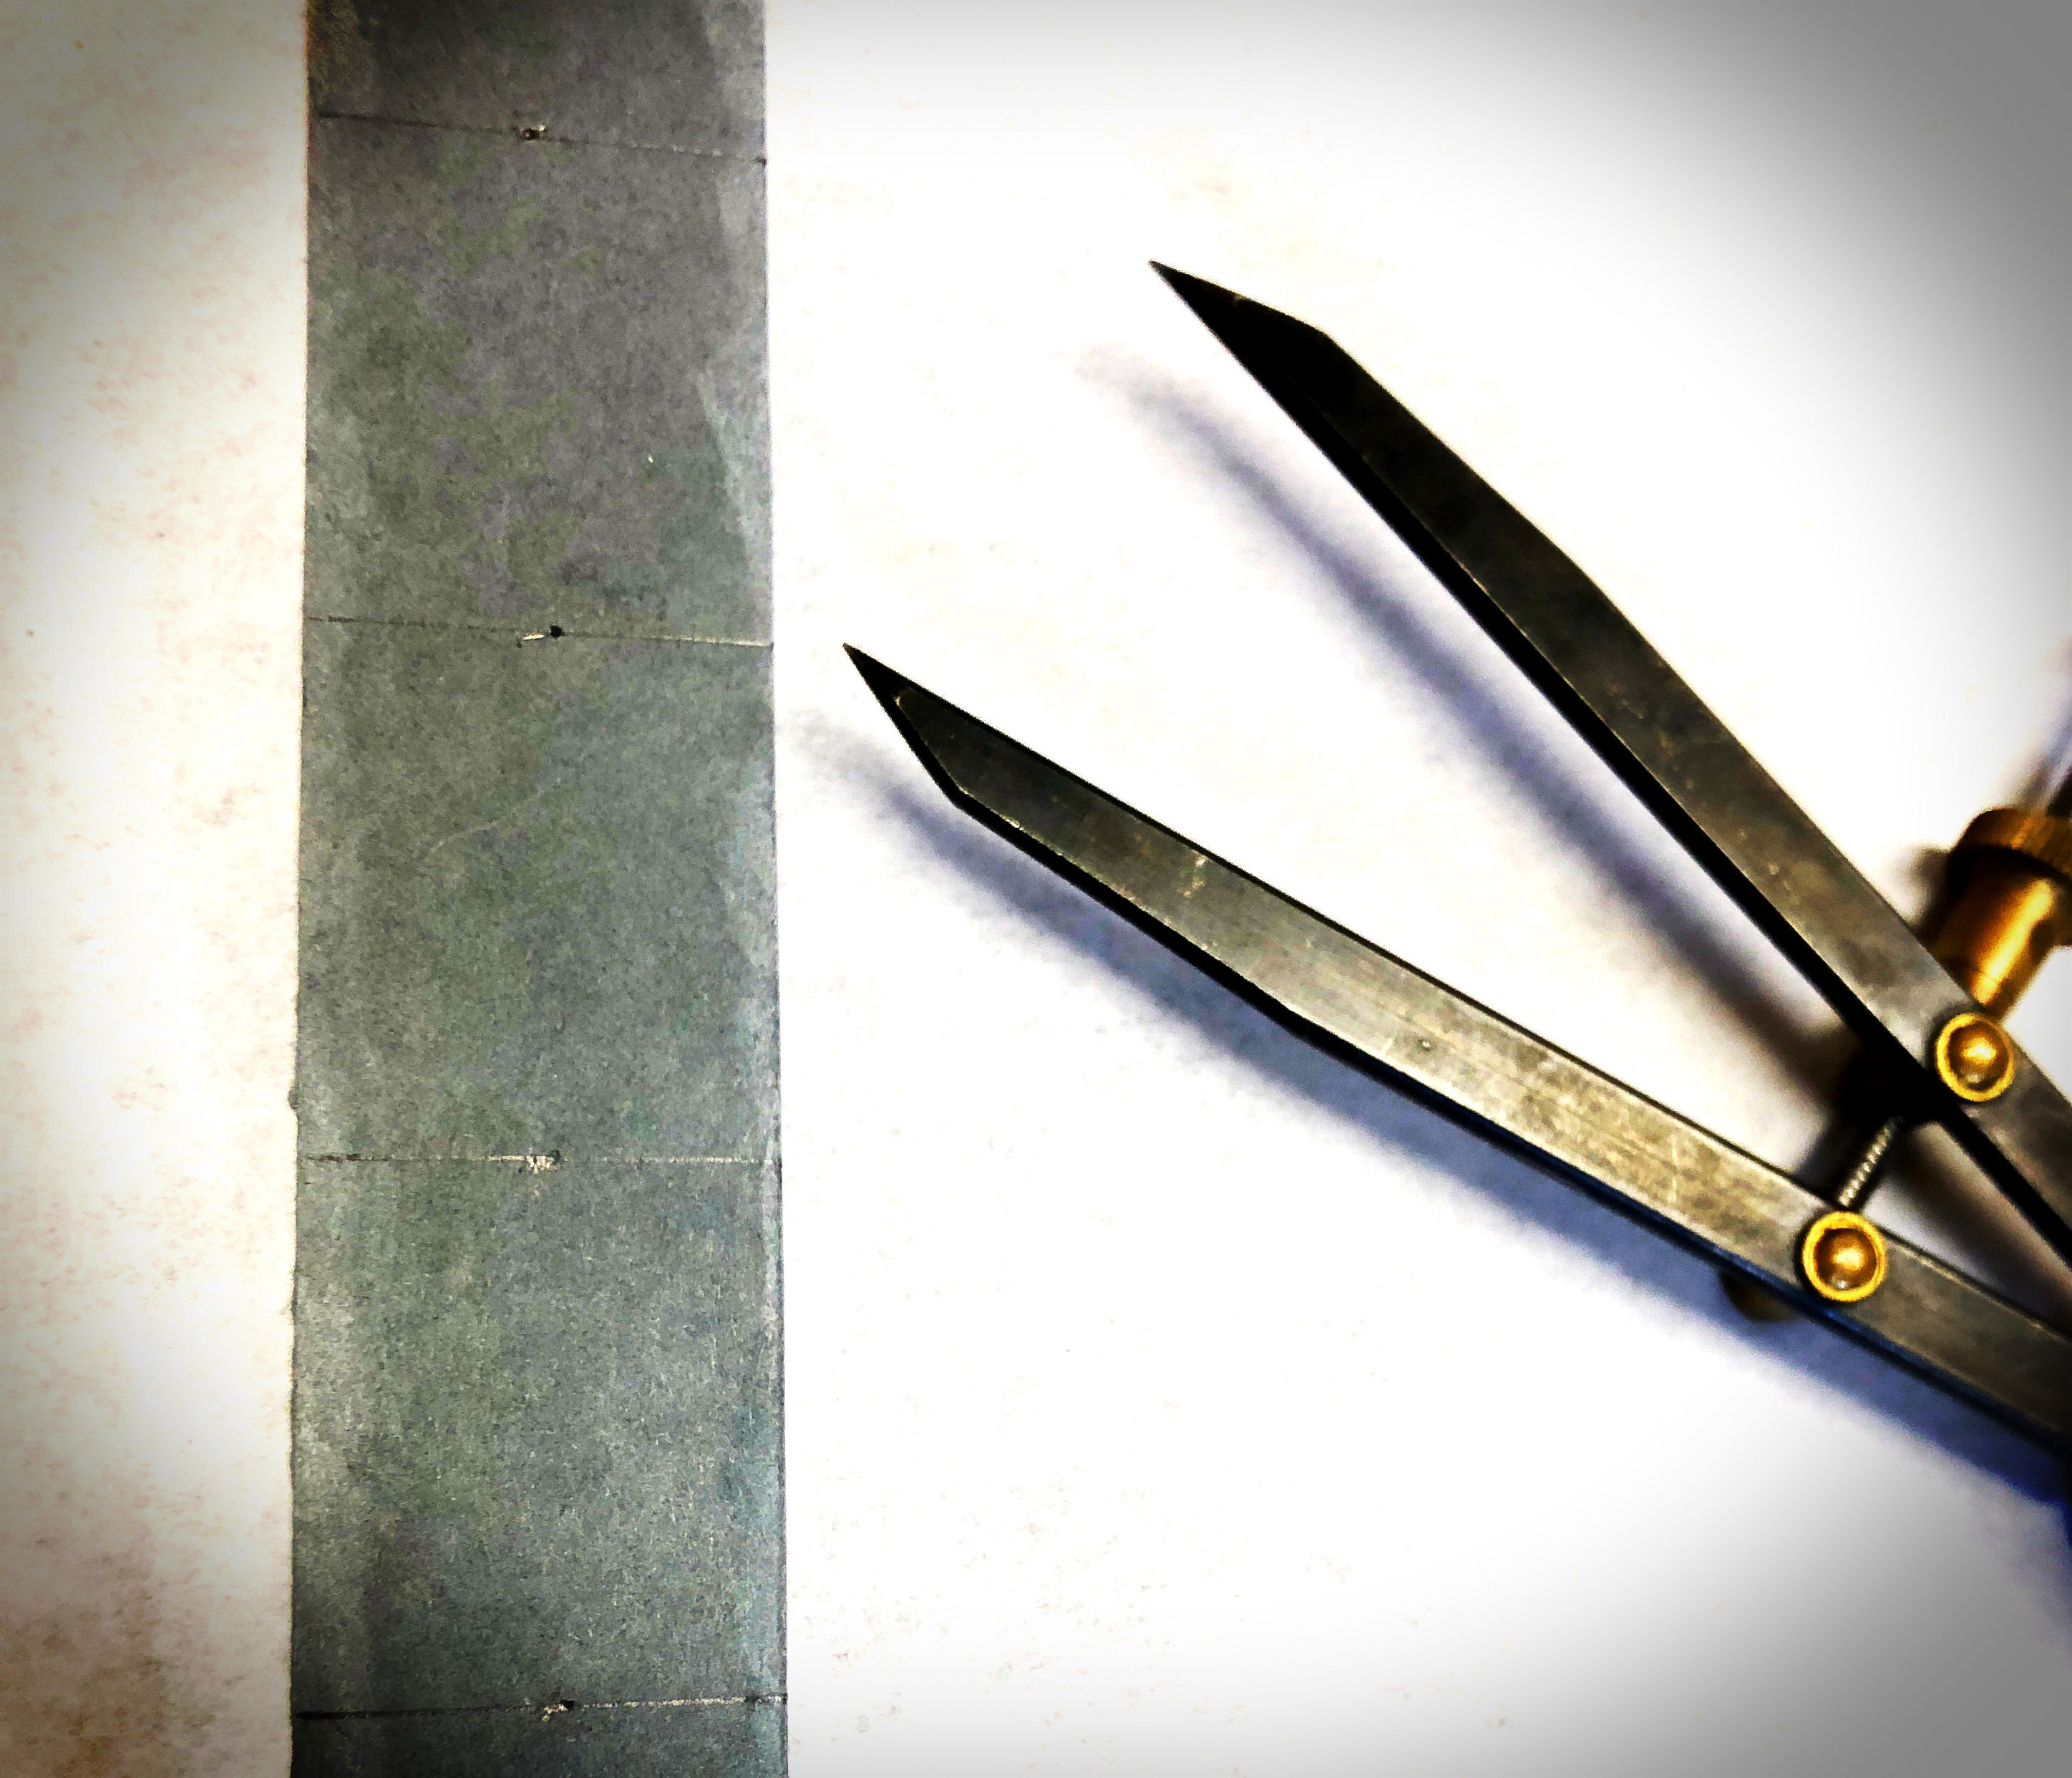
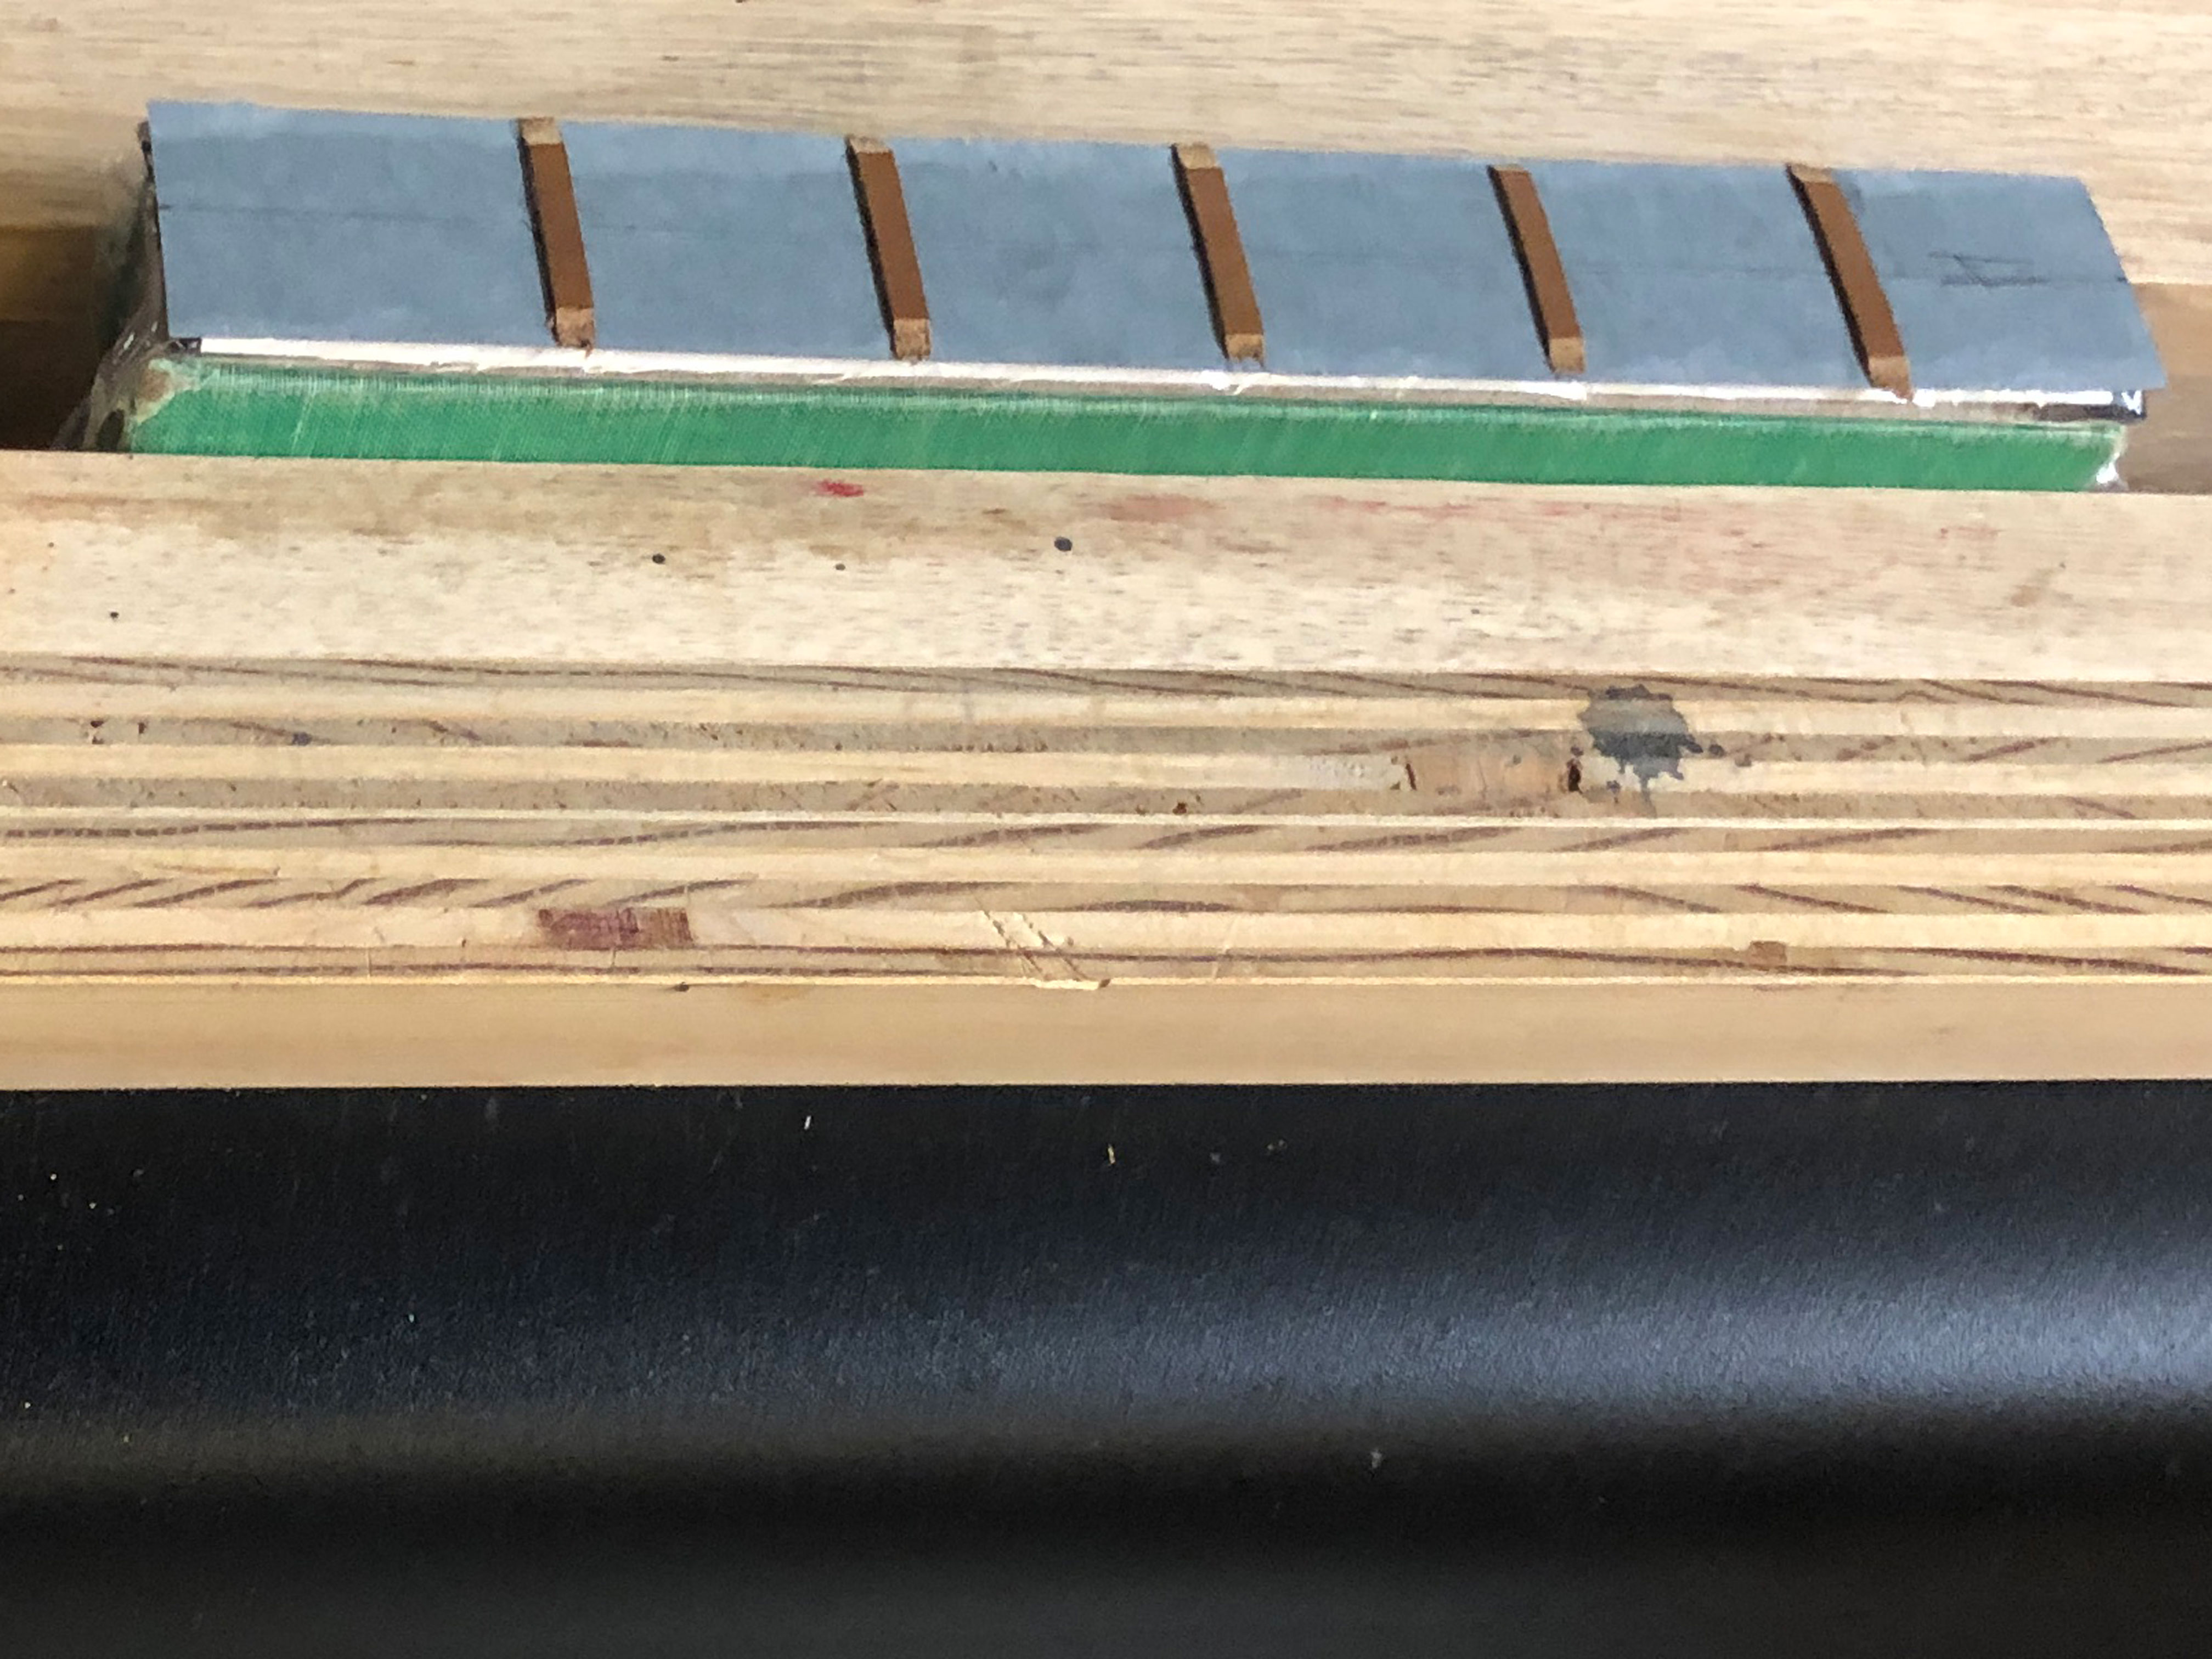
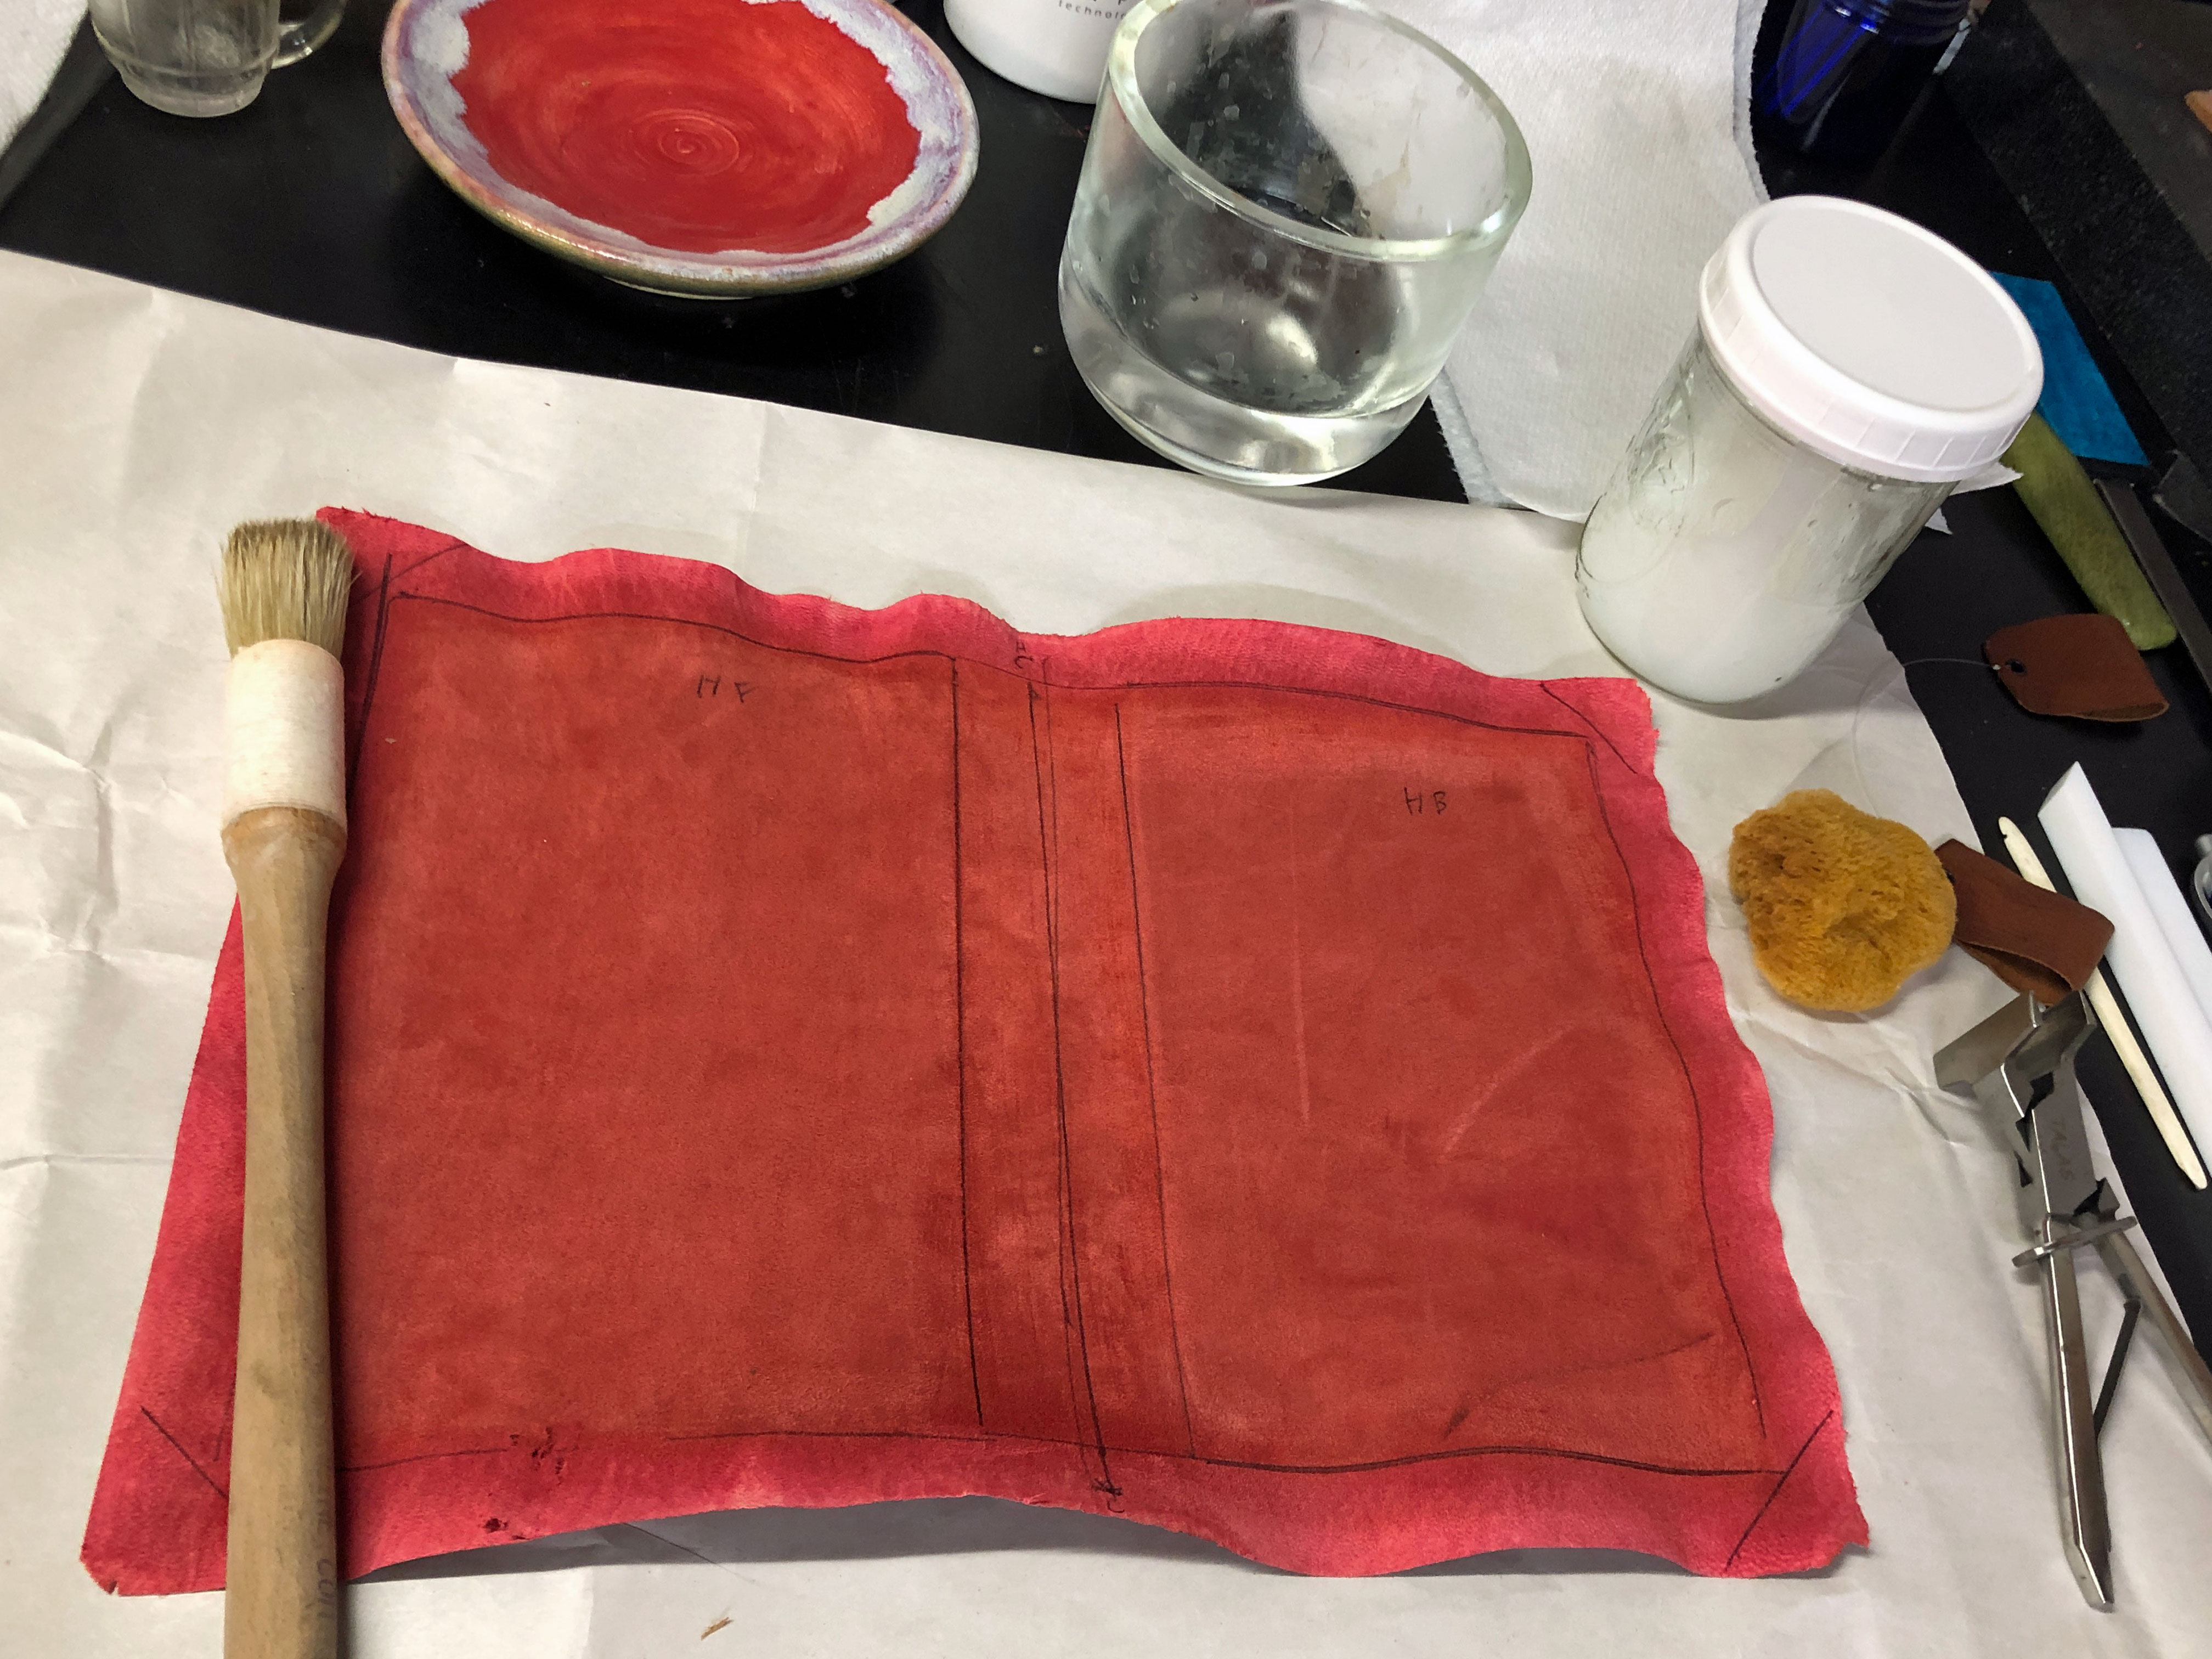
Marked up a spine lining strip for false raised bands.
Double-check the fit of the spine strip with false leather bands attached.
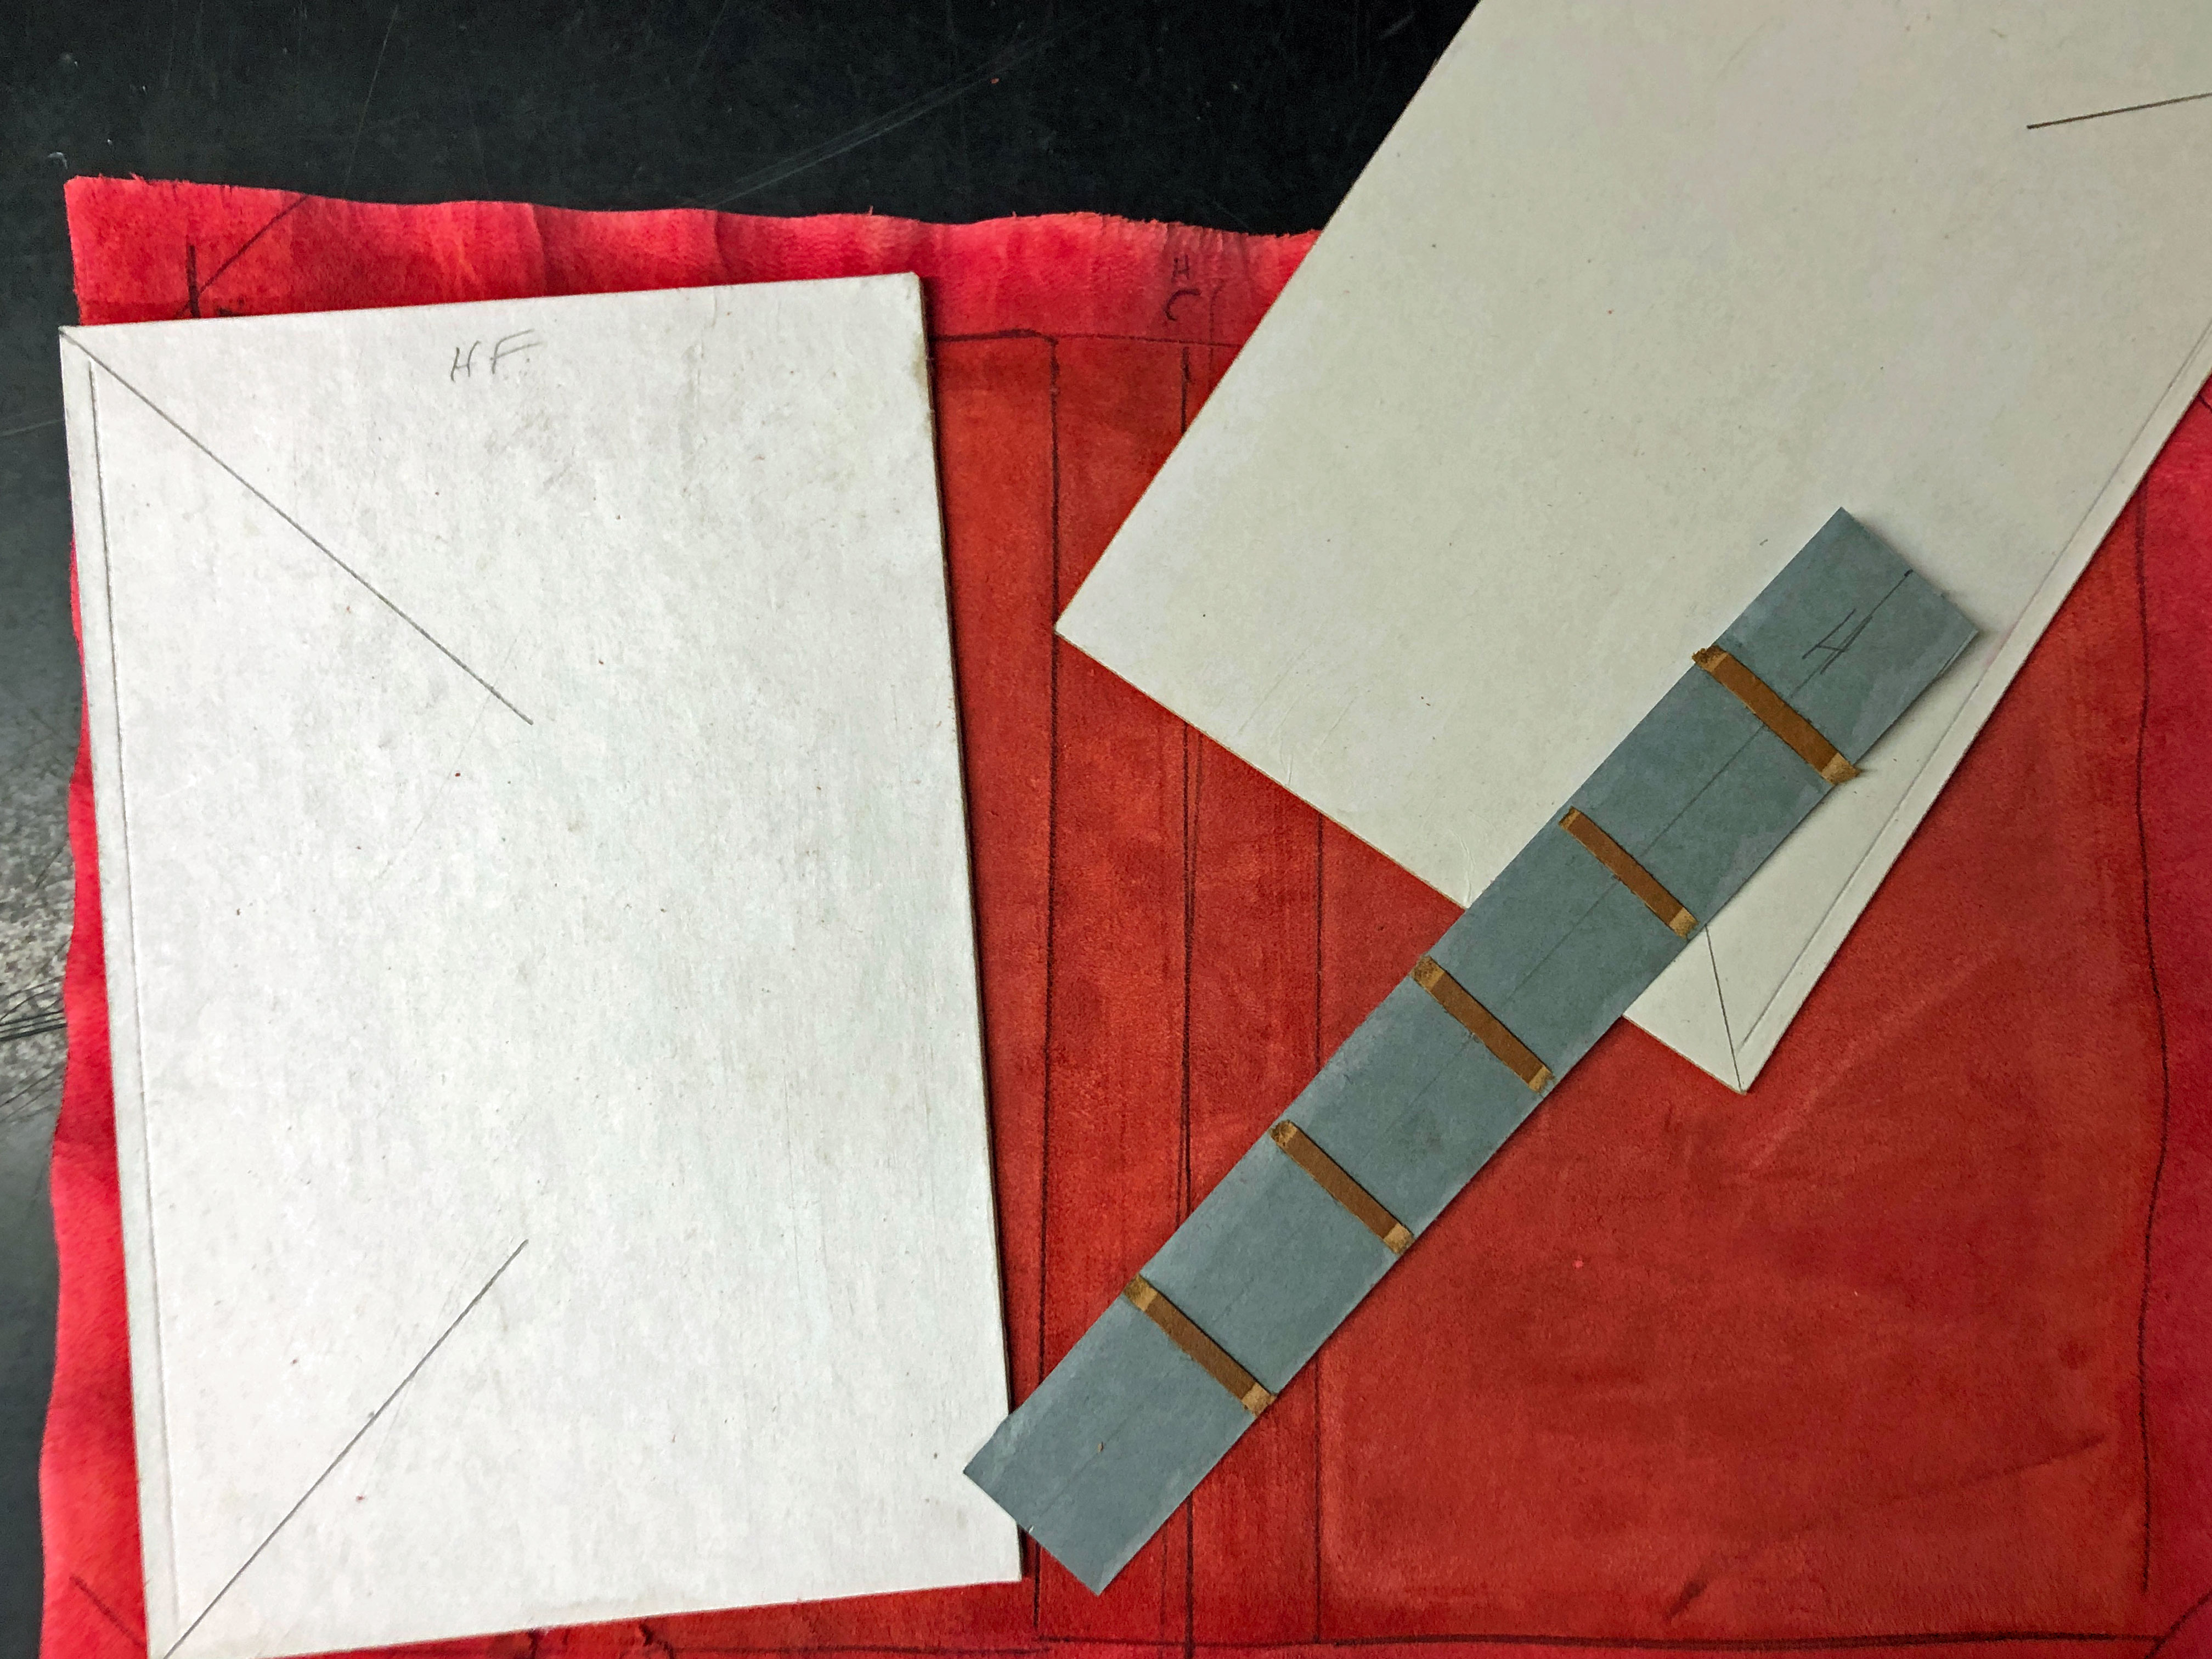
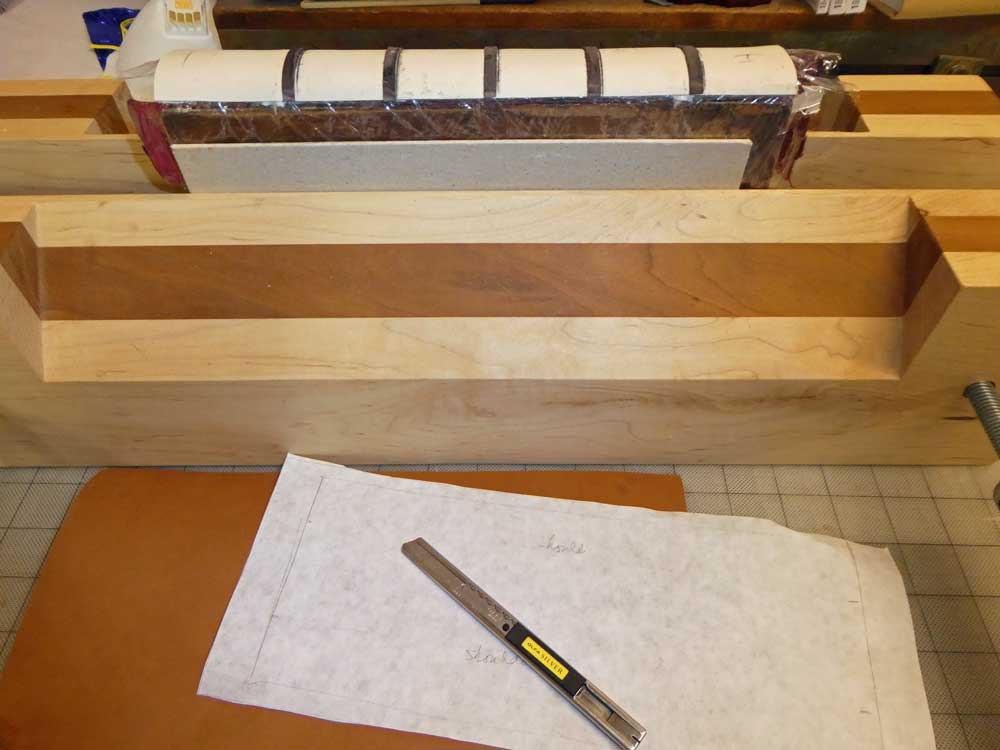
I made a pattern for the leather cover.

Transferred the pattern from the paper to the leather.
![]()
Pared the edges and turn-ins.
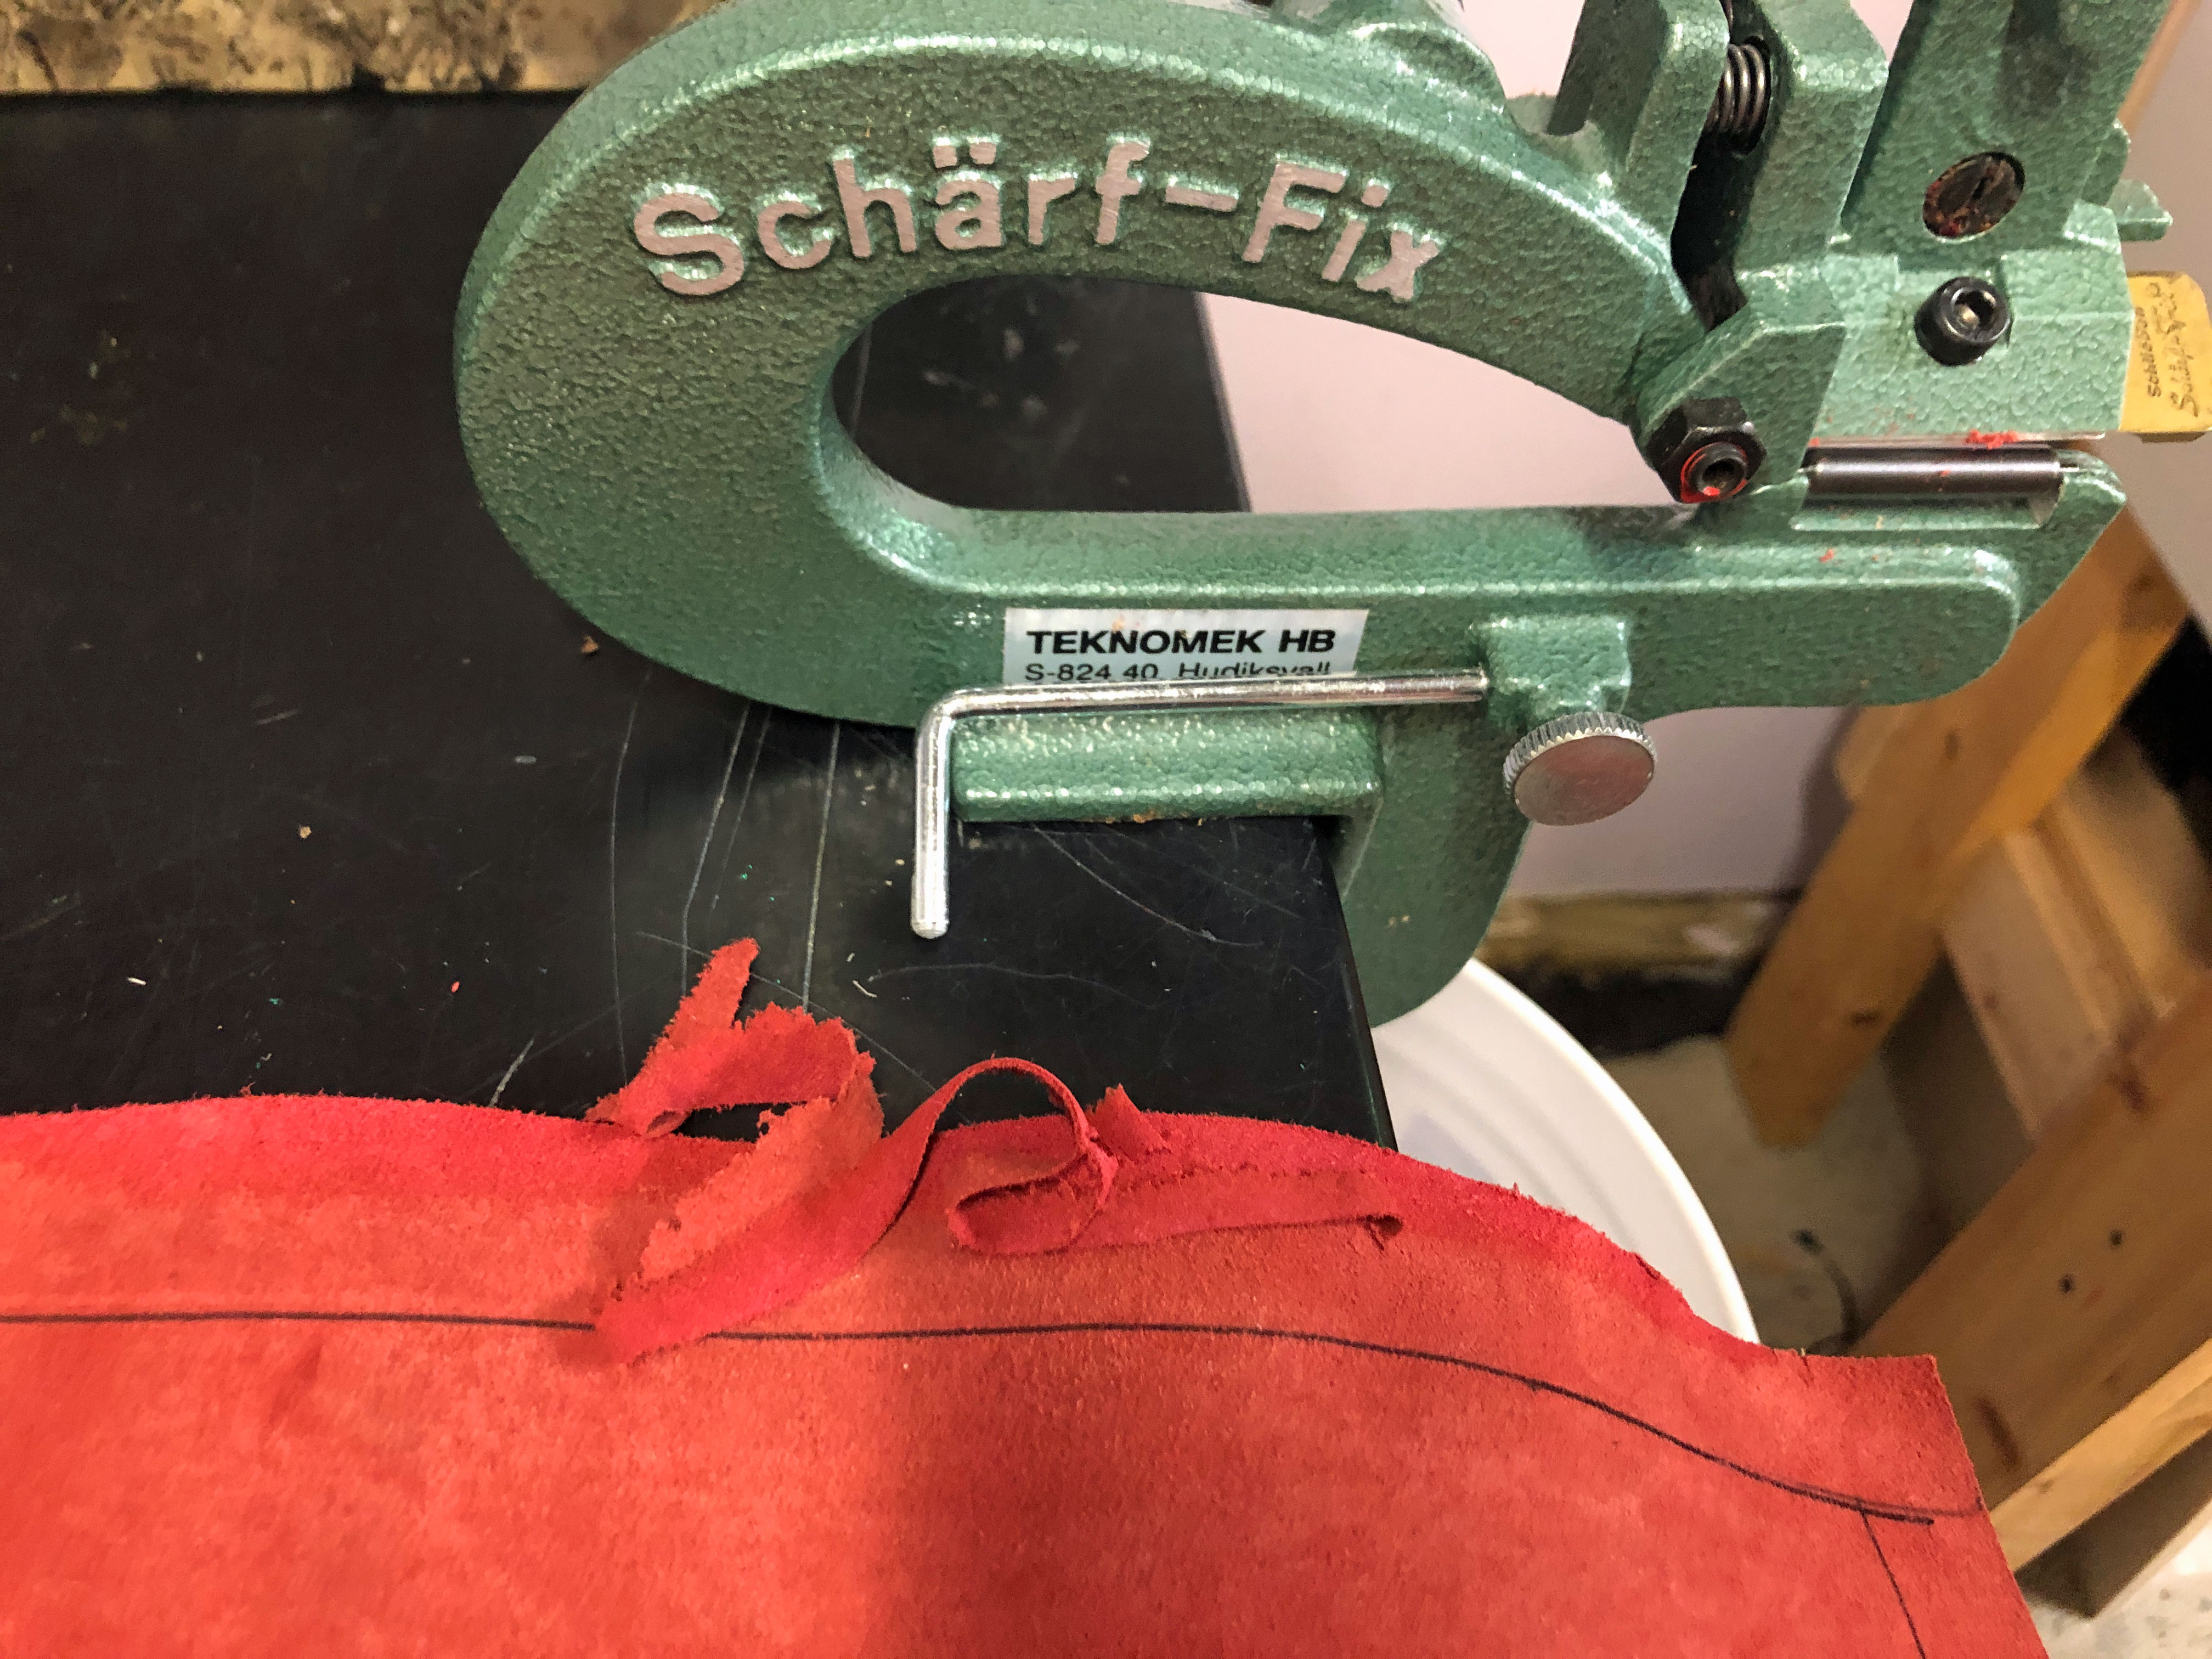
Refreshed the pattern after paring.

Assembled all the materials for the cover: leather, spine strip, and new cover boards. I didn’t take pictures of the tedious chamfering of the boards of lining them with paper on both sides.
All ready to go with fresh paste, new scalpel blade, and assorted folders/triangles/straightedges/sponge/water/paste brush/band nippers…
After pasting the leather to the new cover boards and forming it around the raised bands on the spine strip, I let the cover dry on the (plastic-wrapped) text block so that it would have the correct shape. Once it was fully dry, I marked the inside turn-ins and filler card using dividers to make small marks. Cutting through paper and leather at the same time gives an exact fit for the liner card. The liner card is the same thickness as the leather turn-in, so it makes a smooth surface for the decorative paper.
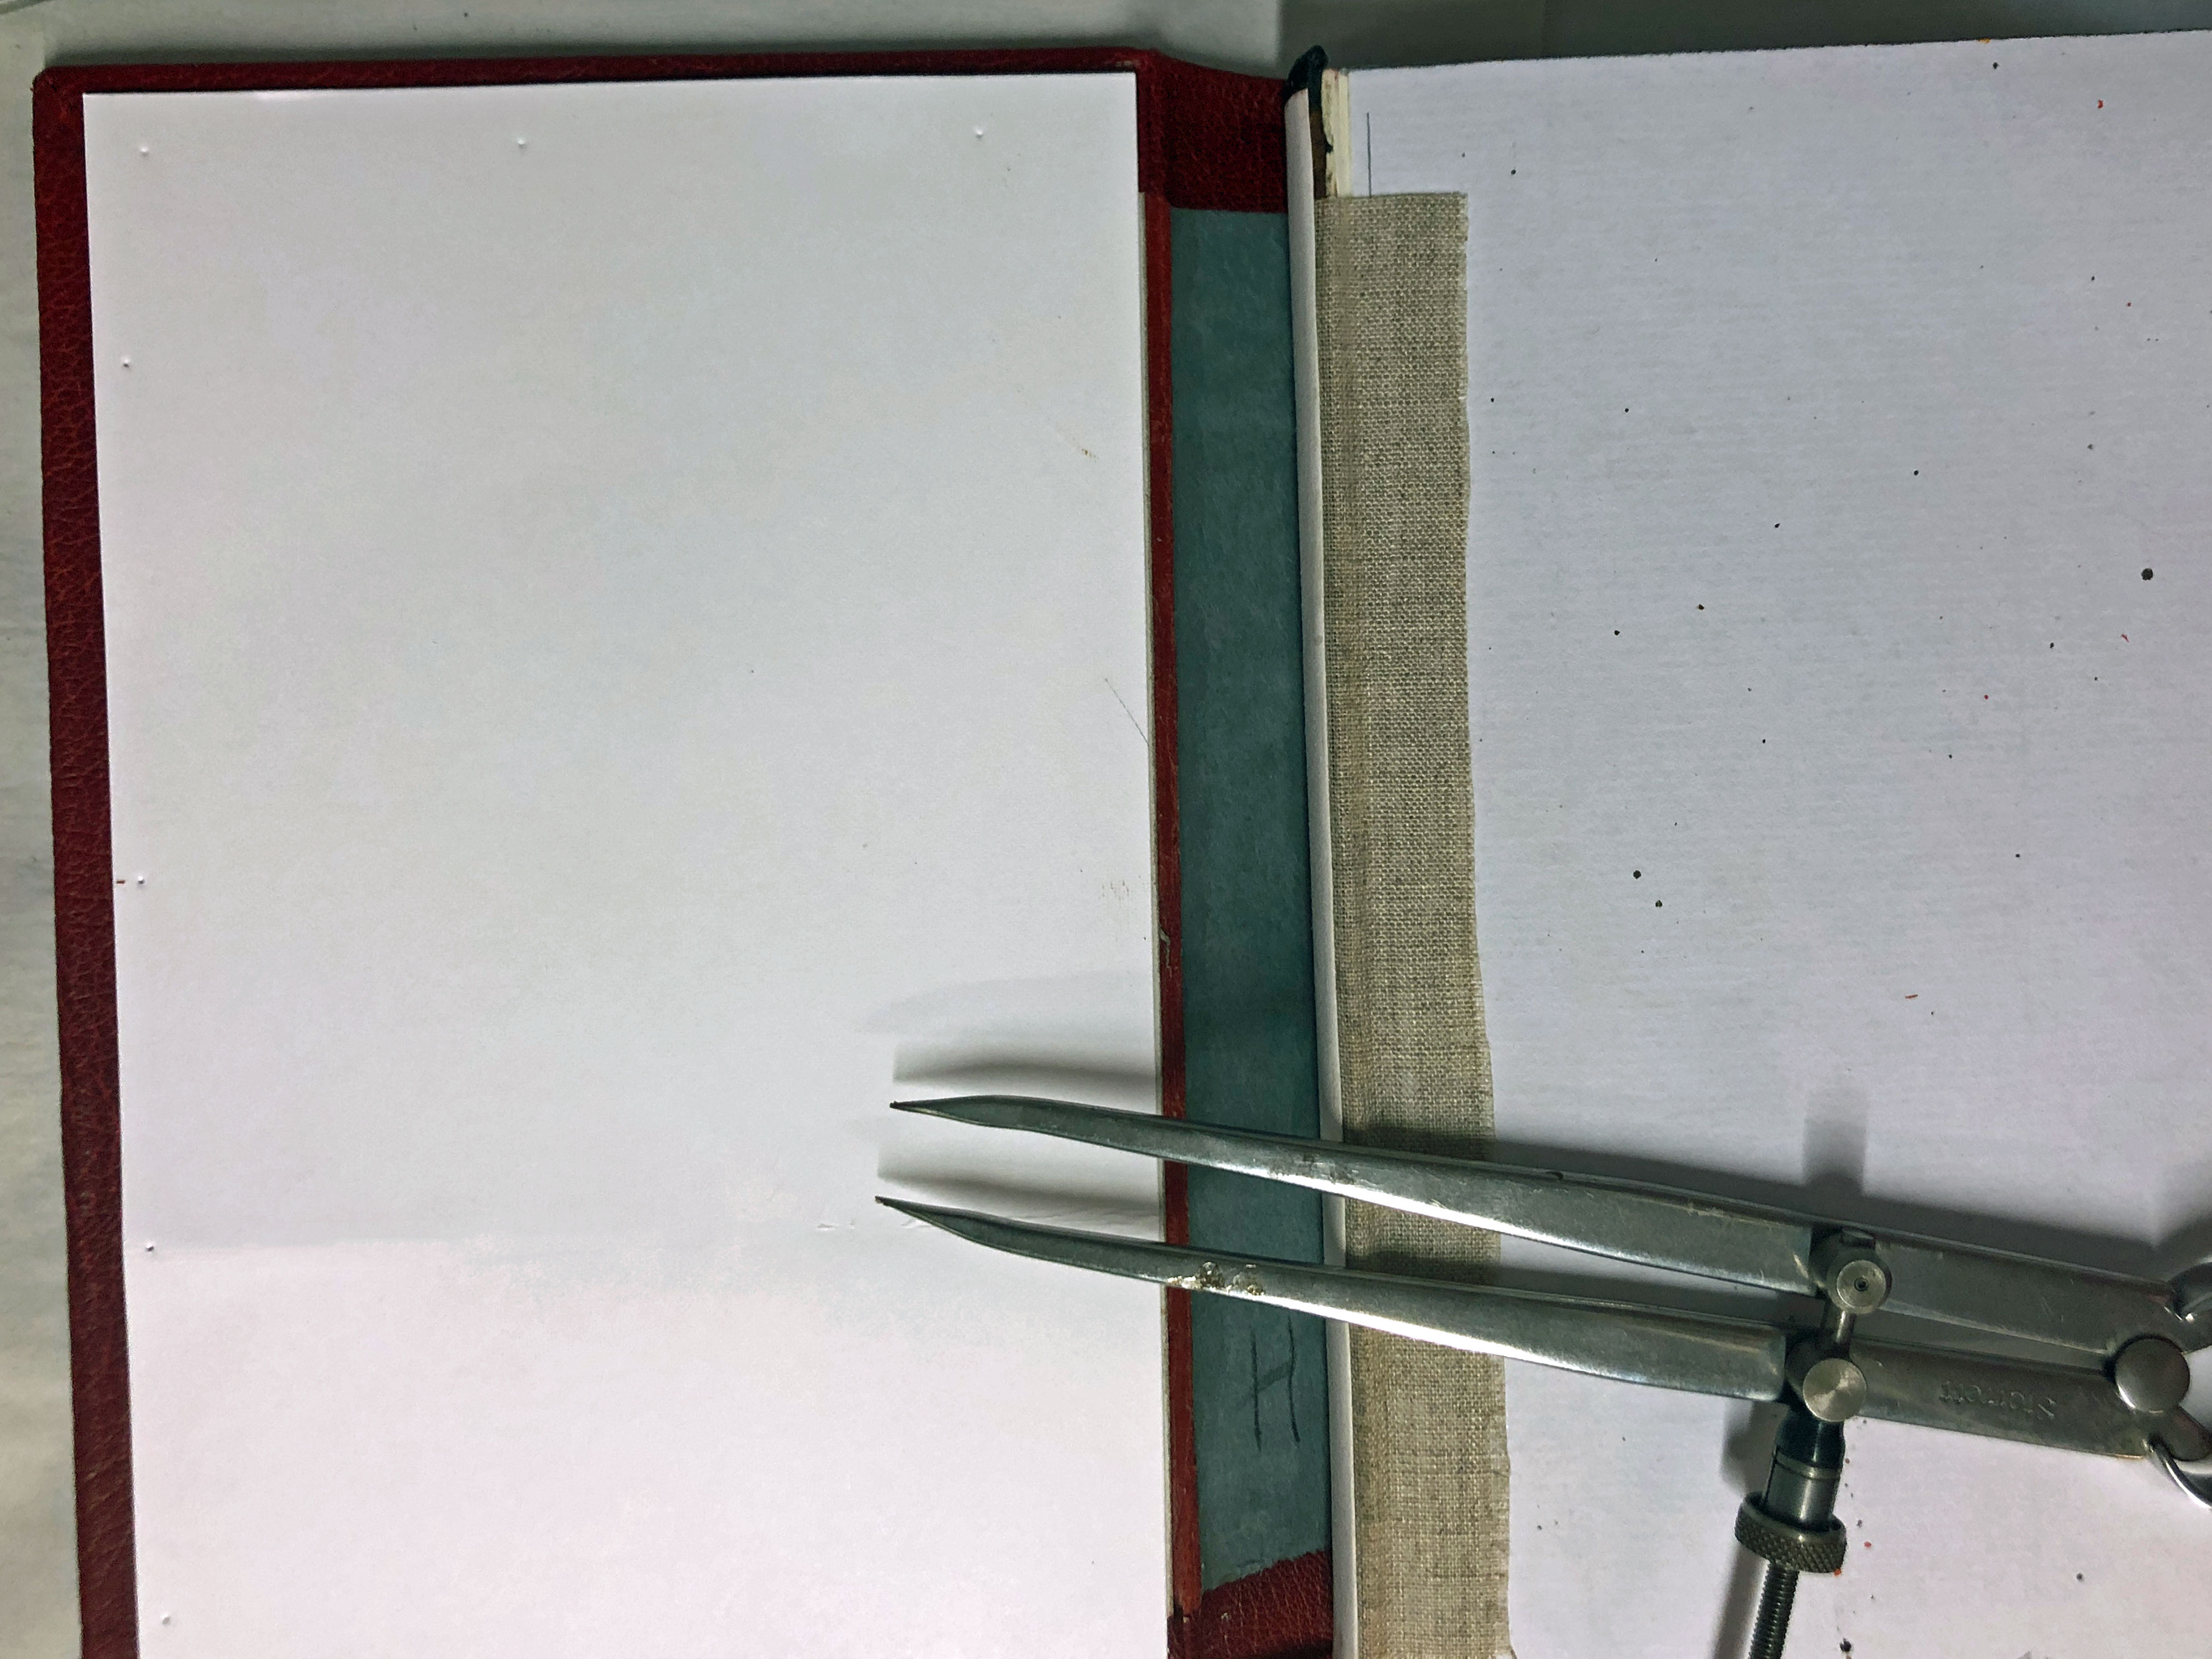
Once everything is dried, I attached the new cover to the book, gluing the spine to the hollow and attaching the linen strips to the inside covers. I trimmed them back close to the inside edges of the covers so they wouldn’t make a big lump under the pastedowns. Once that was all dry I pasted down the inside pastedowns, trimmed the new endsheets as needed, and finished the flexi-fold endsheets.
I thought a long time about decorating the cover, but none of my efforts were satisfactory. I had printed the spine text using genuine gold foil on the Kwik-Print before attaching the cover. Finally I made an inlay to look like the door at Bag End. I used a bone folder to create boards and wood grain on green leather, then set that into a piece of fair calf, then applied very thin bits of brown leather on top of that for the brickwork/stonework that surrounds the door. Colored the leather to bring out the “woodgrain” and to give the stones some shading, then inlaid that into the cover. Ask me if it’s nerve-wracking to cut a big hole in a perfectly good leather cover. OK, since you asked … it is.
Here’s the final book.

Detail of inlay.

View of top edge showing leather endband and colors spattered over a graphite base color.

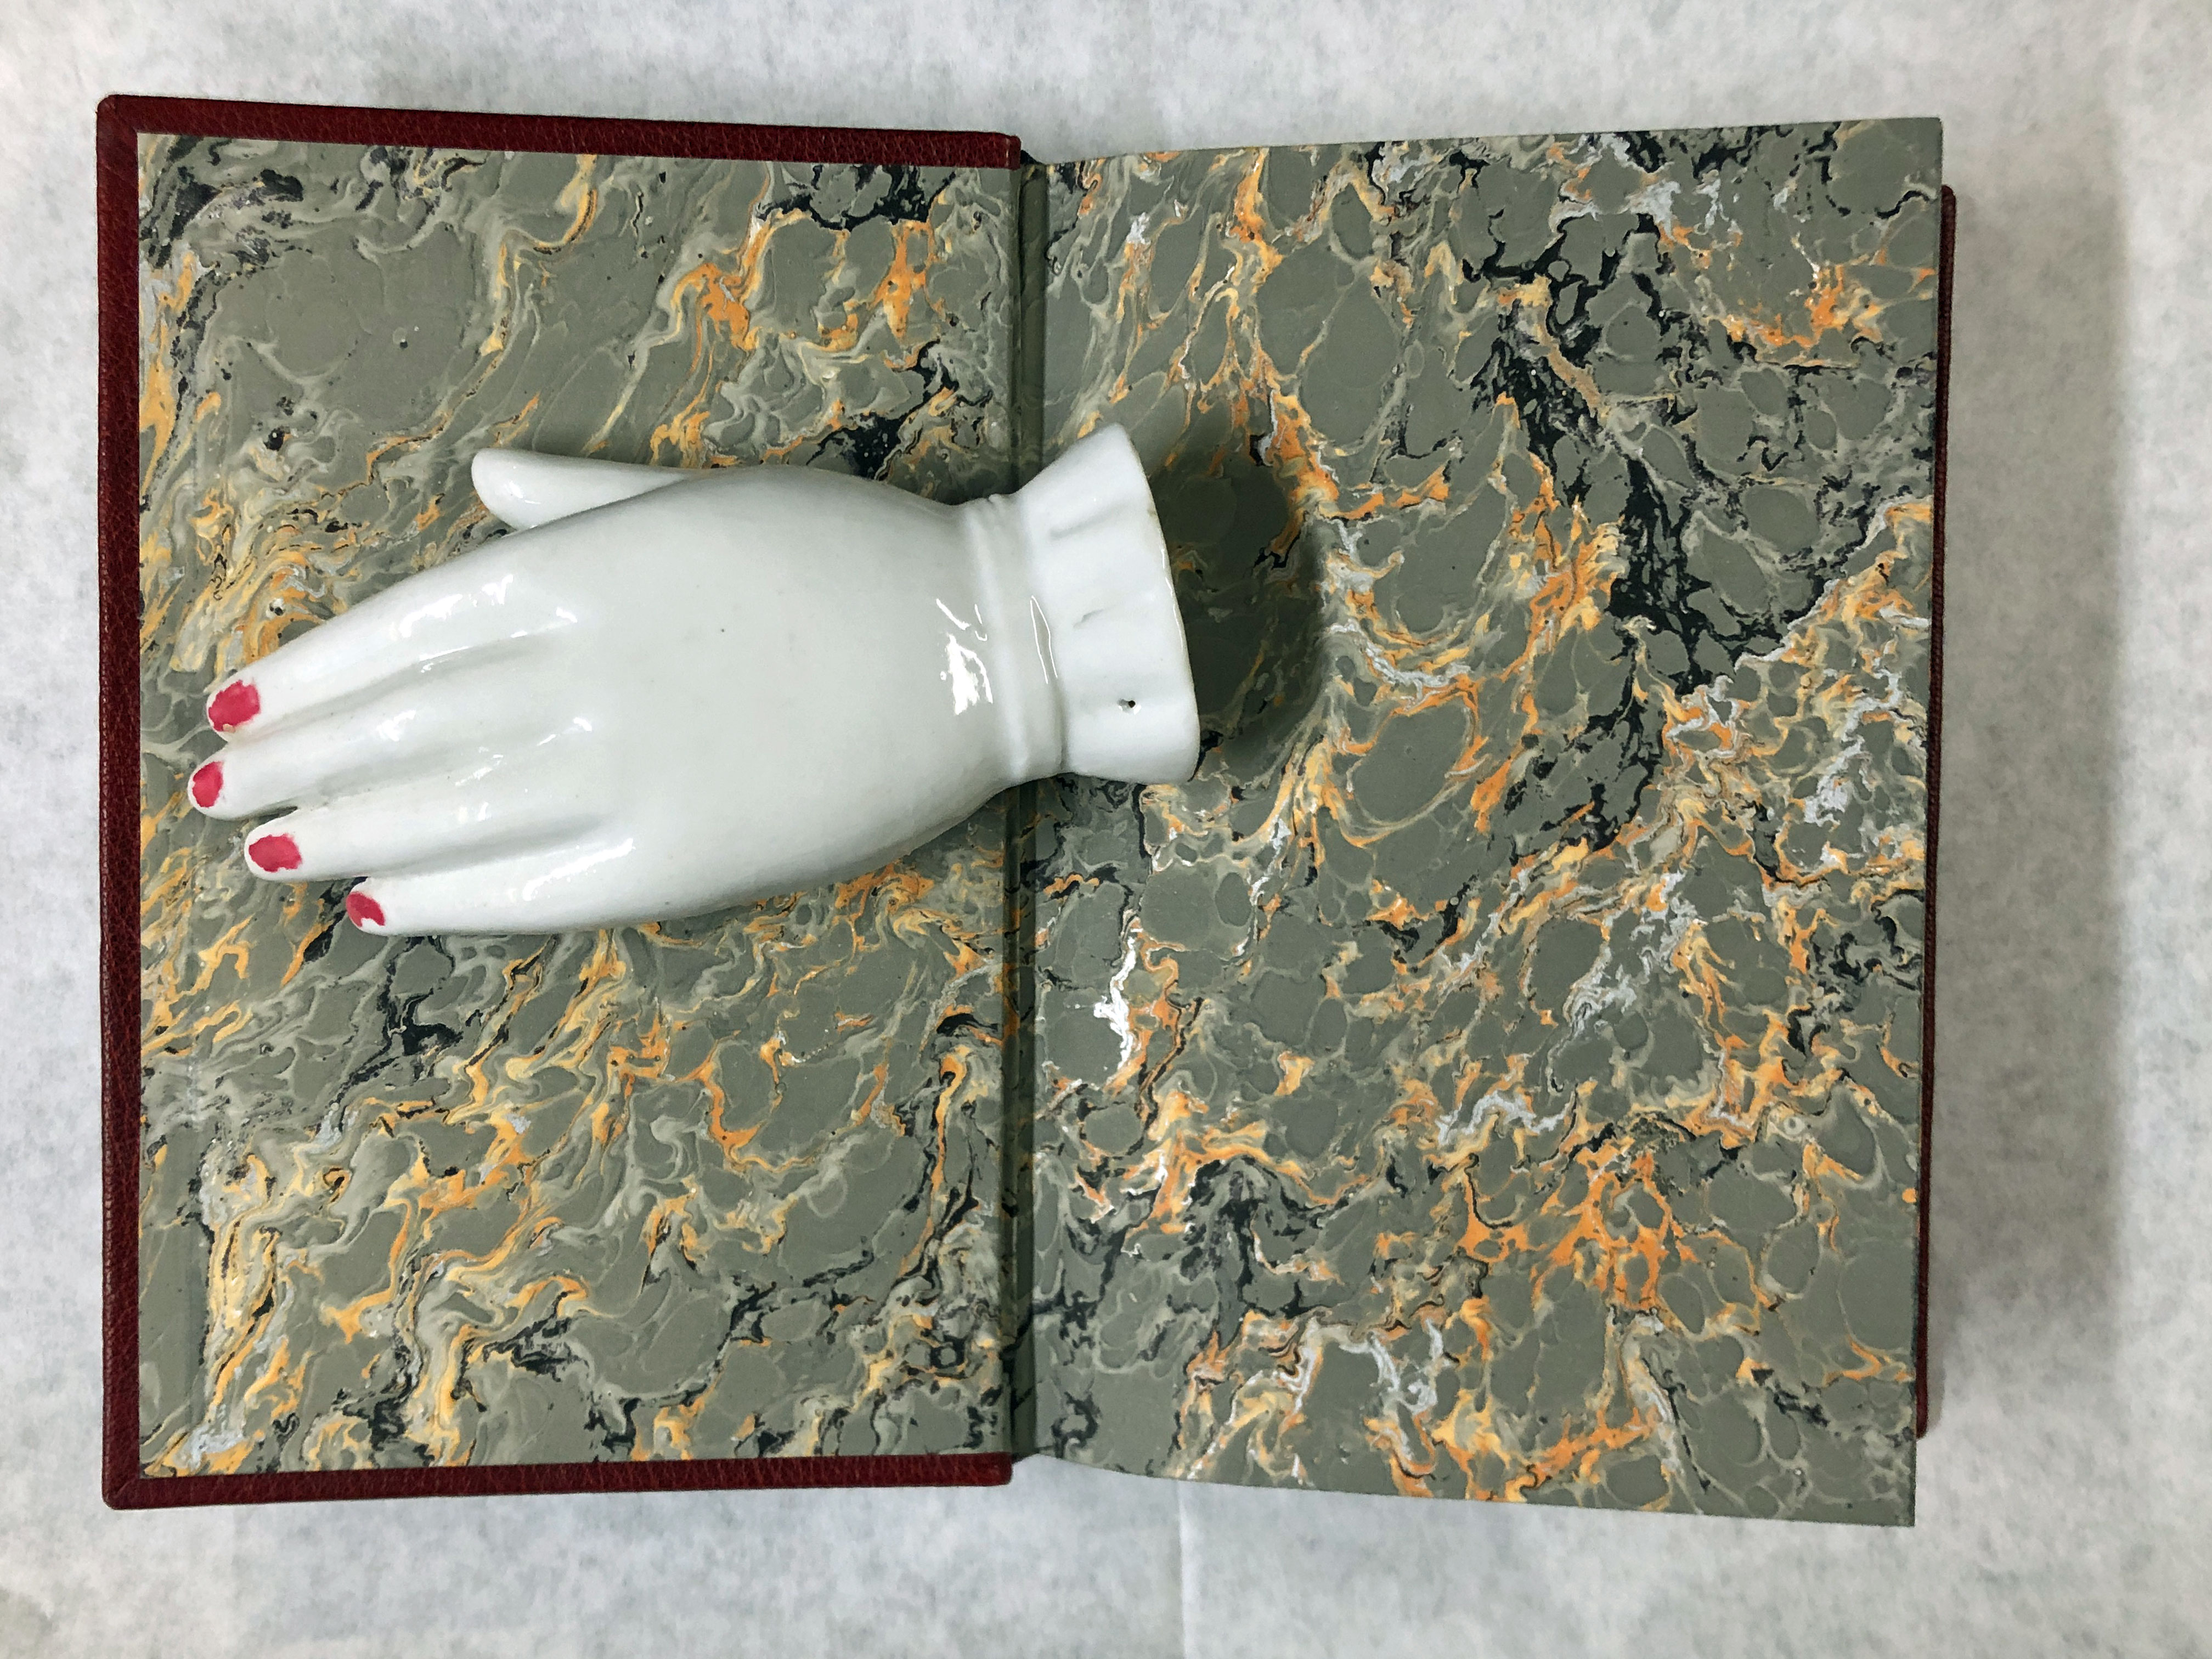
Here is the inside cover…
Small title page.

Title page.
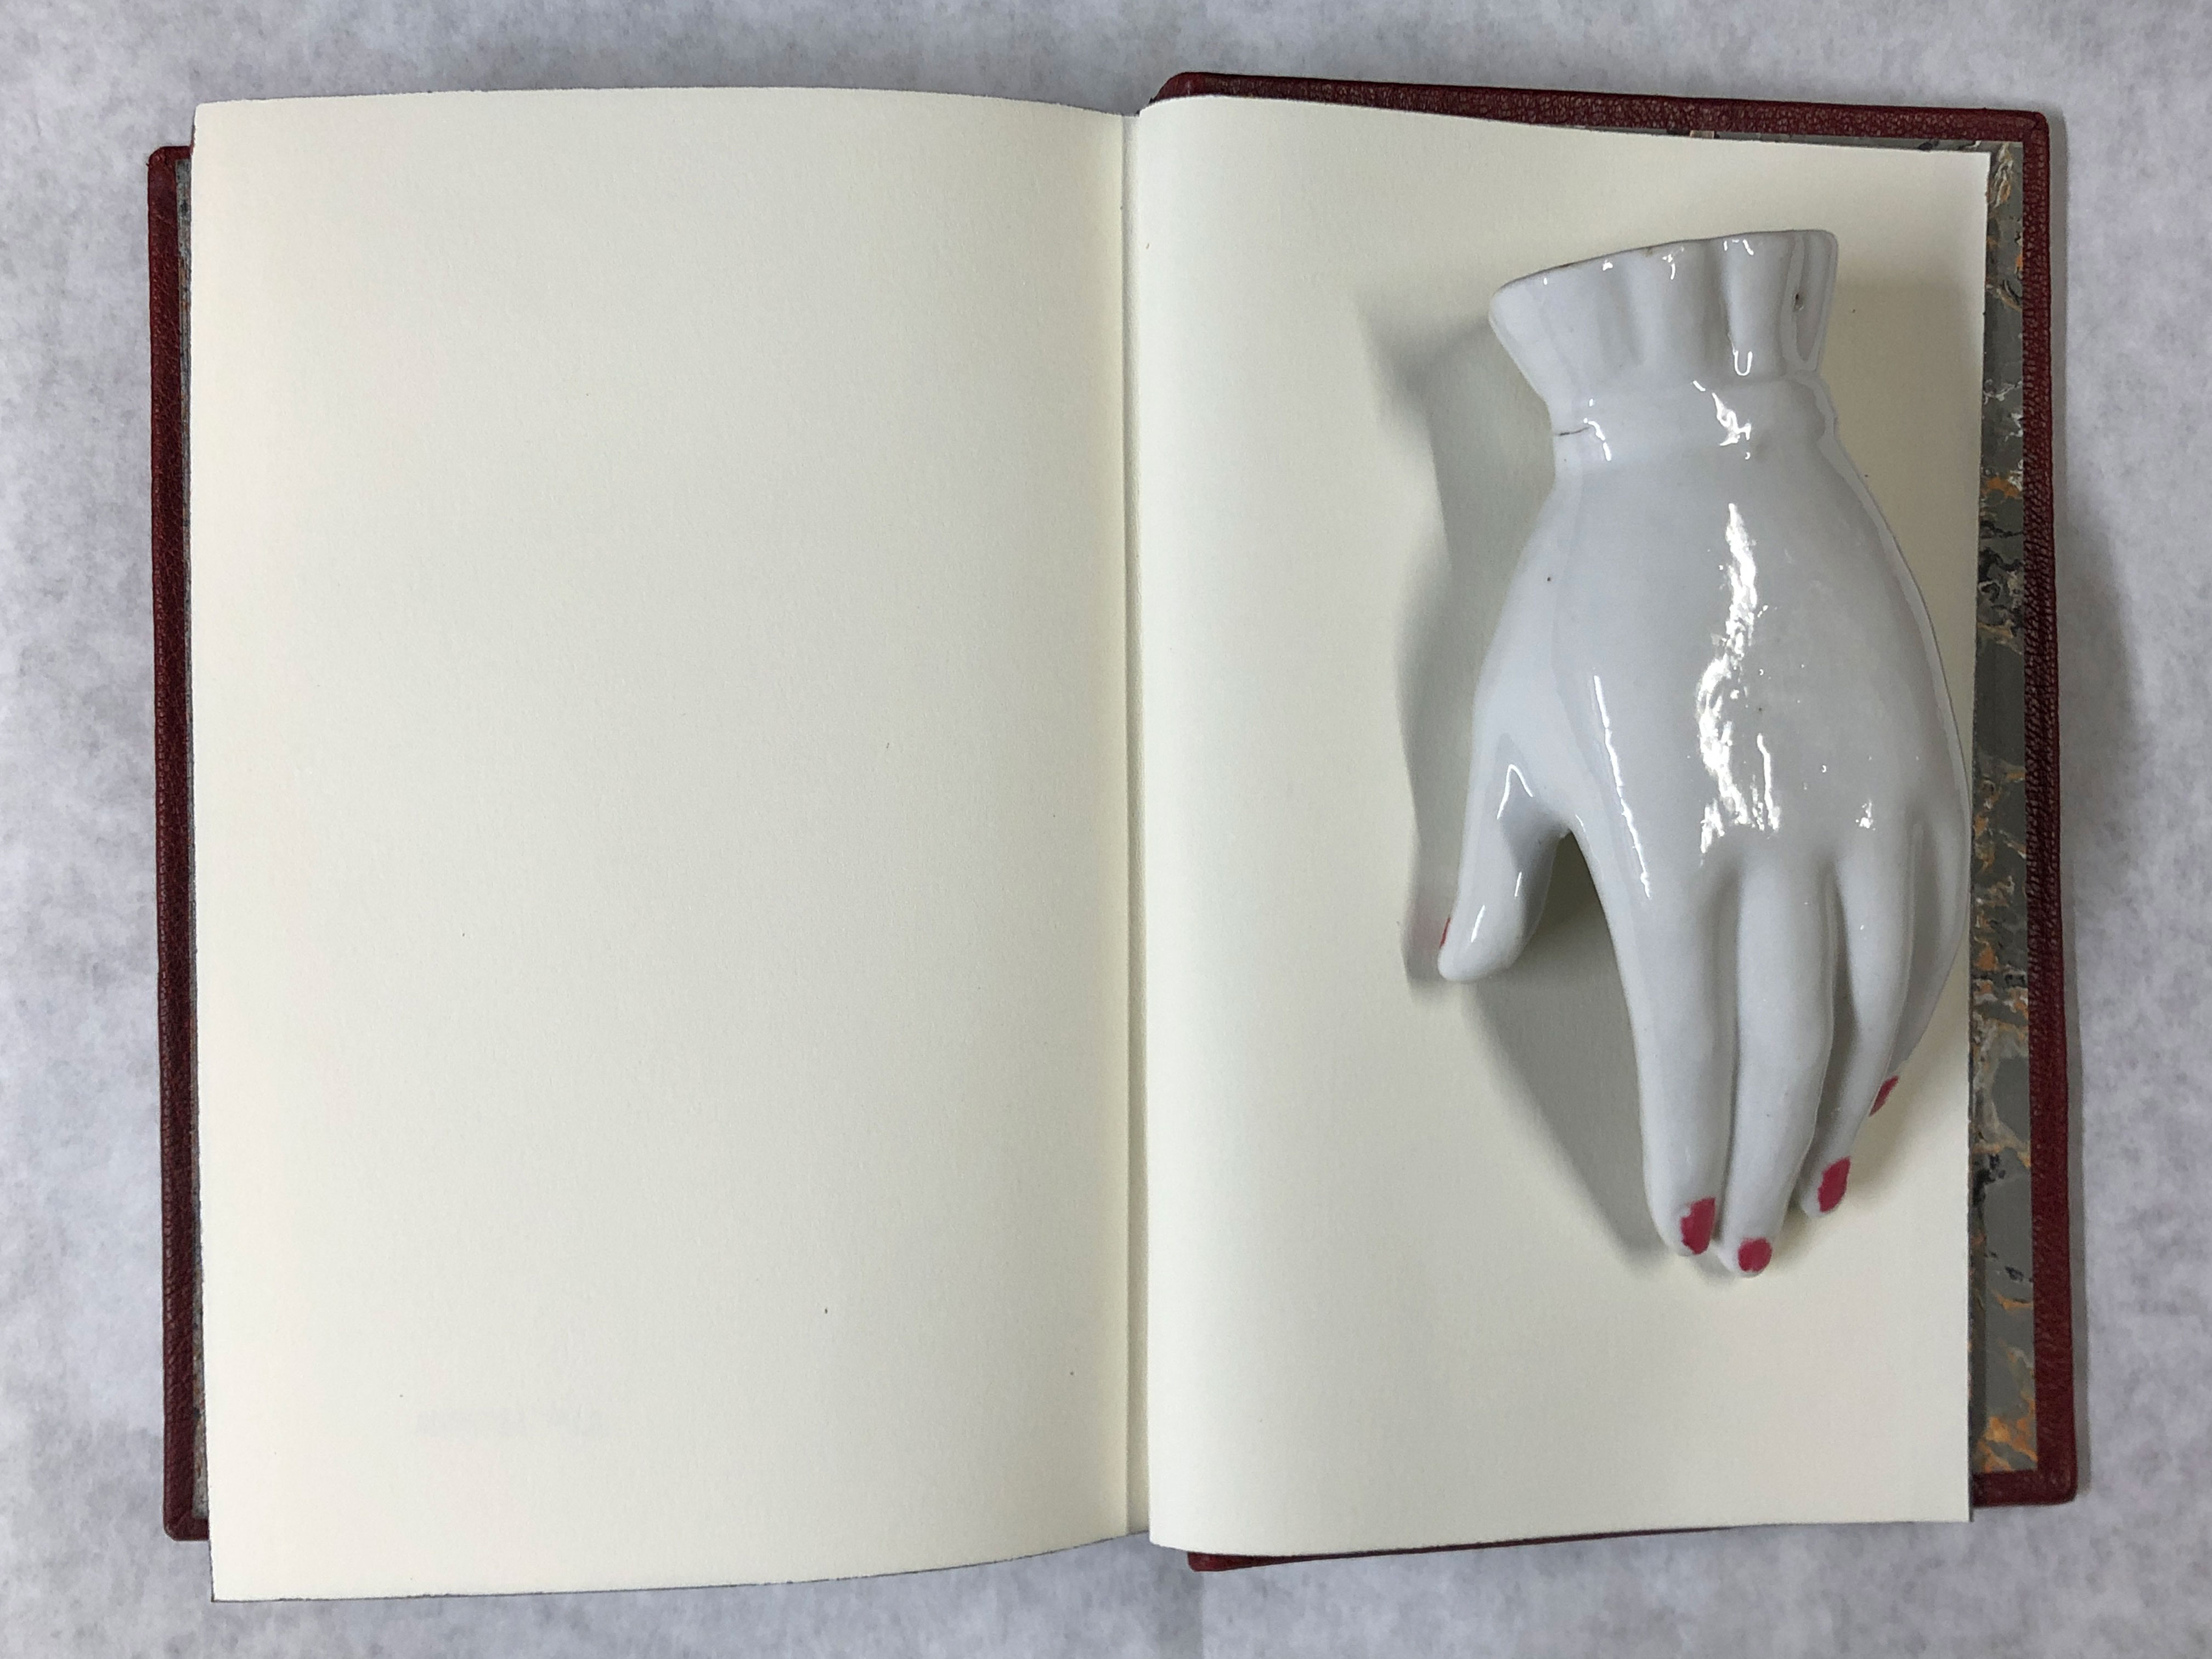
Back endsheet.
And outside back cover.
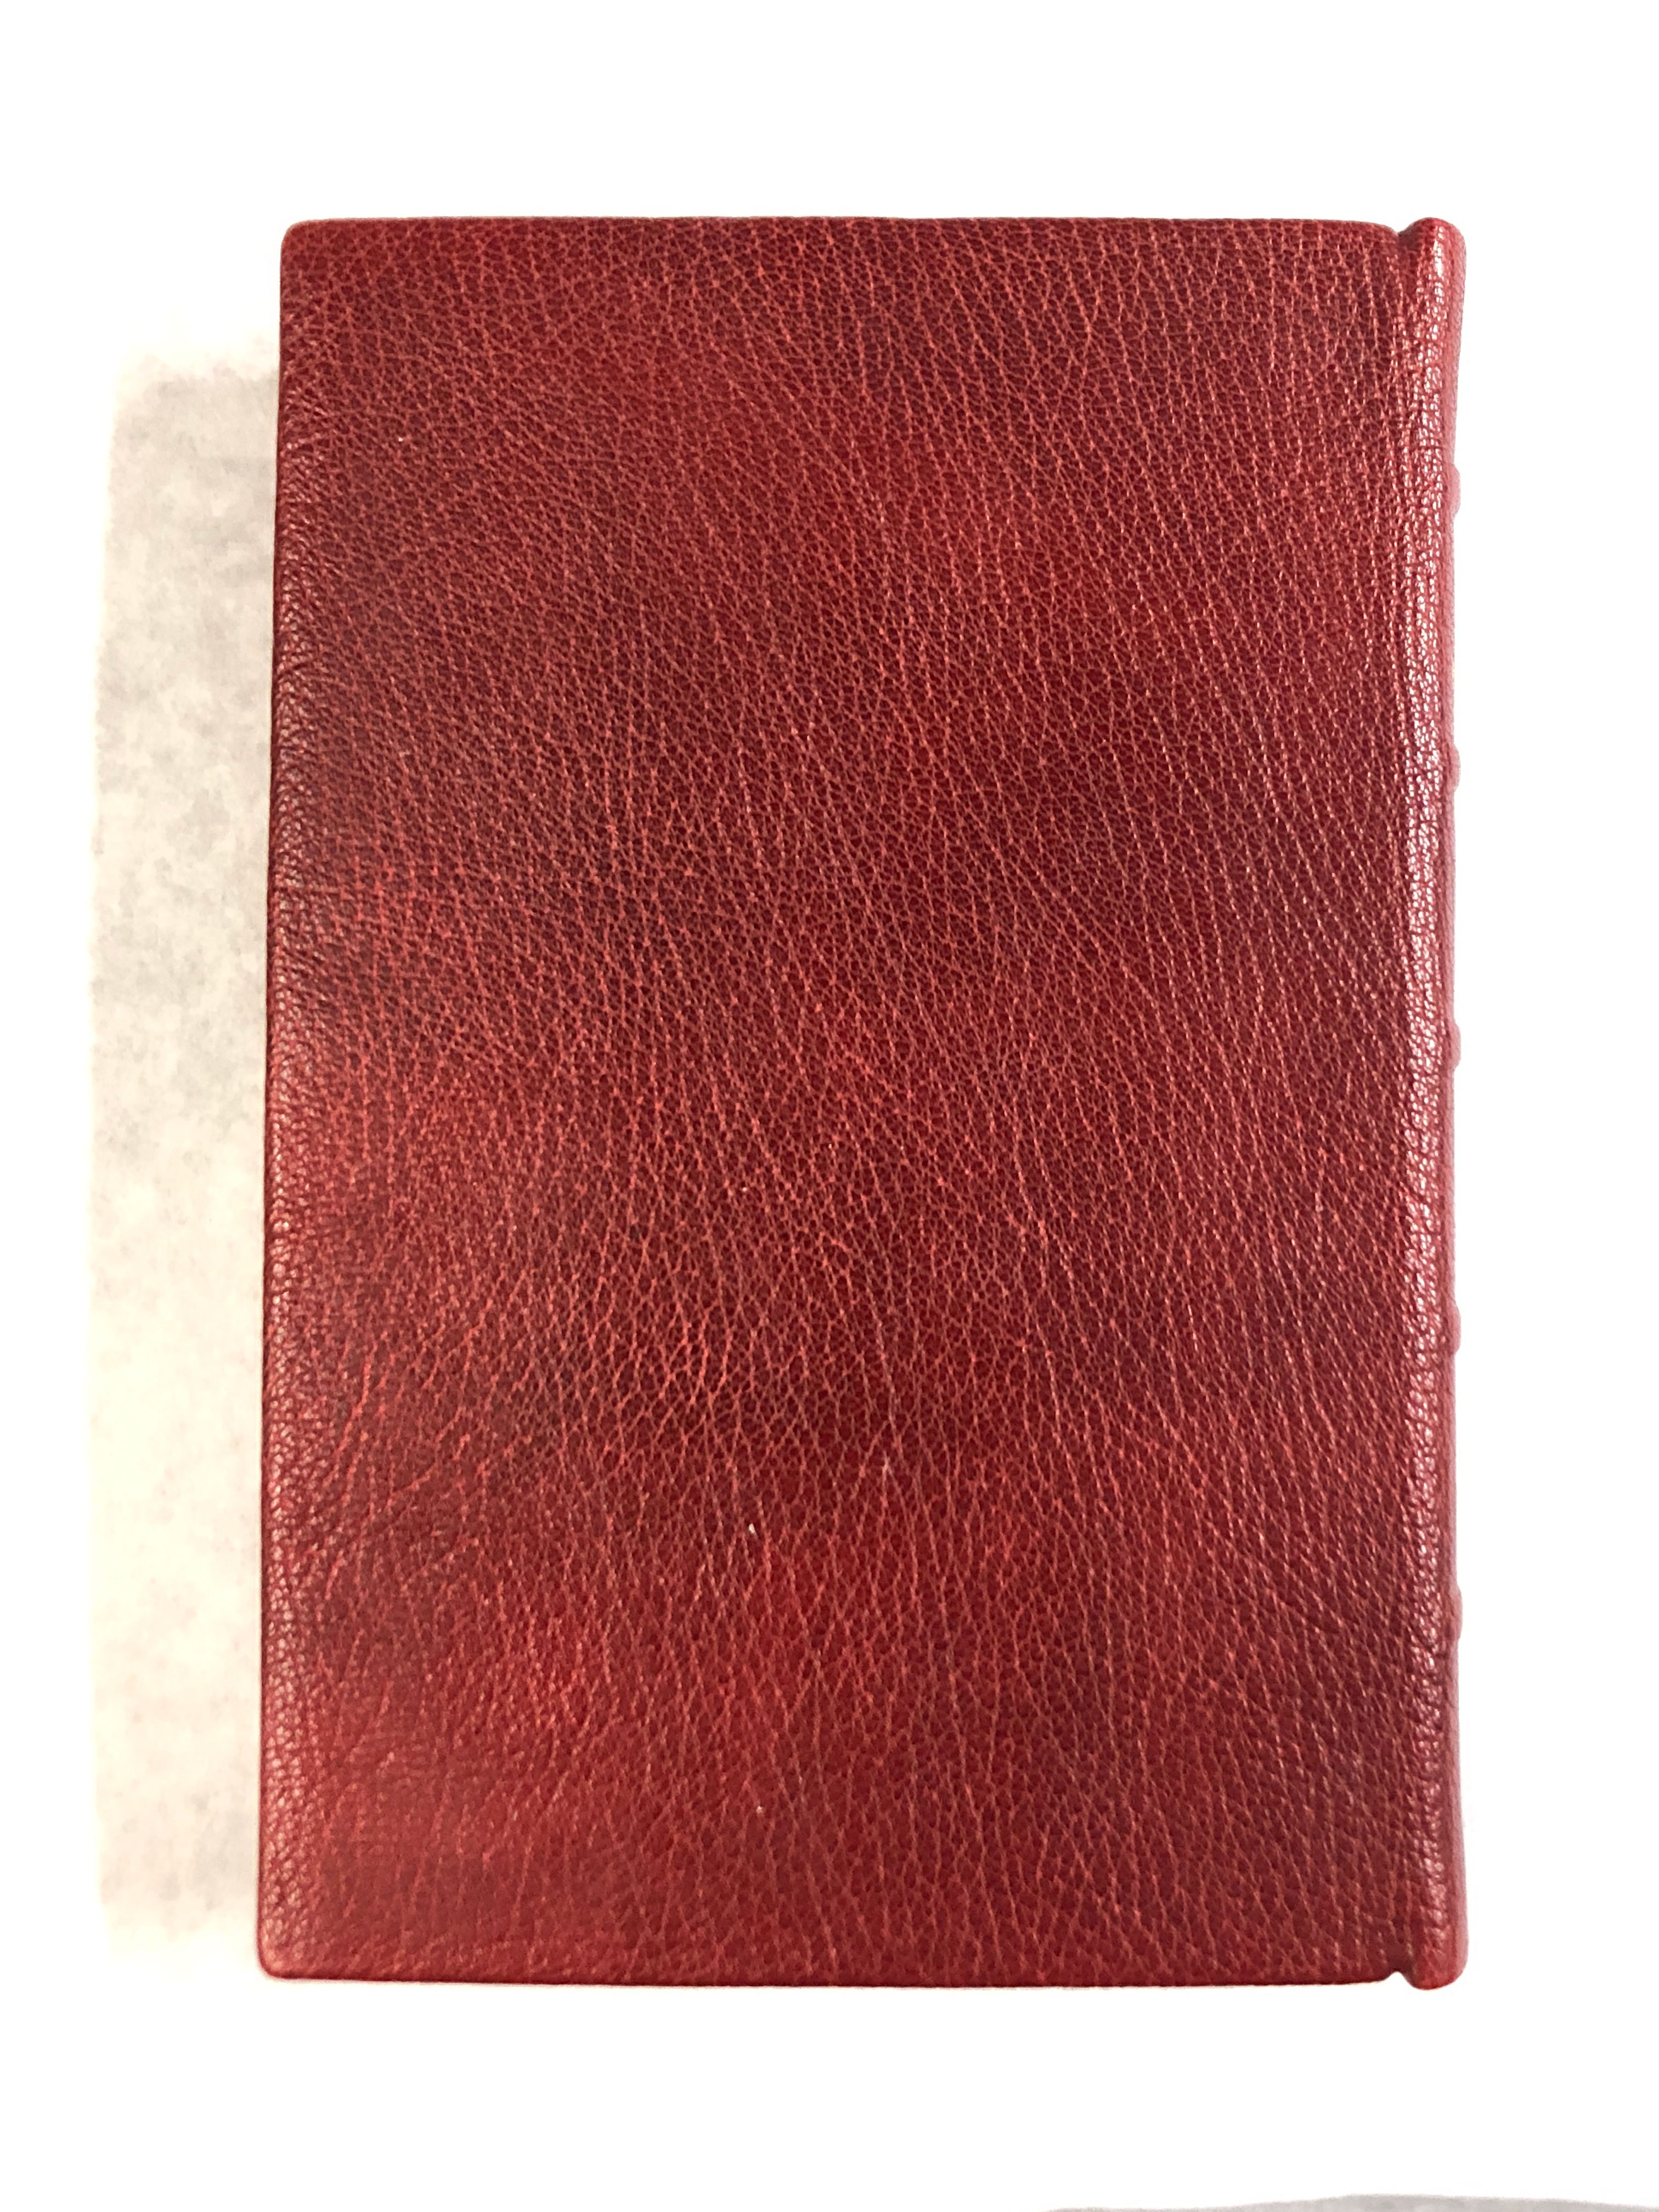
The leather’s not actually that mottled … I had shadows on the photo. I gave the book some final primping, trimming, protective leather treatment, and sent it off in the mail.
This was a fun project and just what I needed to get back into design binding. I wonder what will be next….

Keratol TEXTILEATHER
This little book from the 1950’s might be my favorite one of all. These are samples of “imitation leather” – cloth coated with resin and grained to imitate whatever. There are still a few types of this cloth available today, but nothing like this variety.
Keep reading to see the pictures.

Bookcloth: Interlaken Art Buckram
For those of you who just joined us, this is one of a series of posts about vintage bookcloth samples. Continue reading to see all of the pictures of bookcloth in this booklet.
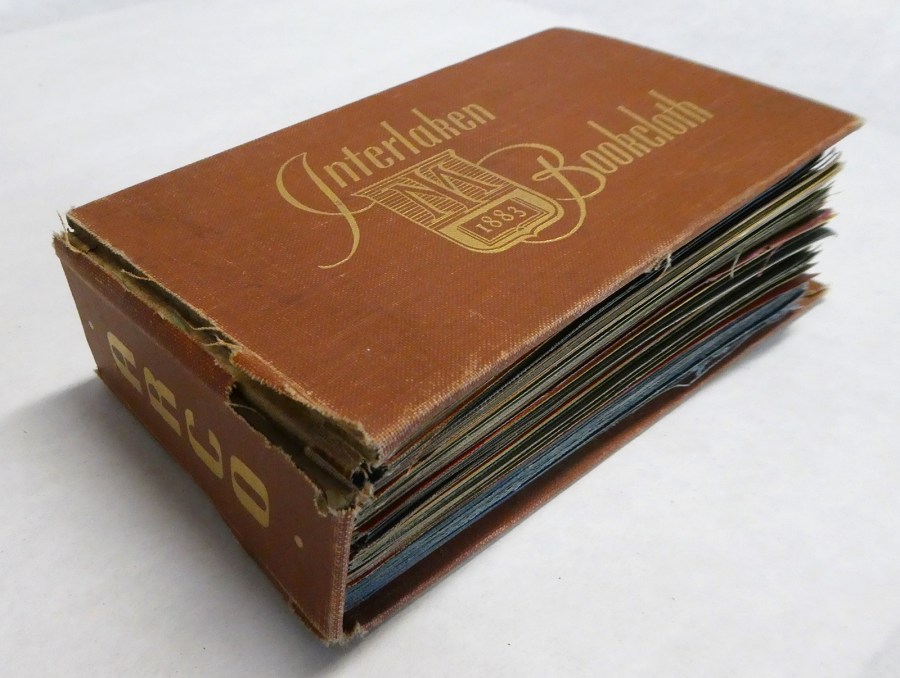
Bookcloth: Interlaken
They make no claims as to the vermin resistance or washability. The texture samples are very interesting – click any image to see/download at full resolution.
Continue reading to see all the images from this sample book.
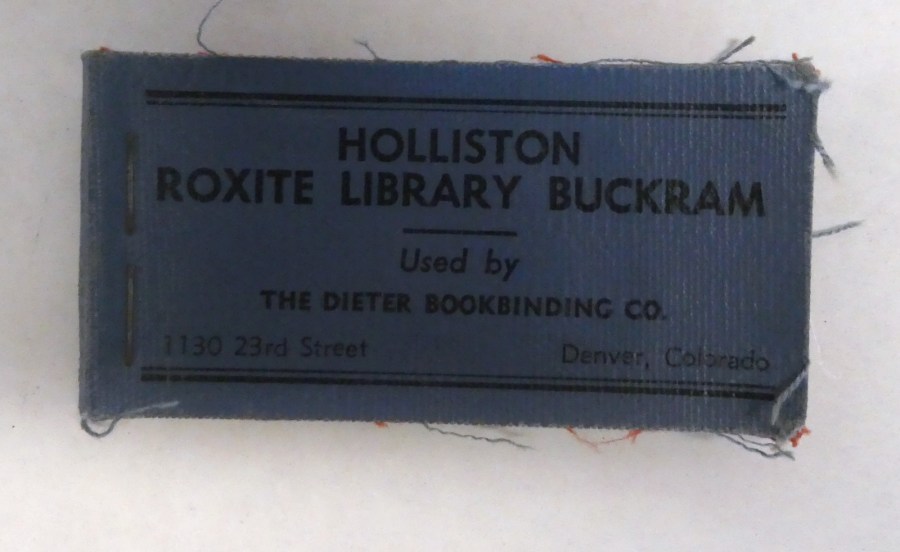
Holliston Roxite Library Buckram
“This outstanding binding fabric is washable and vermin proof”
In case you need to, you know, wash your books. Dry cleaning is so expensive.
Continue reading to see all the images …

Bookcloth Samples: Joanna Arrestox B
What, you aren’t completely bored of looking at old book cloth samples? You want more? You got more.
Joanna Western Mills in Kingsport, TN.
Arrestox B
It conforms to all ANSI standards for Group B! It is vermin-proof! It is moisture resistant! Don’t you wish you had some, right now?
Continue reading to see all the fantastic images of Arrestox B!
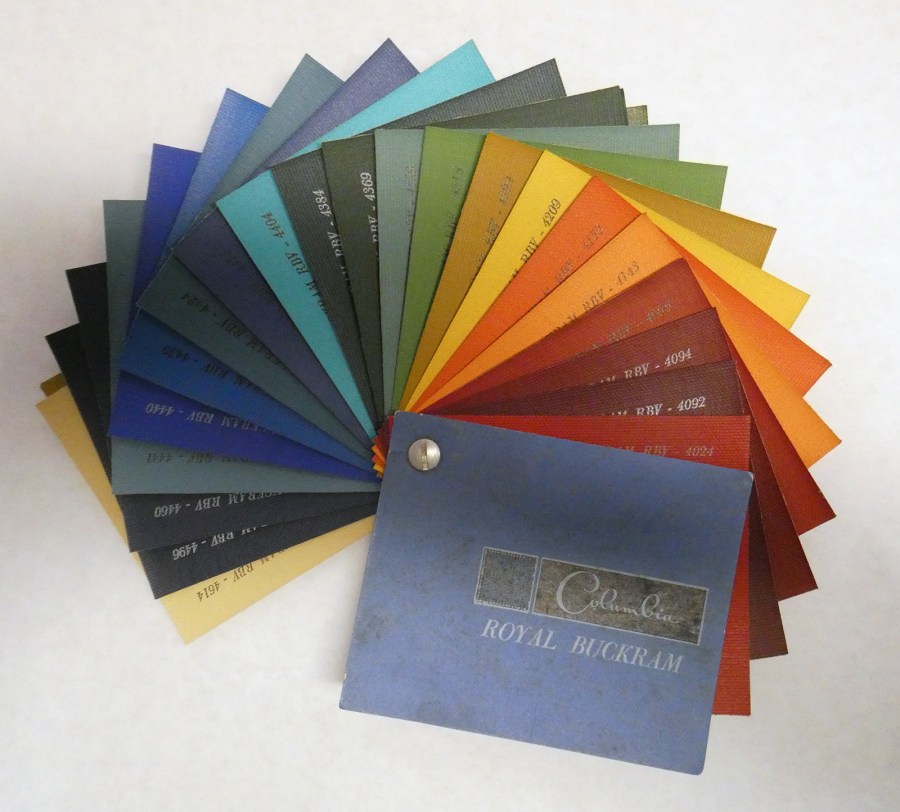
Bookcloth Sample Books: Columbia Royal Buckram
I acquired some vintage bookcloth samples a few years back. The person who sold them to me said they were useful as a source of fabric to repair old books, and I hope I didn’t look too horrified. Sure enough, there are some chunks missing out of some of the pieces, but the books still seem very full so I don’t think any pieces are completely gone.
I took photos of the cloths, because I thought you might enjoy looking at them. I photographed the book covers, the front sides of the fabrics showing identification marks, and sometimes the reverse side as well. I didn’t use a very professional setup – OK, I used a most unprofessional setup – the books are lying on two pieces of white kraft paper on a gray cutting mat. I corrected the color cast to get the background paper to look as neutral as I could, then adjusted the levels – mostly on the white side, except for the reverse of some dark samples to make the labels more legible. The pictures were then resized to about 8″ on the longest side at 200 dpi, and saved as jpg files at quality 10. If for some reason anybody needs a bigger or un-retouched photo, let me know. I figure this is good enough for entertainment purposes.
The first series is Columbia Royal Buckram, possibly from 1972
Continue reading to see all the great images of bookcloth you can’t get any more!
Continue reading “Bookcloth Sample Books: Columbia Royal Buckram”

Barnaby gets a spine
I wrapped the book in plastic, and glued the new spine liner with false raised bands (same dimensions as the original remnant) to the plastic. Many steps left undescribed.
Here the book with new hollow, layer of thick paper pasted on and then sanded down to even out the bumps caused by the new reinforcing linen cords. The book was wrapped in plastic, new spine liner and raised bands glued to plastic, new repair calf cut using pattern.
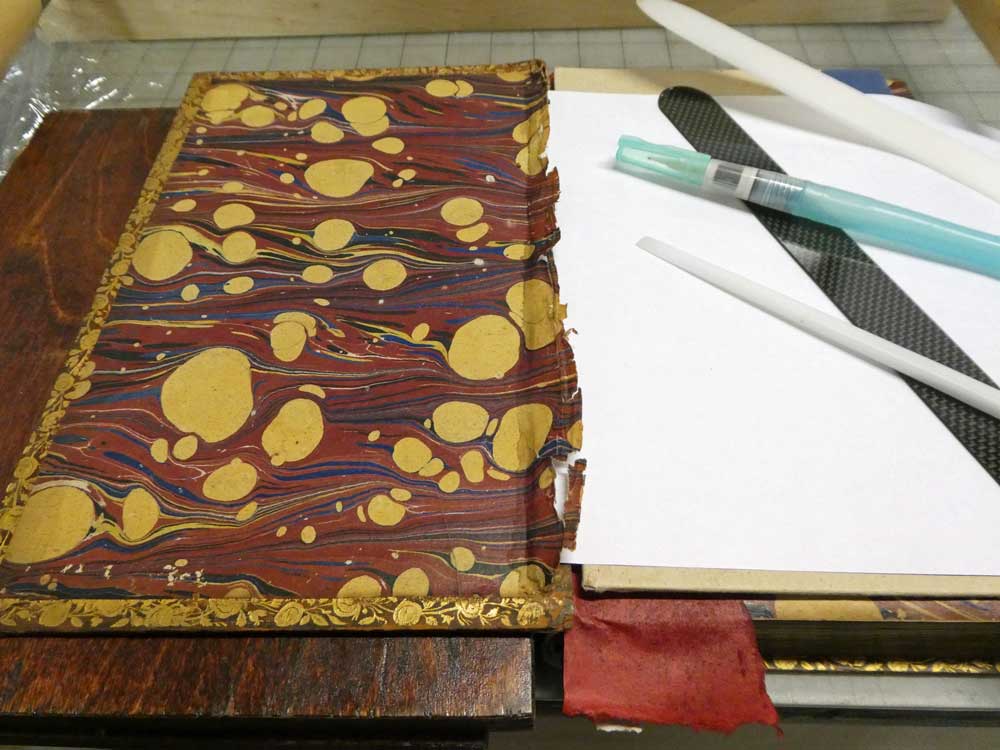
While the dyed leather was drying, I lifted some more of the pastedown, then flattened it out.
Lifted portion folded back over white paper, showing bare board. I put mylar in here before closing the cover, so the underside of the old paper wouldn’t stick to the fly leaf.
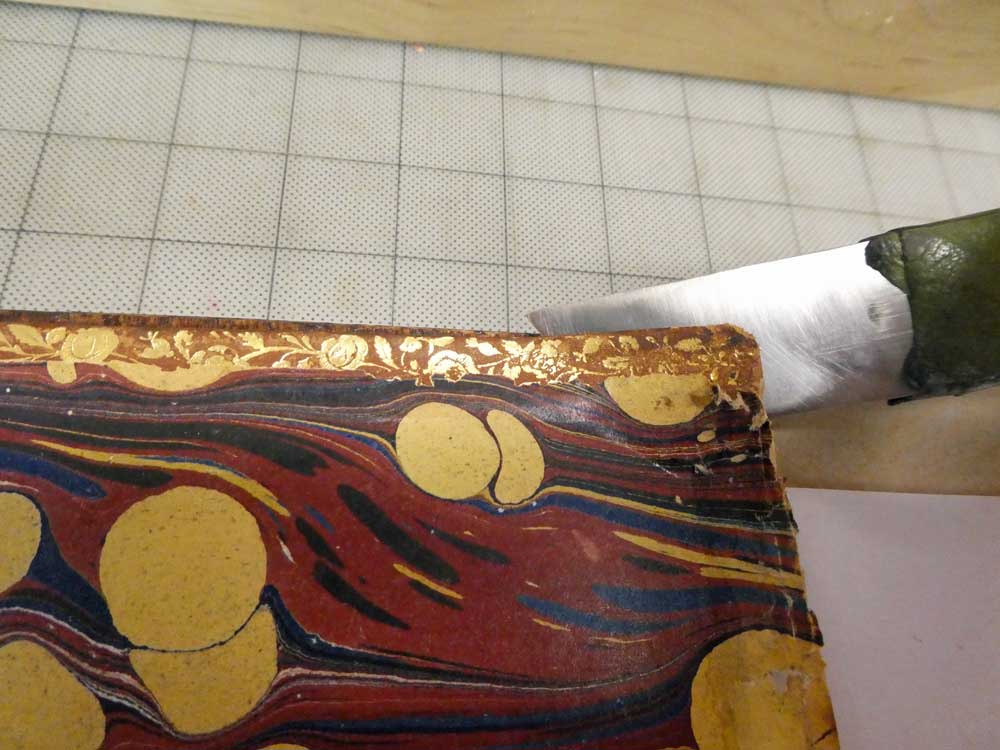
Using a sharp knife to cut through the old leather turn in at the edge of the board. When the new spine is put on, it will be pasted underneath this lifted piece, so that the old leather covers up the new. Don’t ask how nerve-wracking it is to cut into beautiful, dry, brittle, gold-tooled leather almost 180 years old. My blood is ice! I OWN this! Plus, the book gods were kind.
