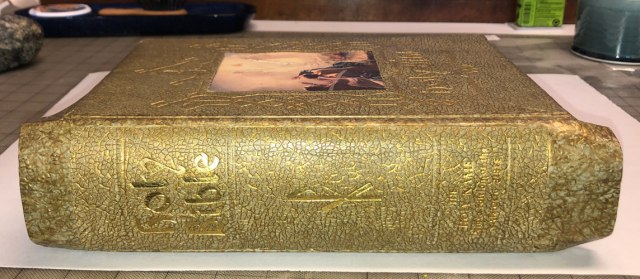

I say “impossible” because ordinarily no sane bookbinder would try to restore or repair one of these bibles. This particular bible edition was made with thick cardboard covers – these become brittle over time. The endcaps break off, the projecting cover edges (called “yapp” edges) break off, the padded covers come apart… and usually the small pieces get lost.
I couldn’t just glue the broken bits back on…it might hold for a few seconds, but as soon as any stress is put on the paper the pieces would come apart. I could have put paper or cloth over the break to hold the pieces together, but that’s unsightly and also liable to tear. Most binders would rebind this type of bible by remove the covers, trimming off the wide margins, making a new cover, then glueing the trimmed pieces back on. Most SANE binders.
But I took this as a personal challenge. The wide yapp edges, the three dimensional textured cover…those were probably why the original owner chose the bible in the first place. The bible has been passed down in the family. I thought about this. The current owner probably remembers the bible the way it was when it was new … maybe the family read from it, or kept it in a place of honor. The current owner didn’t keep it safe it all these years because it was a fancy bible. They kept it because it was their FAMILY bible. I wanted them to be able to look at it and see that original old bible, with all the warm memories associated with it – not look at it and think, “It’s not the same any more.”
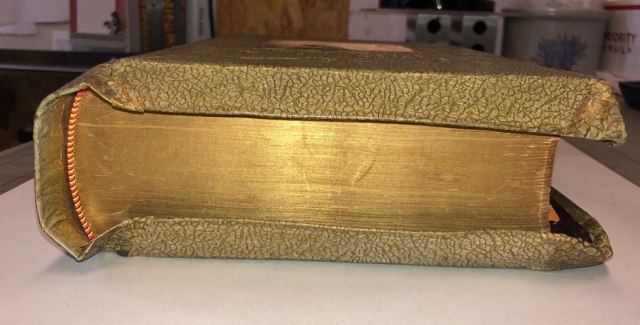
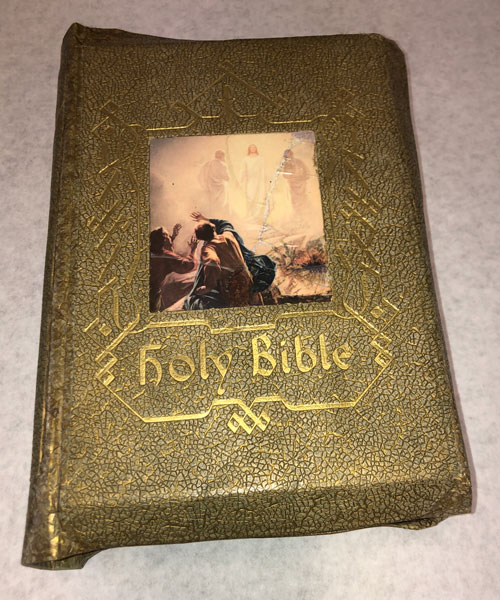
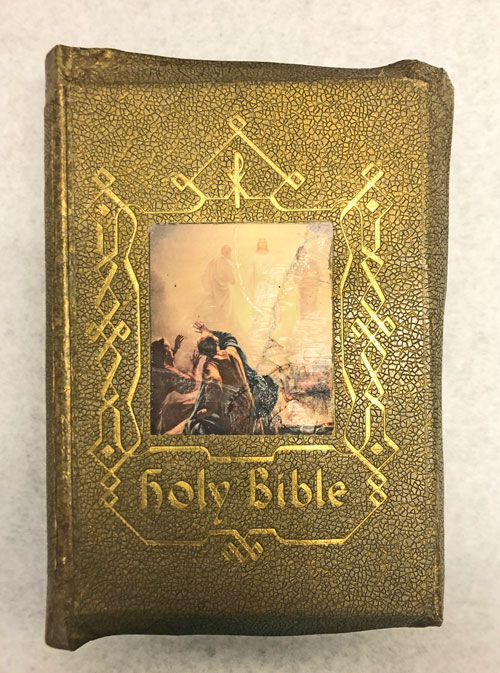
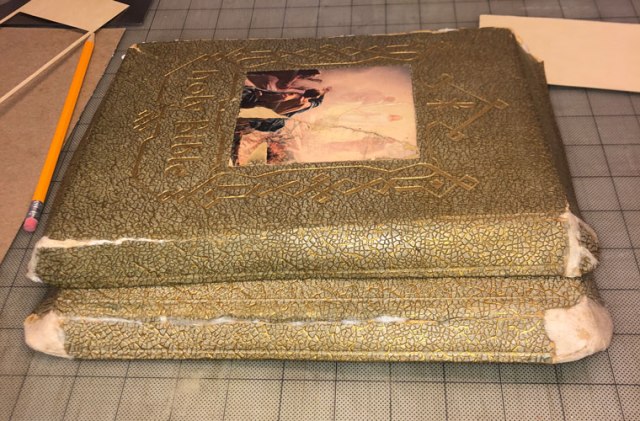
You can see from the initial before/after images that the process went better than I expected. In fact the before and after pictures don’t look radically different. This is what a good restoration is supposed to look like – the repair work is very quiet, and all you see is the book. It’s not easy to do! If you would like to see the “during” photos, keep reading. Click on any image to see a larger view.

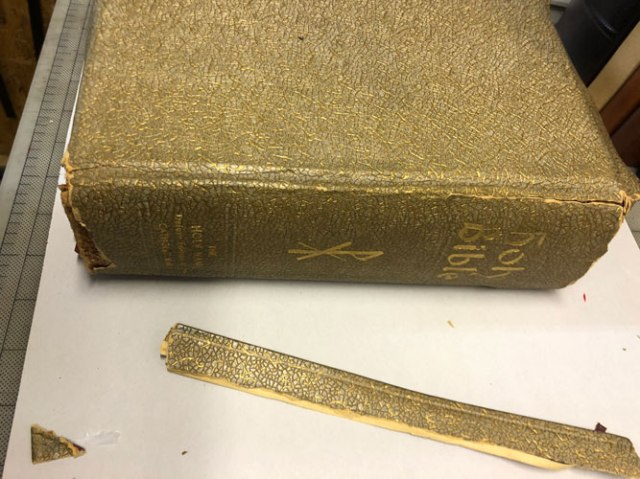


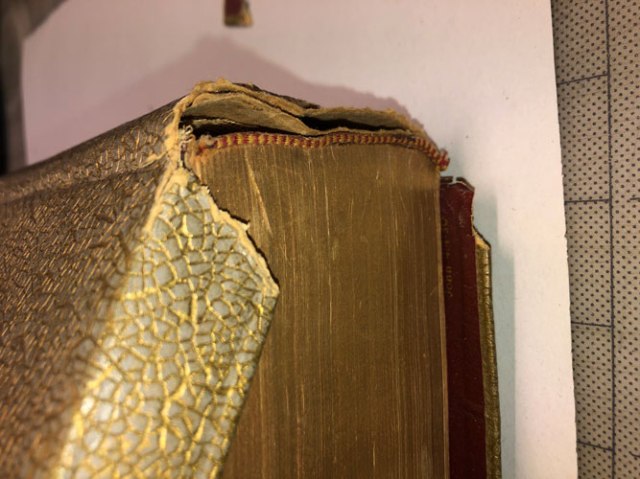

Here’s where we start: the front cover is fully broken at the spine, and the back cover is beginning to separate. The projecting “yapp” edge of the rear cover has broken off, and the front edge is halfway broken from the cover. Both endcaps are missing. I had to carefully remove the entire cover, in pieces, before I could begin the repairs to the pages inside.


Details of the cover construction: There were several layers of tissue paper between the cover cardboard and the printed fabric pastedown. All that held the pastedown to the cover was the fabric around the edge. The cloth pastedown was dry-rotted and torn, so I cut it away from the cover. The endpapers were actually all that was holding the front cover on to the bible. The front cover had the first few pages of bible attached to it, all separated from the main part.


The spine had lost its nice curve and the cloth endbands were torn and dirty. Above at right, the removed endbands on top of the front section. Notice the row of stitching along the spine edge? This first section was sewn separately, stabbed through the side, and then that section attached to the main block of text. It was not well attached.


I re-sewed the first few signatures back in place more firmly, sewing through the new cloth, because the existing thread was loose and partially broken. I cleaned the old glue from the spine, reshaped the spine to a nice curve, then re-glued it. The spine was lined with cloth, new replica endbands were attached, and the spine was lined with several layers of paper.
The sins of construction were many. The first inside pages were glued together along the spine, making a very stiff edge that didn’t turn easily to show the title page. The “stab” sewn section made the pages want to come away from the rest of the book in a bunch. The cloth had dry-rotted with age. I fixed the problems as much as I could – I reattached the front section to the title section so it would open nicely, but I couldn’t remove the old glue between the pages. That only comes off with soaking, and soaking would have destroyed the fabric endsheets. There were scads of small paper repairs, guarded joints, new hollow spine, little details that binders know all too well so I don’t need to go into them all here.

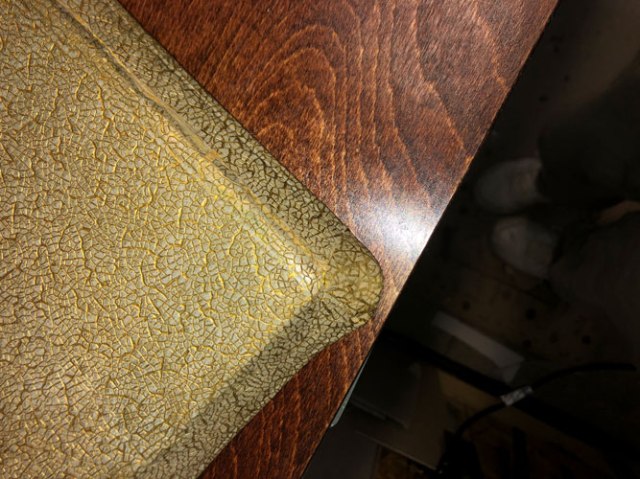
I trimmed the rough edges of the covers and spine, and made a cut-out from thin board to allow me to recess the old spine into the new cover. I pasted several layers of new paper inside the old covers front and back, sort of like making plywood. I alternated the paper’s grain direction between layers to counteract any future tendency to warp. I attached some stiff, thin board paper to provide scaffolding for the rebuilt corners. The new layers of paper made the cover much stronger and held the yapp edges firmly in place.


I happened to have piece of textured paper in a three-dimensional broken egg shell pattern. I colored it to match the existing cover color. I colored the lines between the raised paper by hand with a tiny paintbrush.
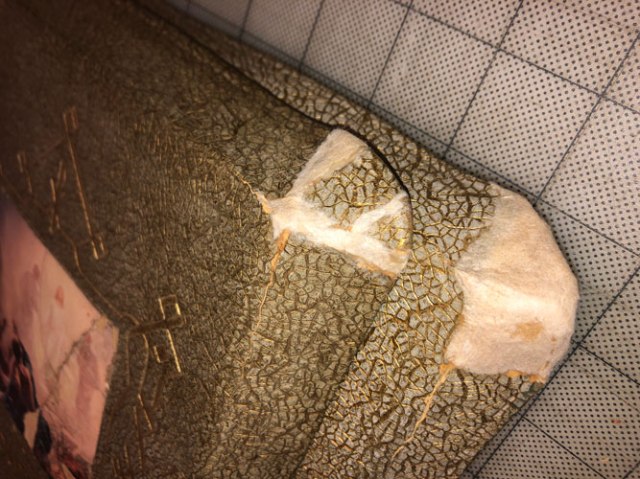
I rebuilt the missing corner pieces on top of the paper scaffolding using special material invented in my bindery – a kind of cross between paper and fiberglass. It is very sturdy, strong, hard, and adheres well to the old cardboard cover. I used it to fill in the gaps where the edge pieces had been reattached. Then I covered the repair with the paper I’d just painted. It blended fairly well.
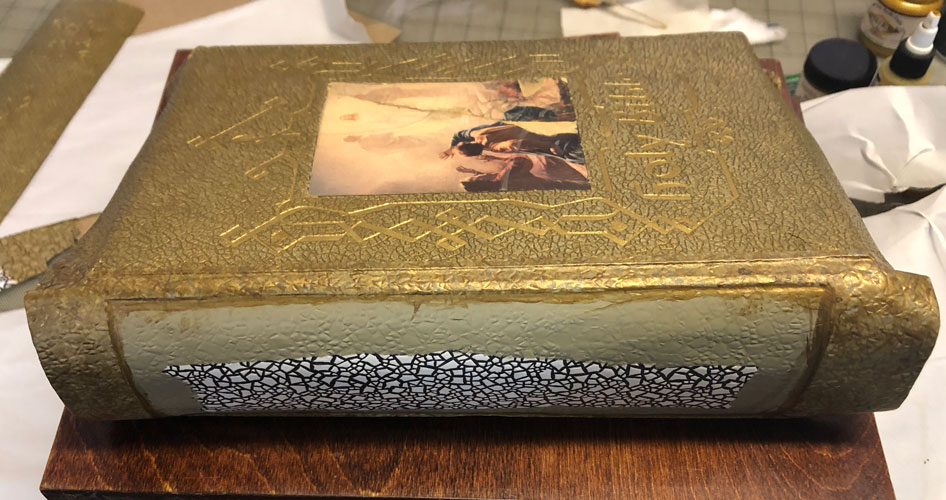
I used strong, thin fabric to create a lining/base for the existing covers. I made a new paper spine ling with endcaps, and attached the cut-out recess to it. I attached the cloth to the inside of the pieces, then use the hand-colored “egg shell” paper to cover the paper lining and the cut edges of the old covers on the outside, turning it in at the top and bottom to cover the inside of the newly formed endcaps. I didn’t paint the whole recess since it would be hidden under the original spine. I decided my original method of painting in the recesses of the paper was too clunky looking, so I painted several more layers of veining and colors onto the repair paper. Then I glued the salvaged spine into the recess on the cover.
I adhered the cover back onto the bible. I touched up the color of the inside of the cover. I glued the printed endsheets back down to the insides of the covers front and back. I lined the edges of the inside covers, where the old fabric had rotted, with handmade Japanese tissue. I salvaged the old cloth edges with the printed captions and attached them on top of this tissue.
Once I was happy with the structural repairs, I primped and fussed and adjusted the colors and generally tried to get the repair as perfect as I could. I noticed that the small printed image on the front cover had a protective plastic layer that was delaminating and that some of the image was missing. I painted in the missing parts of the image, and put a layer of protective acrylic over all.


All in all, the restoration of this bible took over 20 hours. For this reason alone, most SANE bookbinders don’t undertake this type of restoration. I am well satisfied with how it came out.