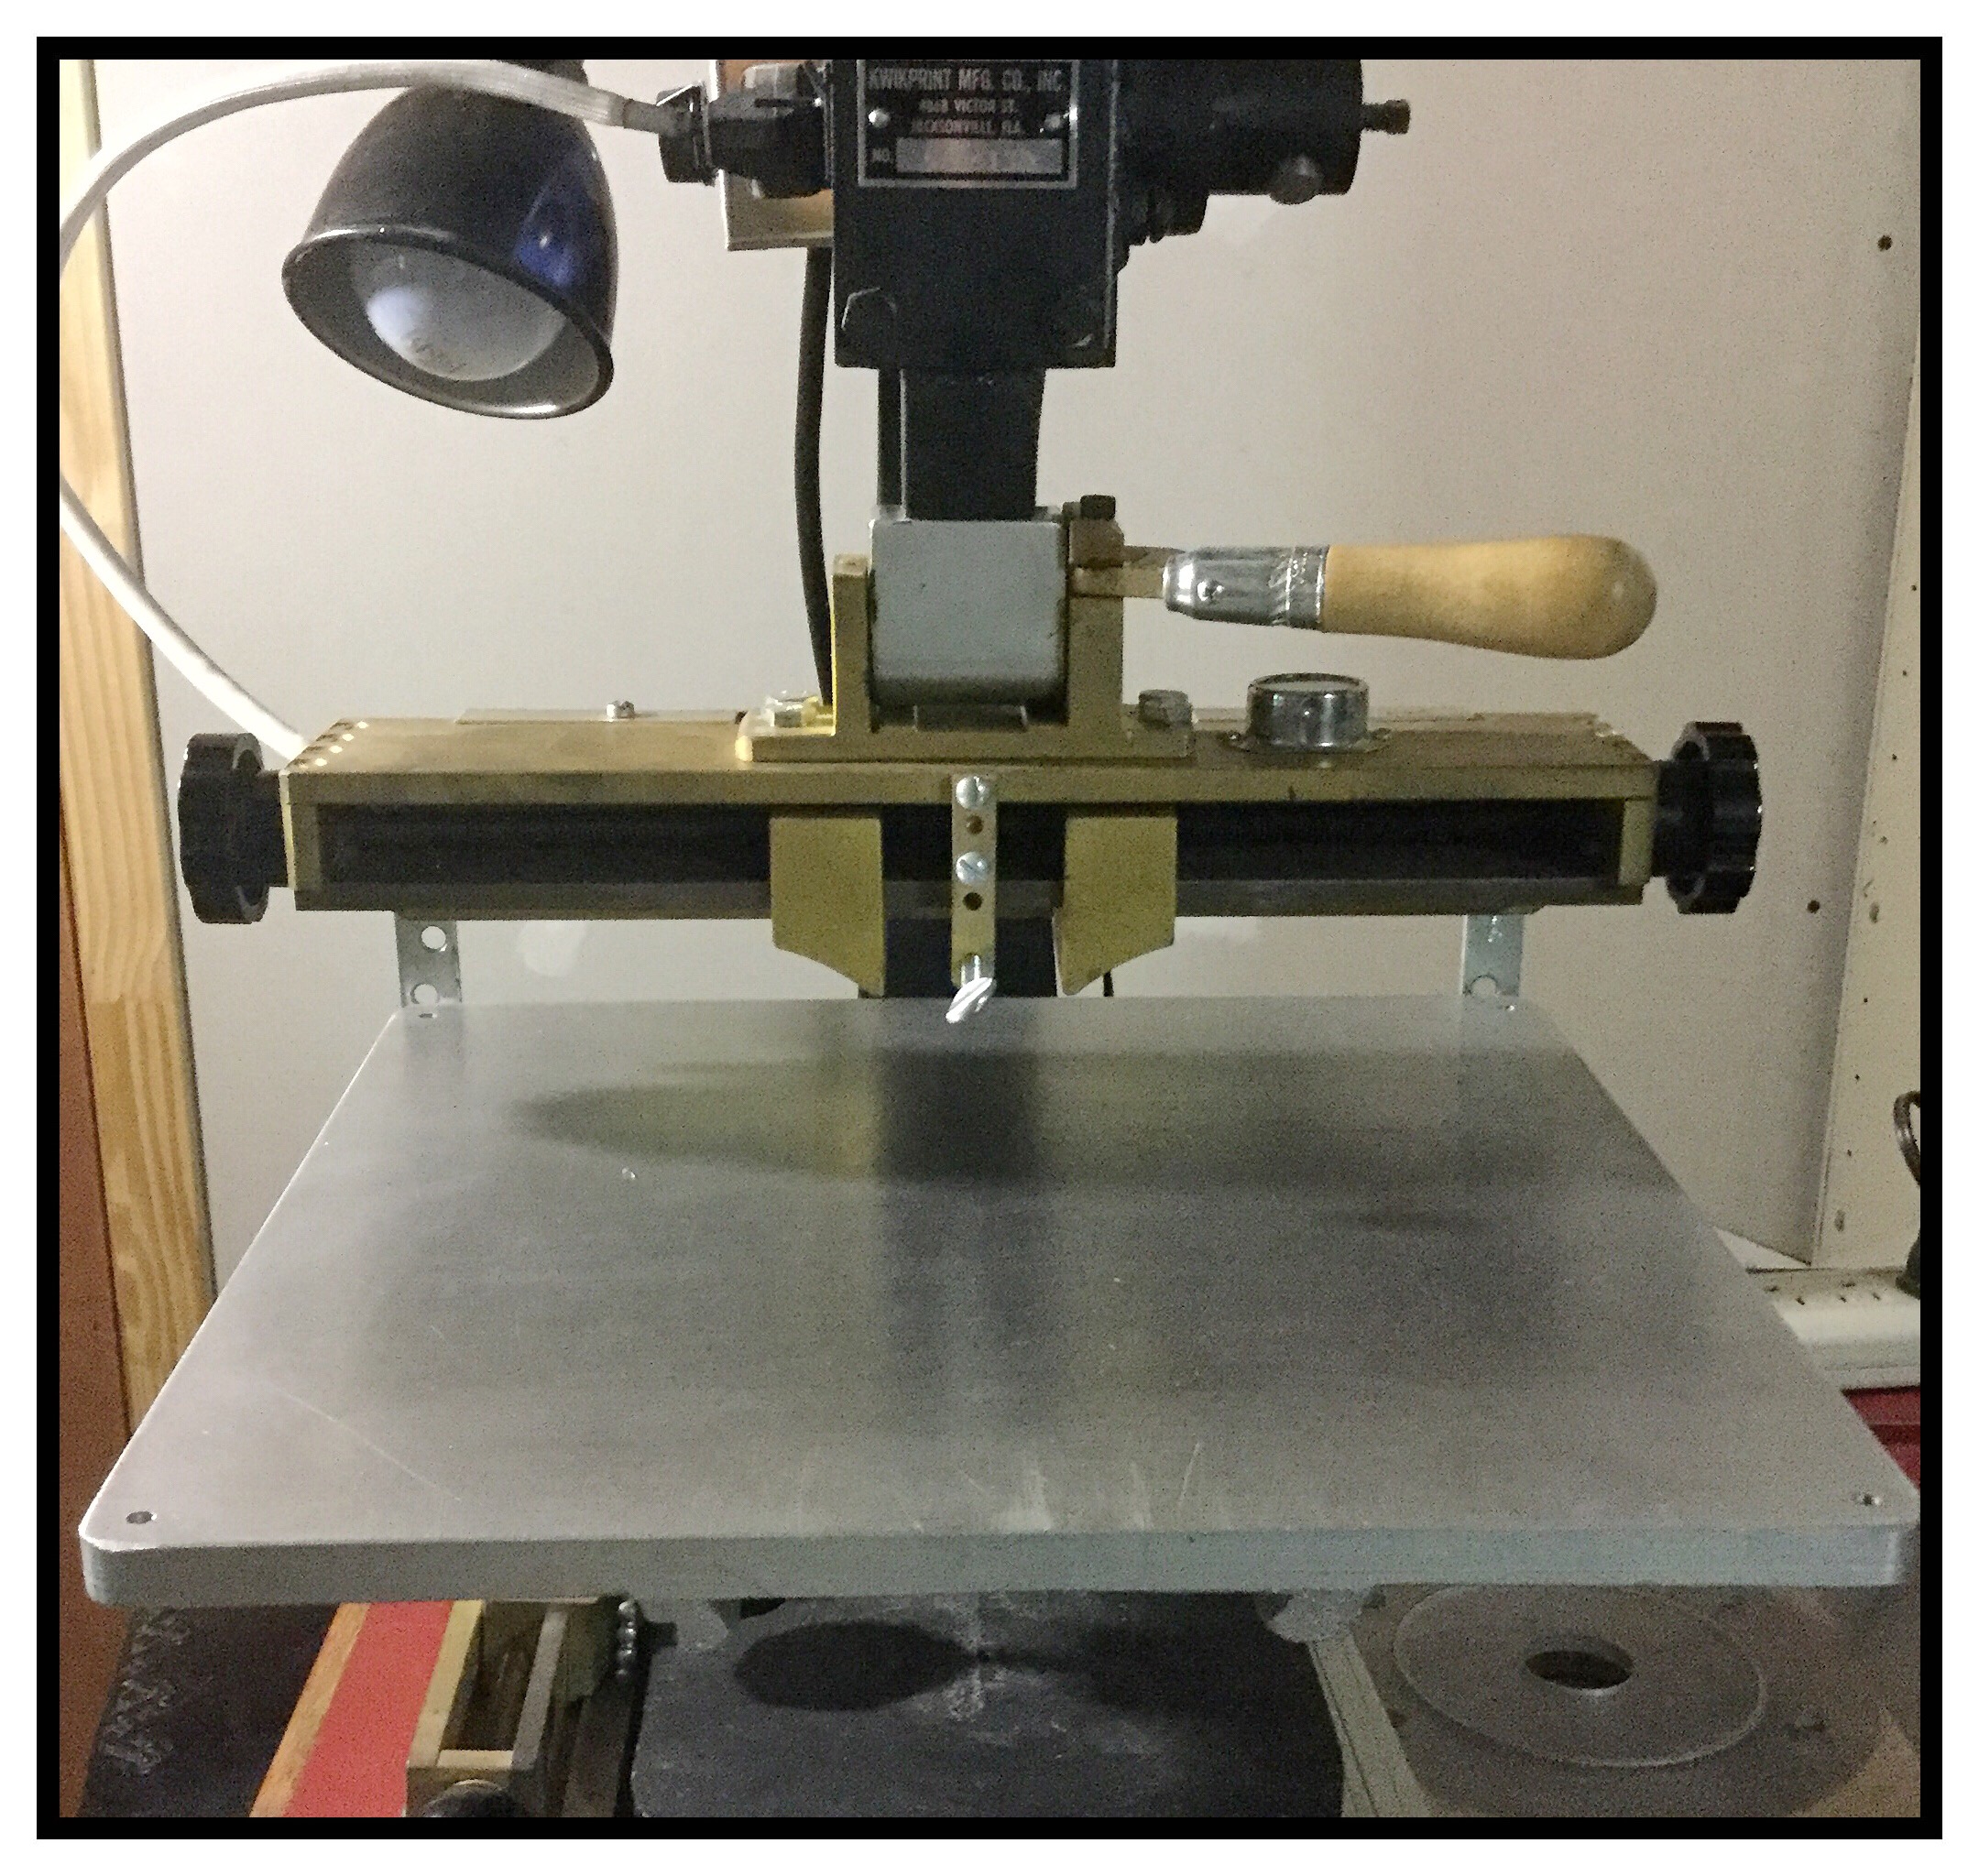
Do you have difficulties in the hot stamping department? Well, there’s no need to be ashamed. I used to suffer from erratic stamping errors myself, but that was before the ever helpful Book Arts mailing list told me a secret. Have you heard of “The Force”? It’s an epic jig for the hot stamping machine, from the seething brain of Bill Minter. I found his instructions online and built one. After that, anything I stamped could be removed from the press, and when put back in place could be re-stamped perfectly every time. Still, life wasn’t perfect. I found that I was spending an inordinate amount of time on the setup phase – partly because the alignment guides I drew on the paper under the protective Mylar, were not exact enough. Also the Mylar I used to protect the paper warps over time and does not hold the materials firmly enough in place.
I sent a copy of Bill’s excellent Force adventure instructions to J.T. , a fellow sufferer. He built his own, making some genius modifications of his own. This inspired me to face my own Force. I removed the Mylar and paper taped to the surface. Then I placed the bare metal Force – mine uses a large flat piece of aluminum plate which was lying around (I know, lucky me, right?) back on the table. I clamped an old blade from a Tandy leather knife in the center of the type holder, lowered it to the Force, and cranked the table all the way in the other direction. The blade left a clean thin line engraved into the metal. (In case it isn’t clear, I stole this idea from J. T.)
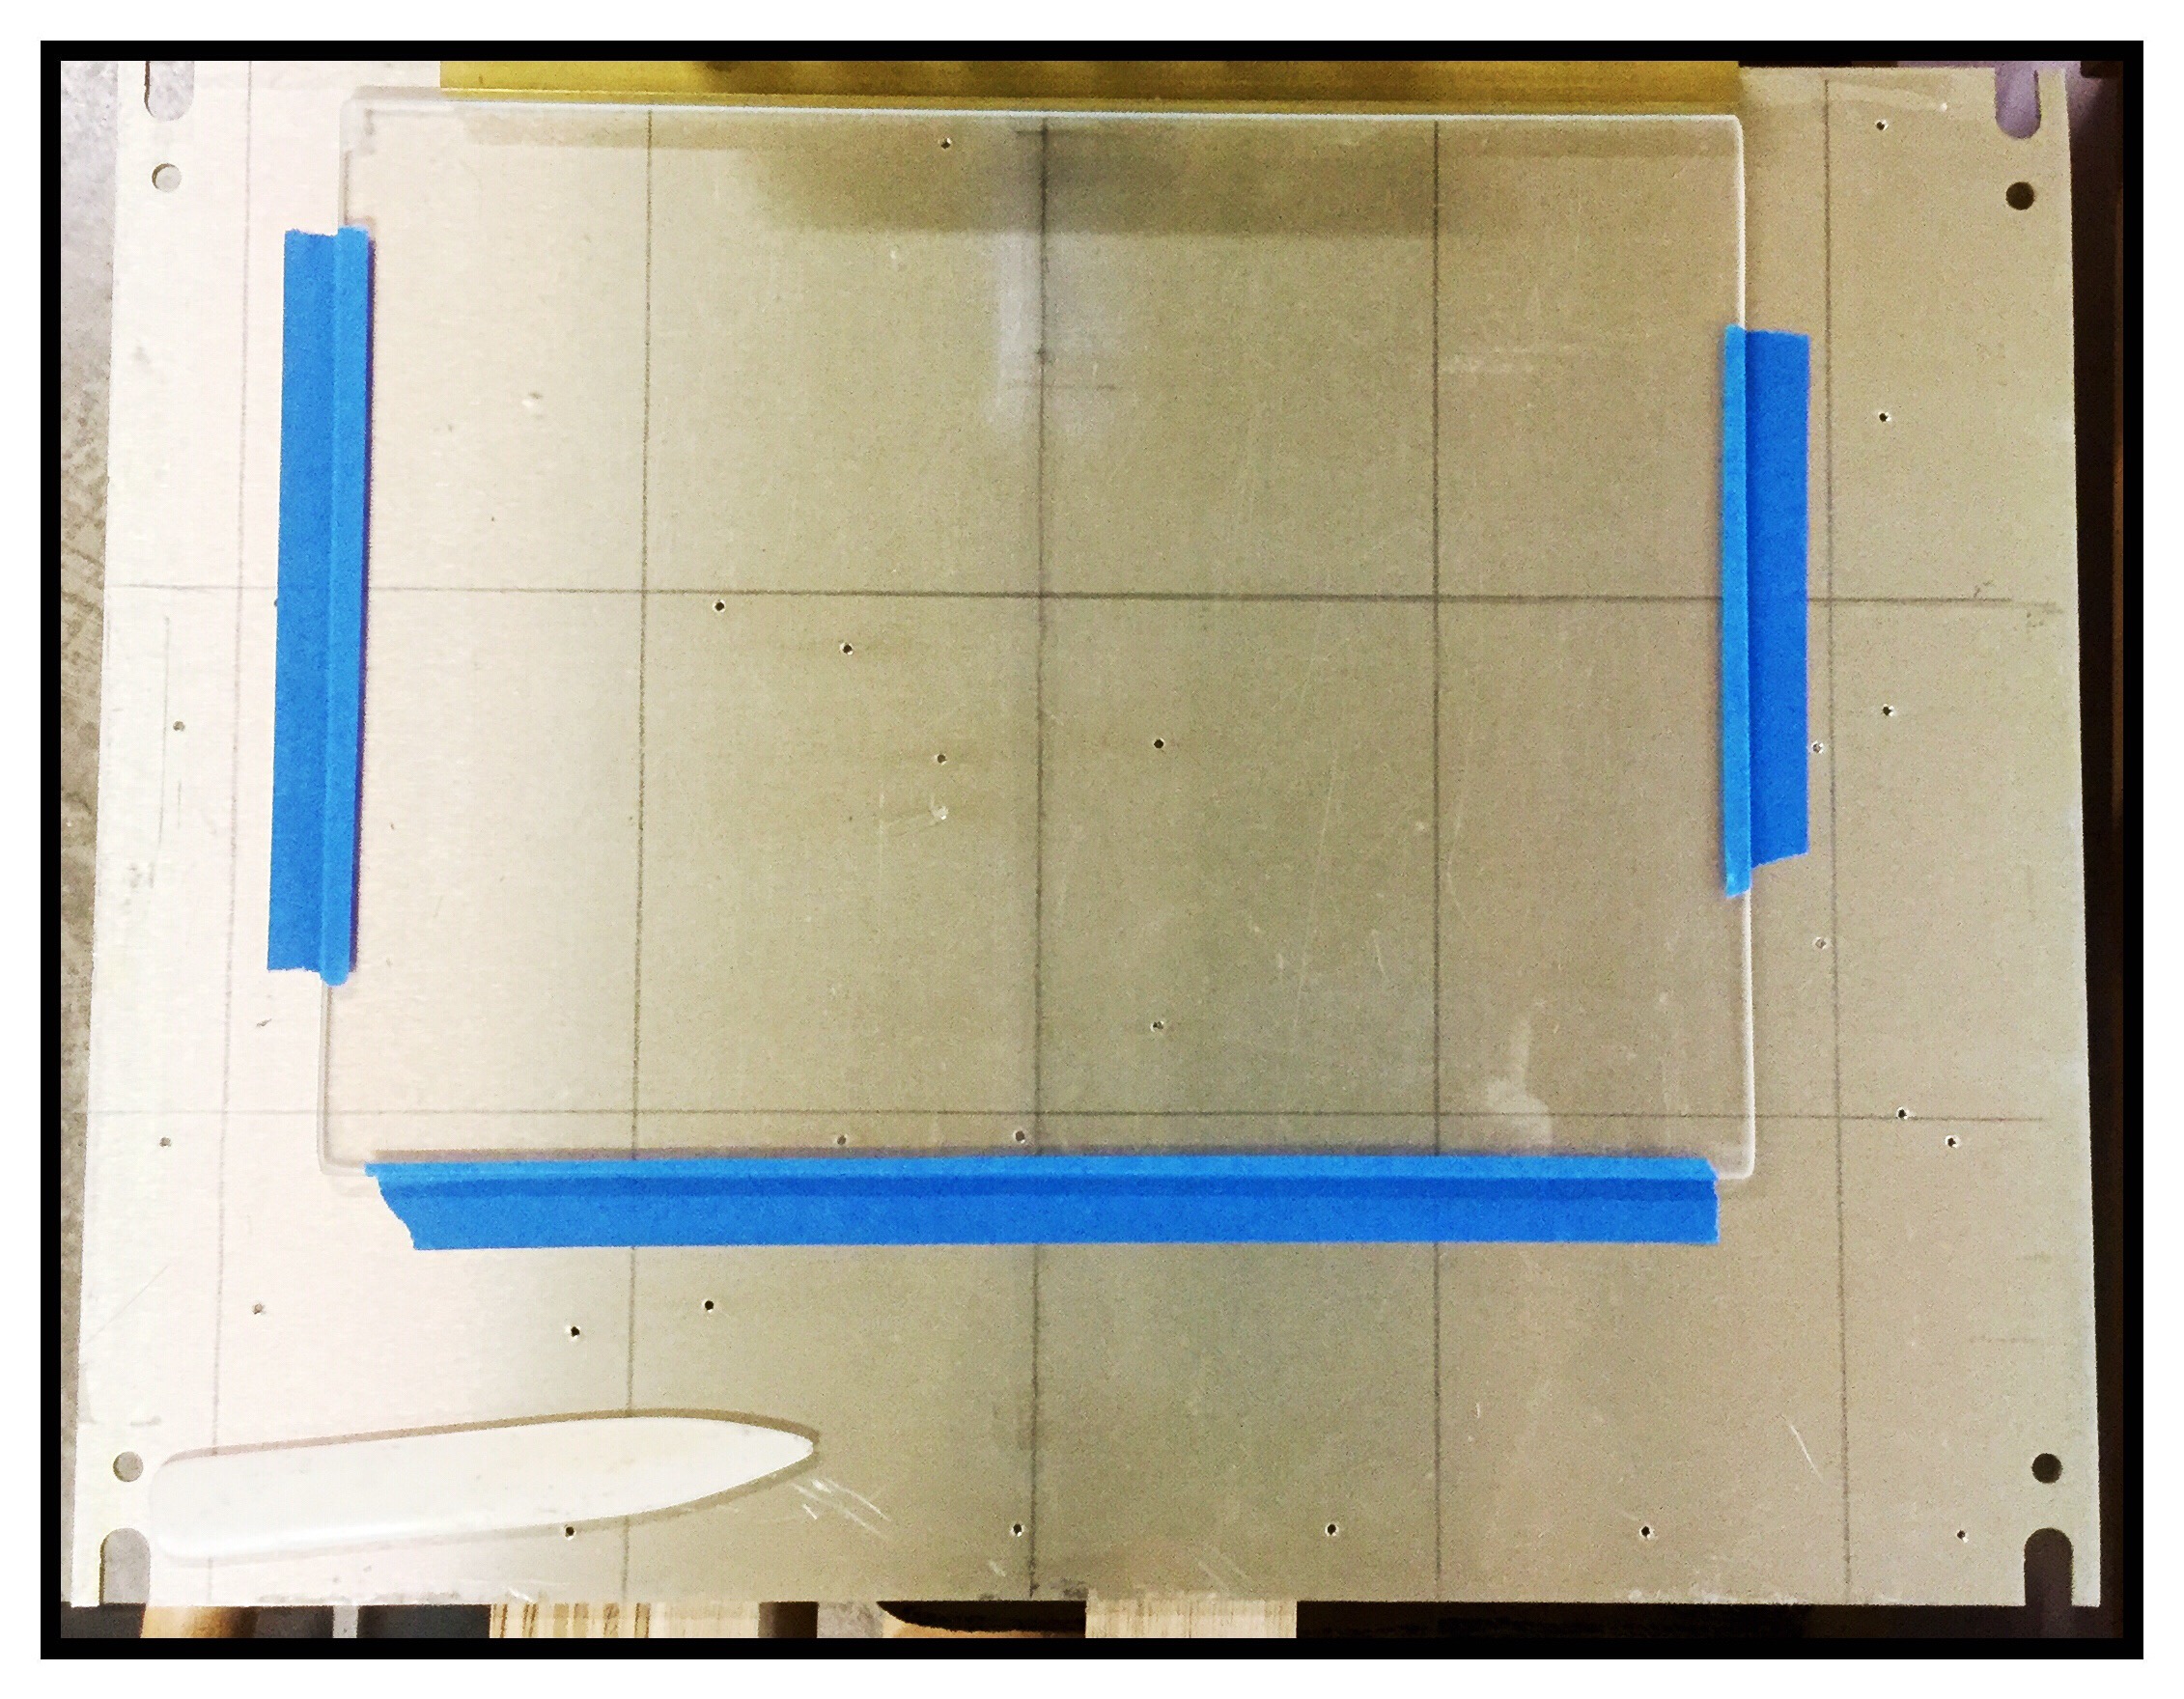
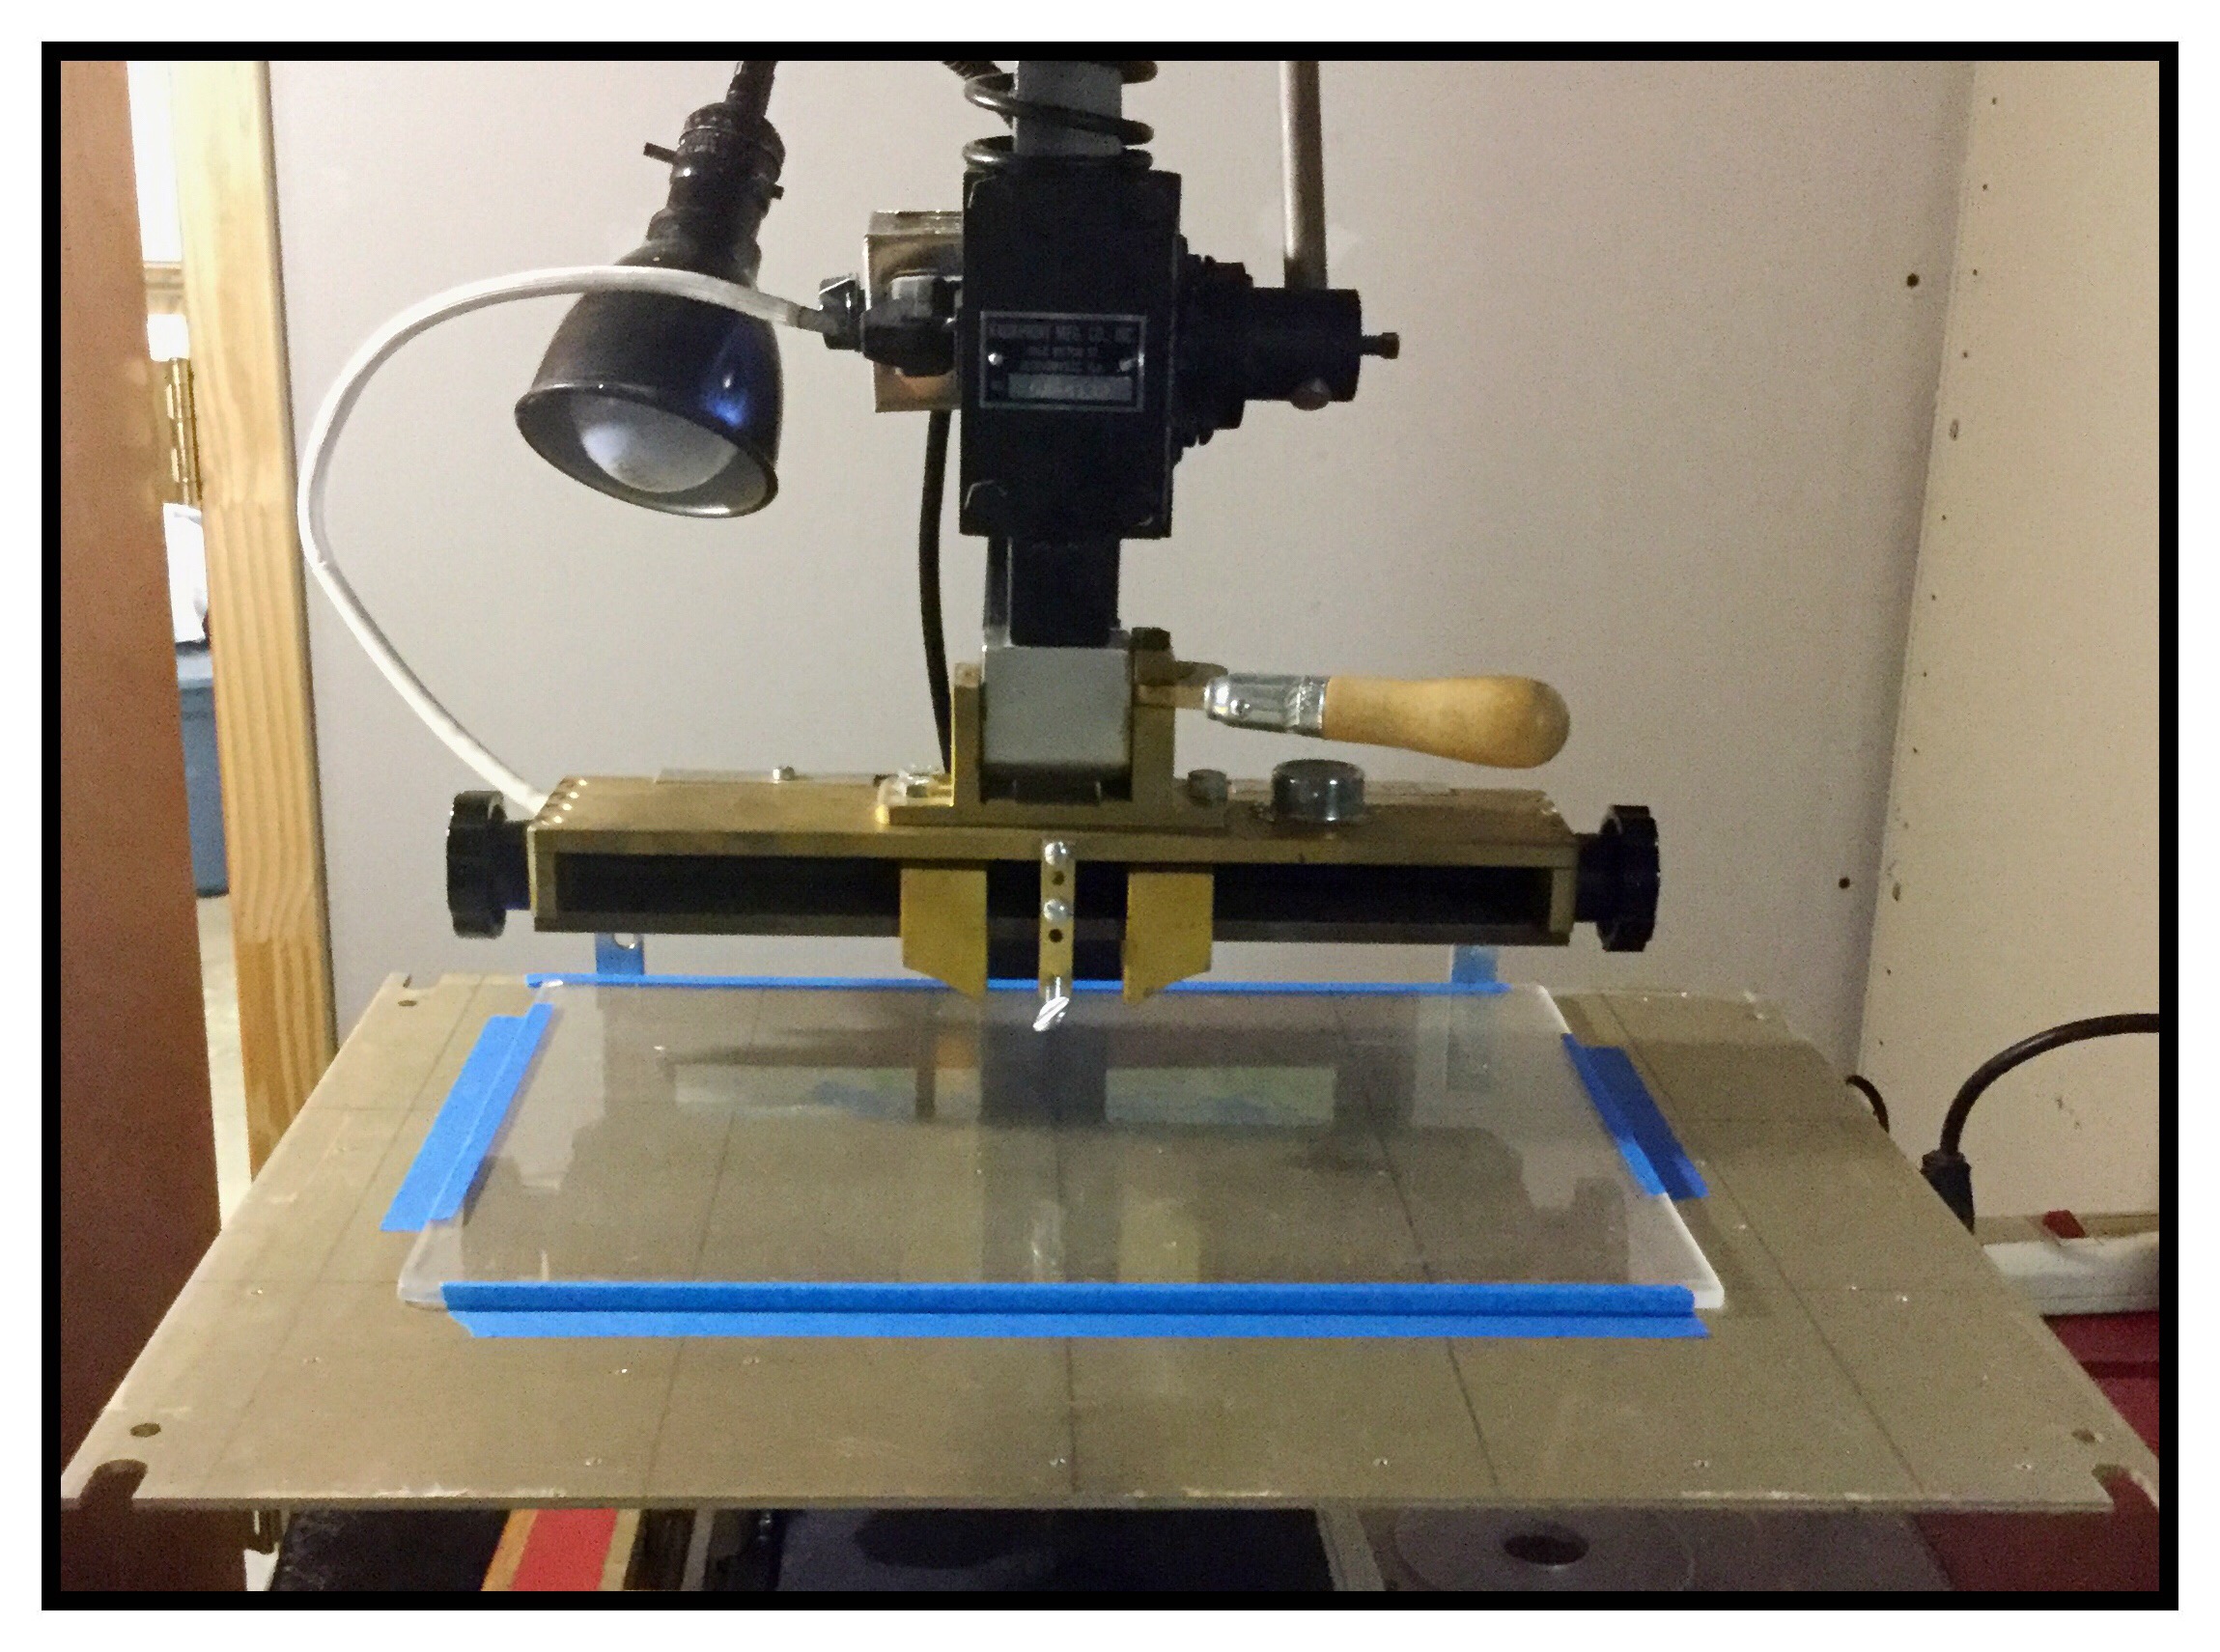
I extended this line all the way across the plate using a sharp tool, then darkened it. I tried rubbing on ink and graphite to see if I could stain the line and wipe the residue from the surface, but finally resorted to strengthening the line by hand with a fine point pen. With a triangle and rule, I made additional lines, in pencil, perpendicular and parallel to this line. I laid a half-inch brass rectangle along the top edge, butted a plexiglass plate up to it and taped it down.
When I get a larger piece of plastic, I’ll cover the entire plate, but for now this small modification makes it simple to set up materials for stamping and get a perfectly aligned result.